Belgian fortifications overview and Aubin fortress case study. Belgian fortifications, their origins and their role.
Belgium
Belgium gained its independence in 1830 after a short war of secession against the Netherlands.
Only 40 years later, in 1870, A newly unified Germany fought a short war against France and won a thorough victory. As a result, Germany annexed the French Alsace and Lorraine provinces. And Belgium found itself surrounded by angry people. The Germans, having won an easy victory started dreaming about more conquests, more victories. The French on the other hand only thought about revenge. It was only a question of time before those two countries would be at war with each other again and Belgium was right in between. The Belgian king tasked General Brialmont, a fortification expert, to come up with a way of securing the borders of this little kingdom. Brialmont’s approach was innovative. He knew modern artillery could very easily reduce conventional forts to rubble.

The Brialmont design
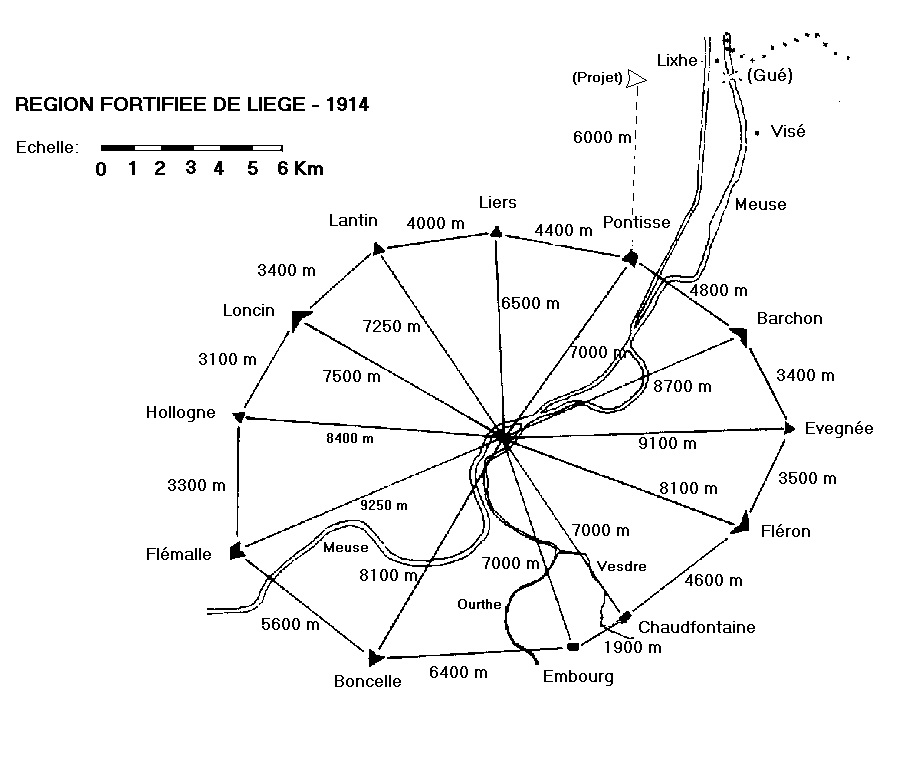
Brialmont therefore came up with a model for one of the very first modern semi-underground fortification system in the world. The Brialmont design was the first to make use of concrete for its construction, the outer walls and roof of the structure were covered in sloped earth that would absorb the impact of enemy shells while most guns would be placed in revolving armoured turrets. Throughout the 1880’s, he built a ring of 12 of those forts around Liege to protect against a German invasion and he built a similar ring of 9 forts around the city of Namur, facing the French border (We knew there would be a war, nobody knew who would start it!). The system was simple enough: A crown of forts, 3 to 4 kilometres apart, surrounding a city. The forts were close enough that each fort could receive artillery support from its 2 flanking neighbours, forcing the attacker to attack 3 forts simultaneously to have a chance to go through the line. And they had been built to resist shelling from 210mm artillery systems which were the biggest “horse transportable” artillery system in use at the time. In 1890, those forts were completed and were formidable indeed… But they were never upgraded while artillery made strides forward in terms of performance. So when Germany violated Belgian neutrality and invaded in August 1914, the Brialmont forts were totally outdated. World War One had just started for Belgium.


The Belgian forts during World War one
Liege resisted 11 days against all odds. The Germans tried to storm the forts with infantry assaults first but were repulsed with heavy losses. They therefore brought in their siege artillery to bear and pounded the forts into submission one after the other. The German’s most formidable weapon against Belgian forts were the Dicke Bertha (Big Bertha) super heavy 420mm howitzers. Those monsters could fire a 900 kilos 420mm shell at a range of 12.5km which was outside the range of the forts own guns. One by one, the forts surrendered or fell, sustaining horrific casualties. The best known example being the Loncin fort: On the 15th of August 1914, the 25th Big Bertha shell landing on the fort went straight through the roof of the fort’s powder magazine which still contained 12 tons of powder. The resulting explosion created a huge crater, pulverised the central part of the fort and instantly killed 350 out of the 550 men garrisoning the place. Having learned their lessons, the Germans did not even bother with infantry assault on the forts of Namur, shelling them into submission straight away. Yet, several of those forts resisted to the bitter end and still managed to inflict losses to the invaders. But, for all their shortcomings and obsolescence, the 12 forts in Liege delayed the German advance by 11 days. Just long enough to give the time to the British and French forces to establish a defensive line in the Marne region and save Paris.

Post war investigation
After the end of WWI in 1918, Belgium started looking into the failures of its fortification system.
The main results of the investigation were pretty clear:
– The forts were not built deep enough
– The lack of adequate ventilation meant that the smoke and gasses resulting from a fort firing its guns would stay inside the building, incapacitating the garrison.
– The fort’s gun turrets were too close to each other, making them all vulnerable to enemy fire.
– The communication between forts had not been good or reliable.
– Once the forts had been surrounded and patrols could not go out on reconnaissance, the forts’ guns had no longer clear targets to fire at, counter battery fire was almost impossible, also.
– The “all under one roof” solution was not a good one as men having fought / worked for 8 hours at a time had to sleep in the same structure, therefore being exposed to enemy shells falling a mere 6 metres overhead and the forts’ own guns firing from within the structure while the men from that shift were running and screaming in the corridors, doing their job.. Sleep was impossible.
Inter war period: Old foe, new threat
In the 1920’s, it was already clear that yet another war was coming. At the end of that decade, Belgium was already refurbishing 8 of its old forts, digging new structures below them to store the ammunition and shelter the men deeper., injecting more concrete inside the galleries, using reinforced concrete inside and out.

In the 1930’s, Belgium started building a new line of 4 modern forts near the German border, ahead of the older modernised forts in Liege, creating a second line of defence. The aim was once again having structures that could cover each other. Aubin-Neufchateau fortress was one of those 4 modern fortresses. Designed along the same Brialmont principles that had worked in 1914, but integrating solutions to the problems encountered by the design in WWI. The other 3 modern forts were Eben-Emael, Battice and Tancremont.

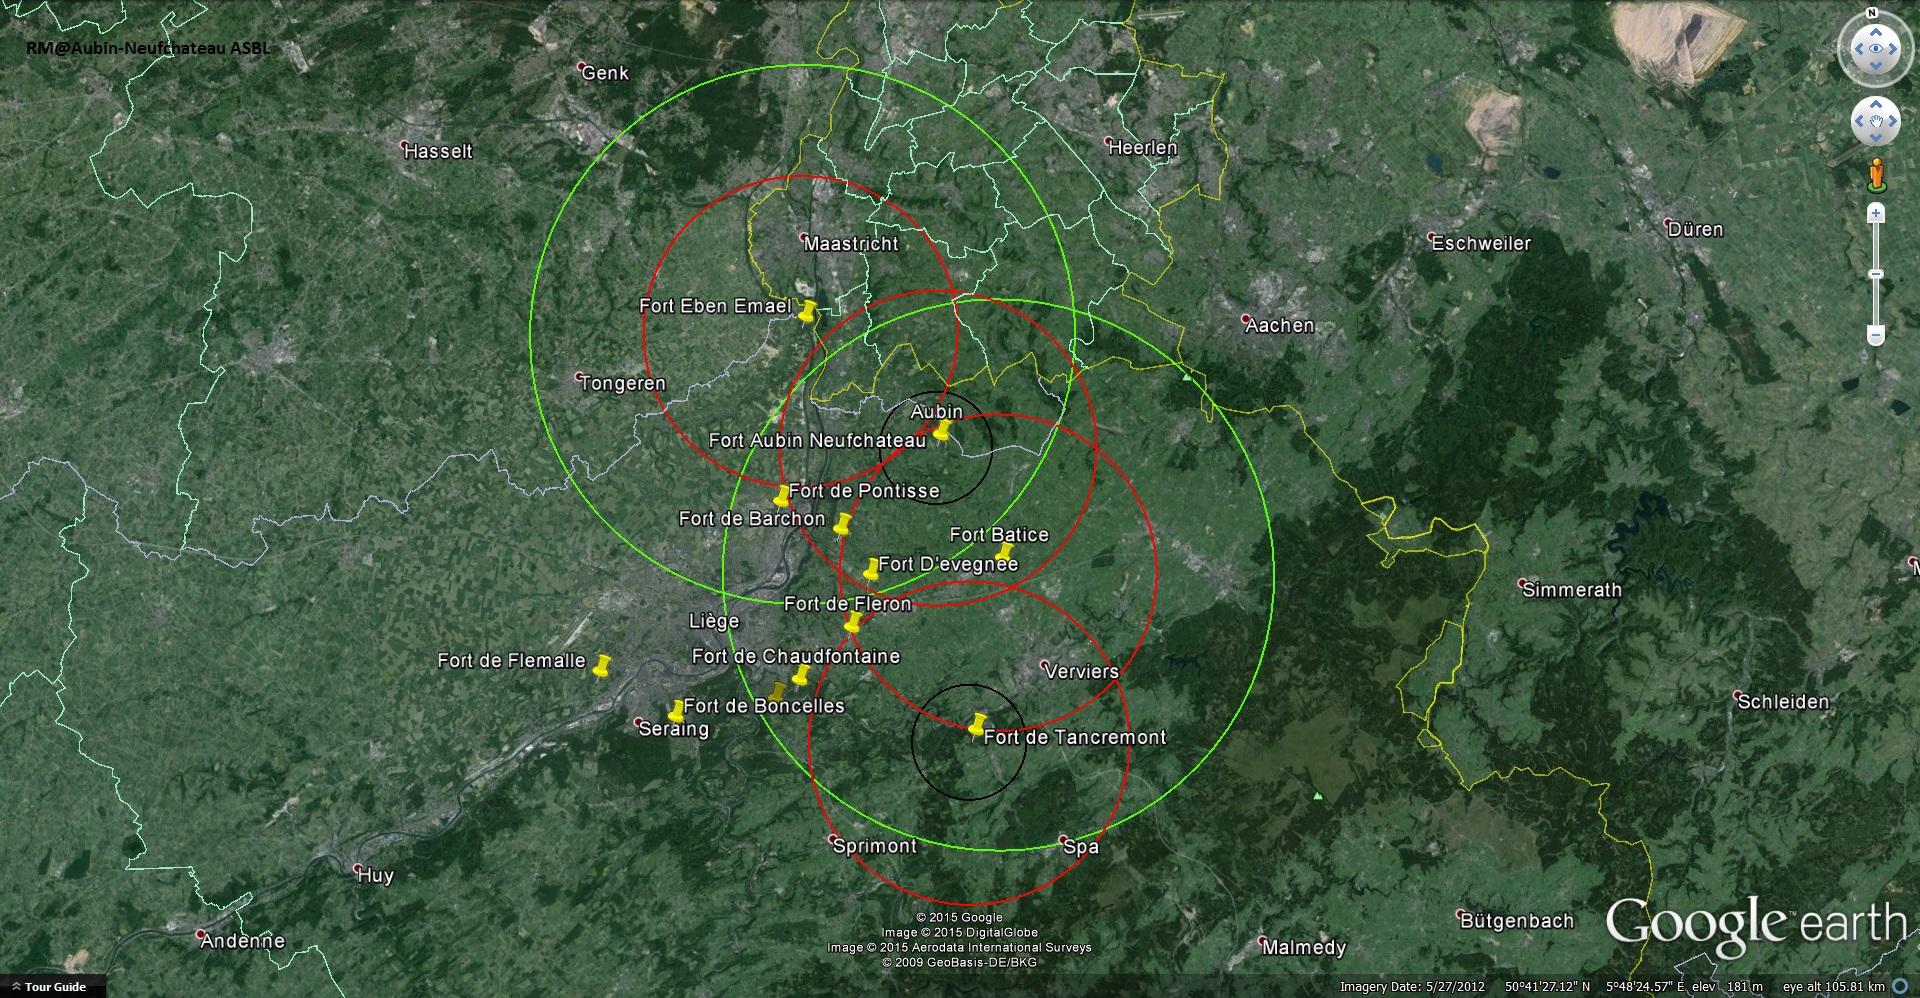
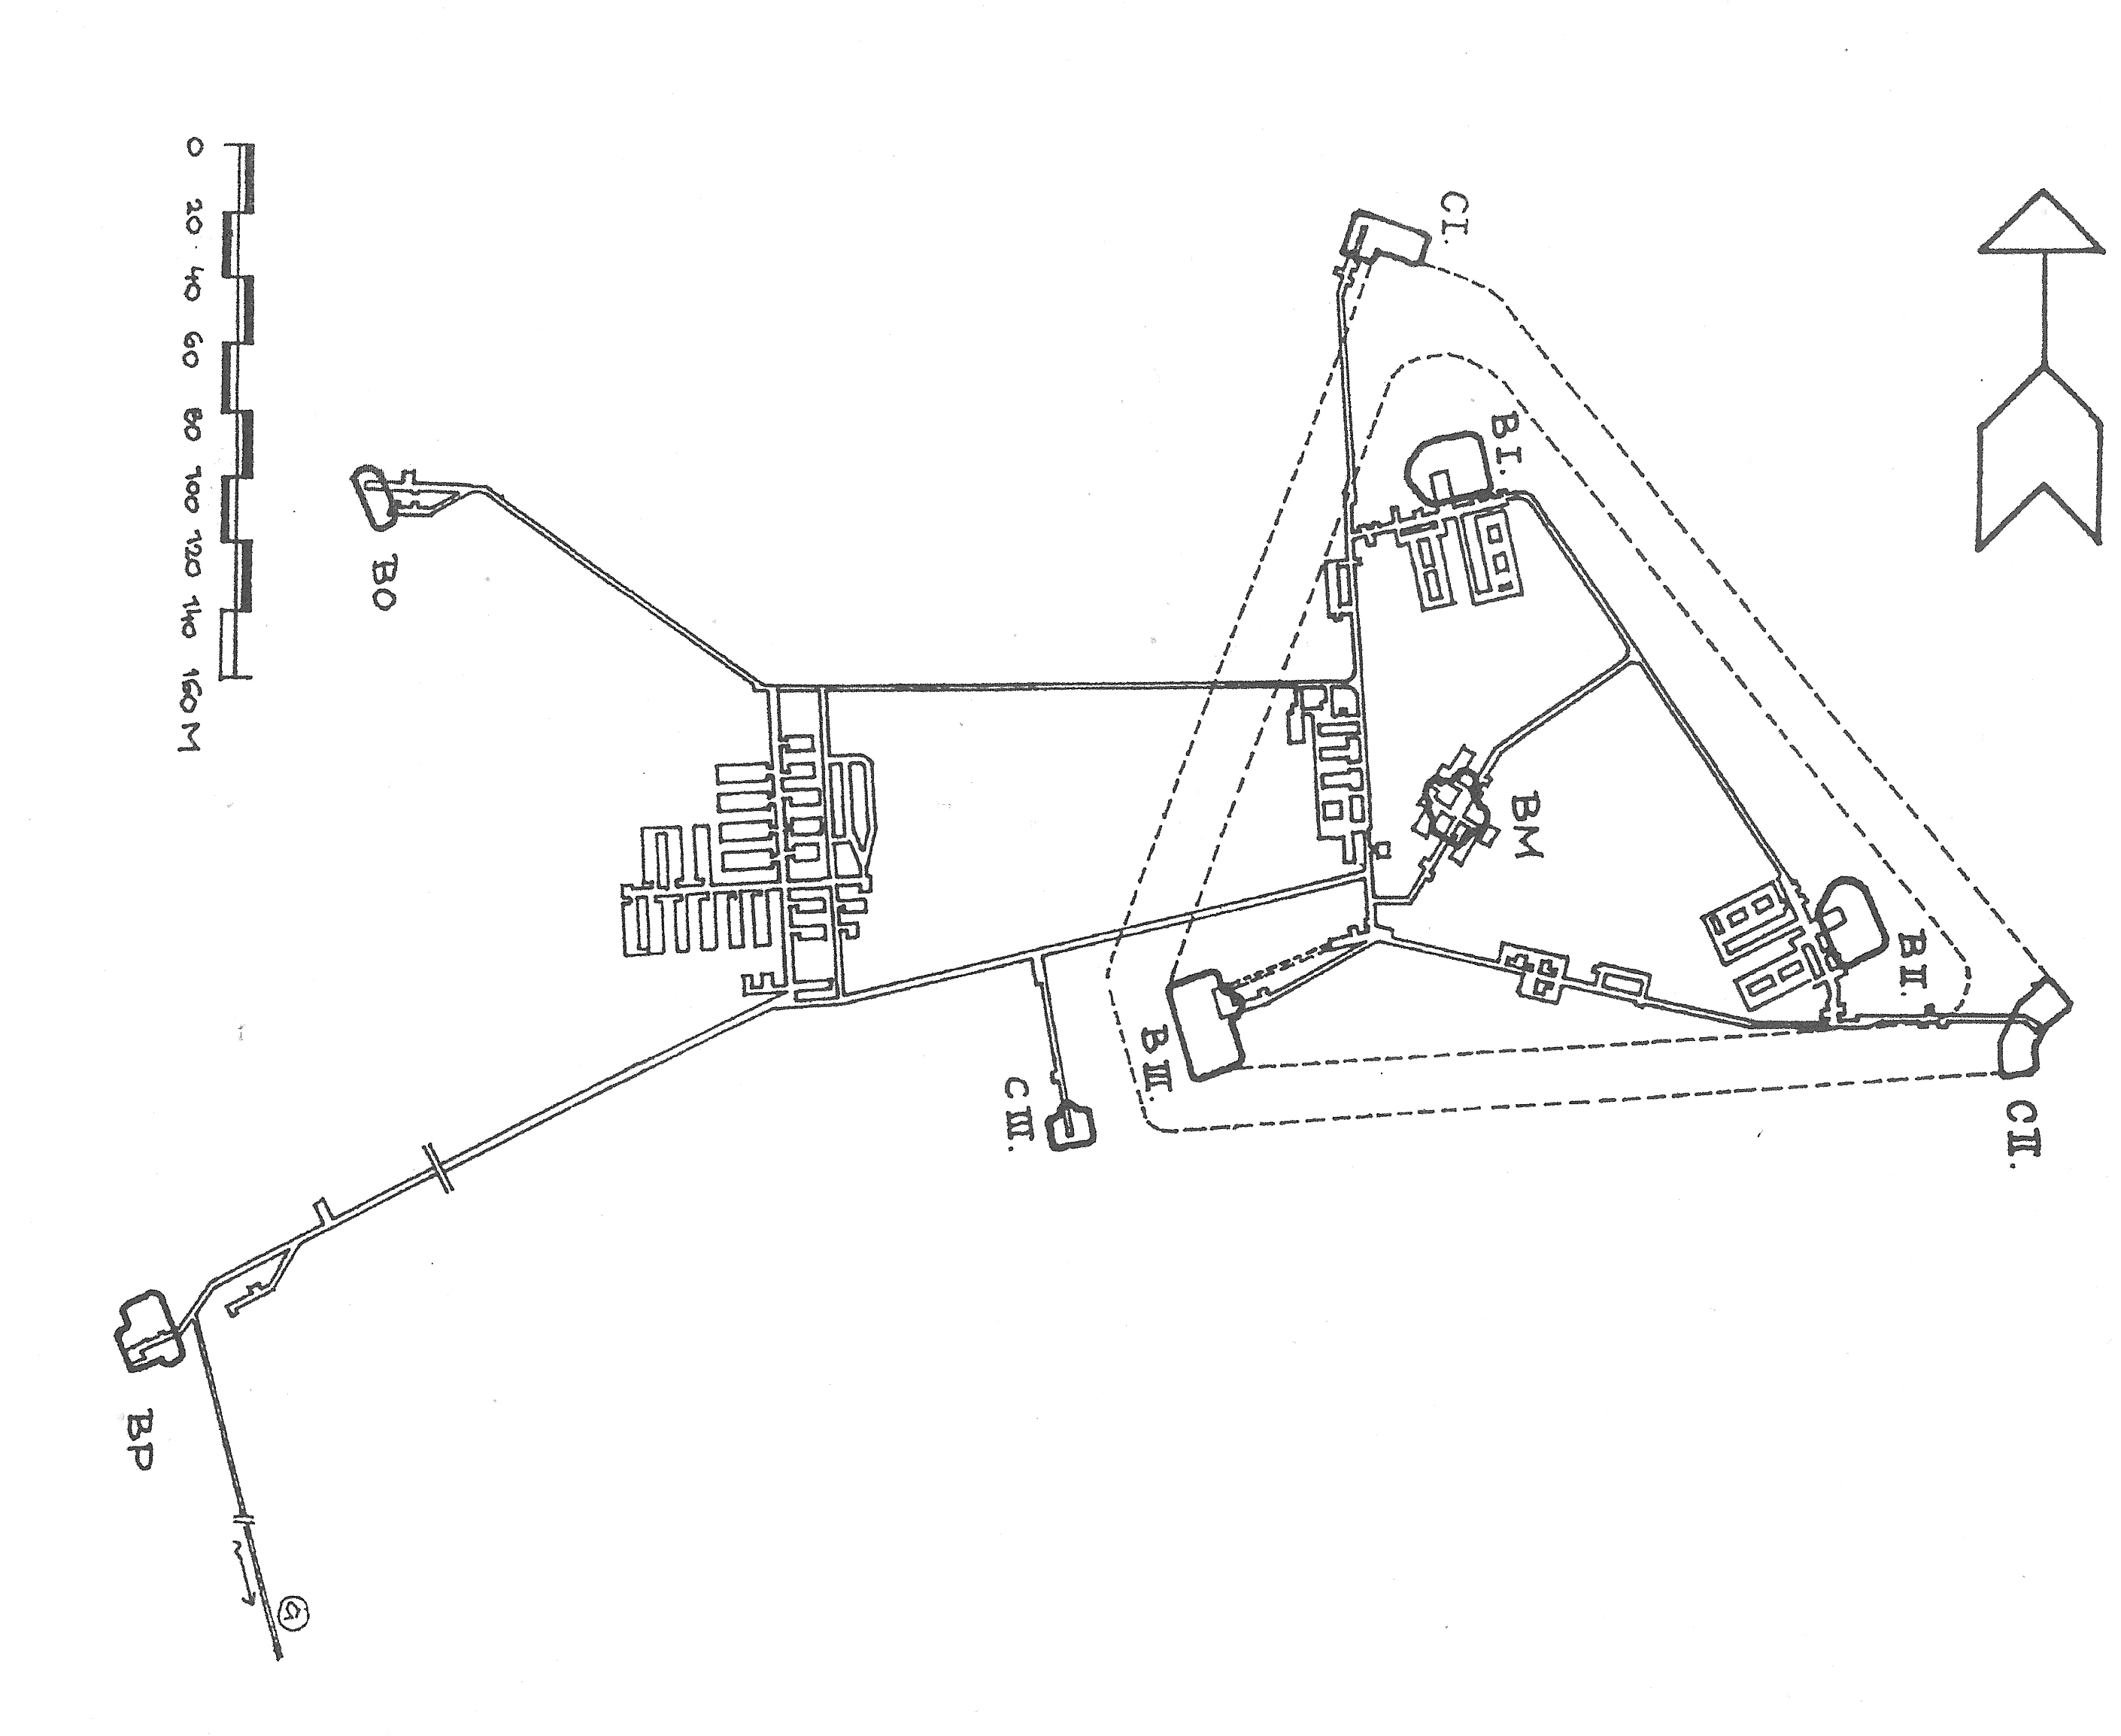
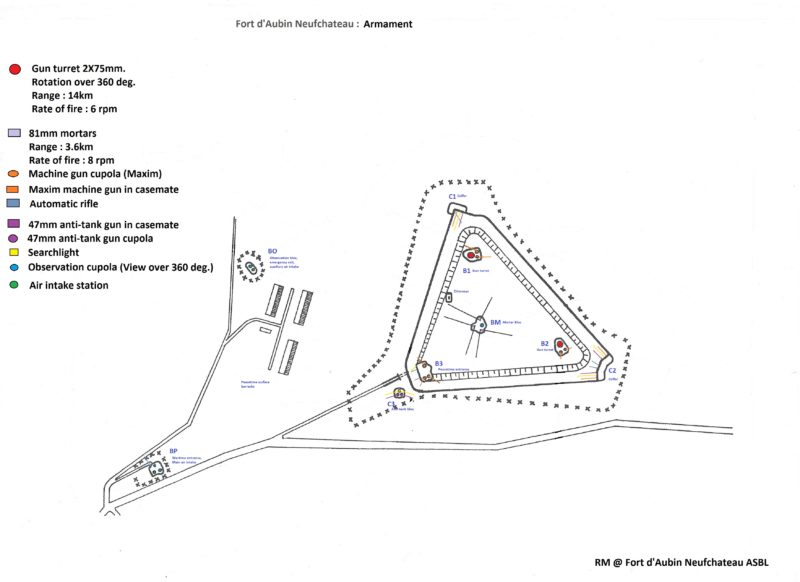
Case study : Aubin Neufchateau fortress. Aubin was a modern “interval” fort or small fort wedged between two larger ones (Between Eben-Emael and Battice). Let’s visit the fort and see how it was built, how it was equipped and how life was inside.
Aubin-Neufchateau fortress: Conception

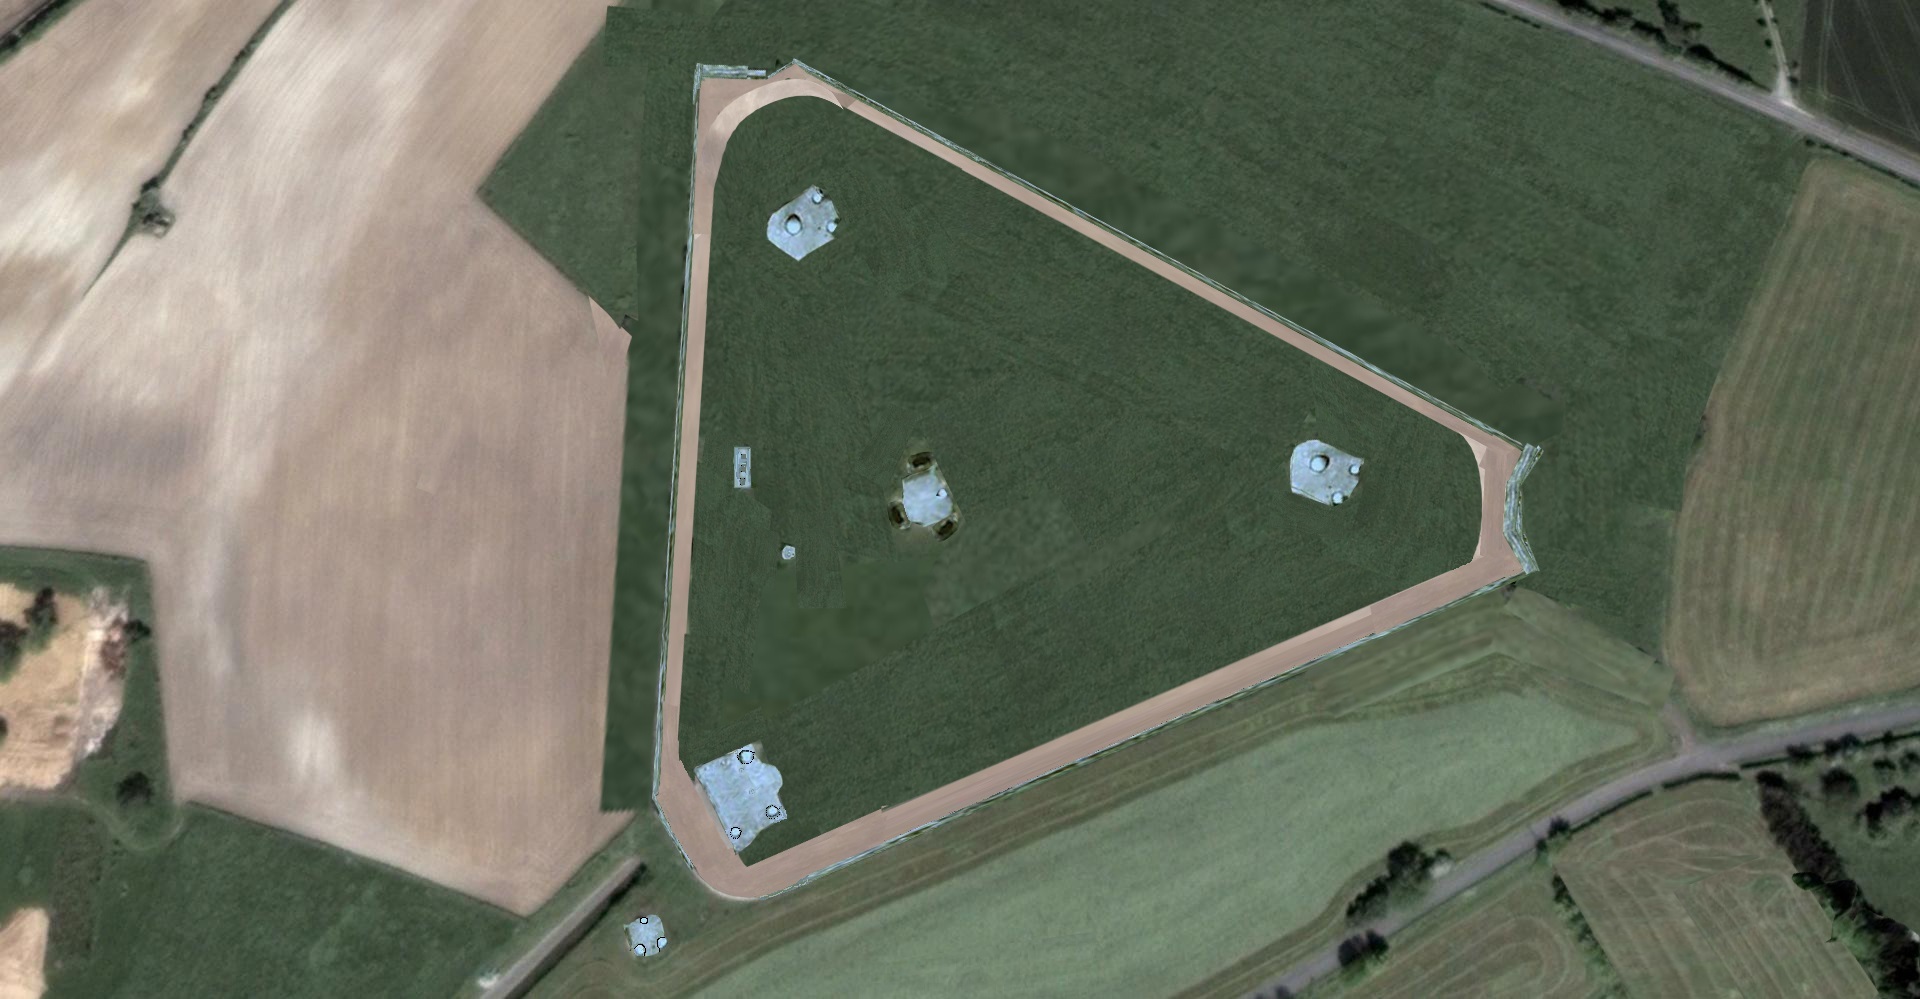
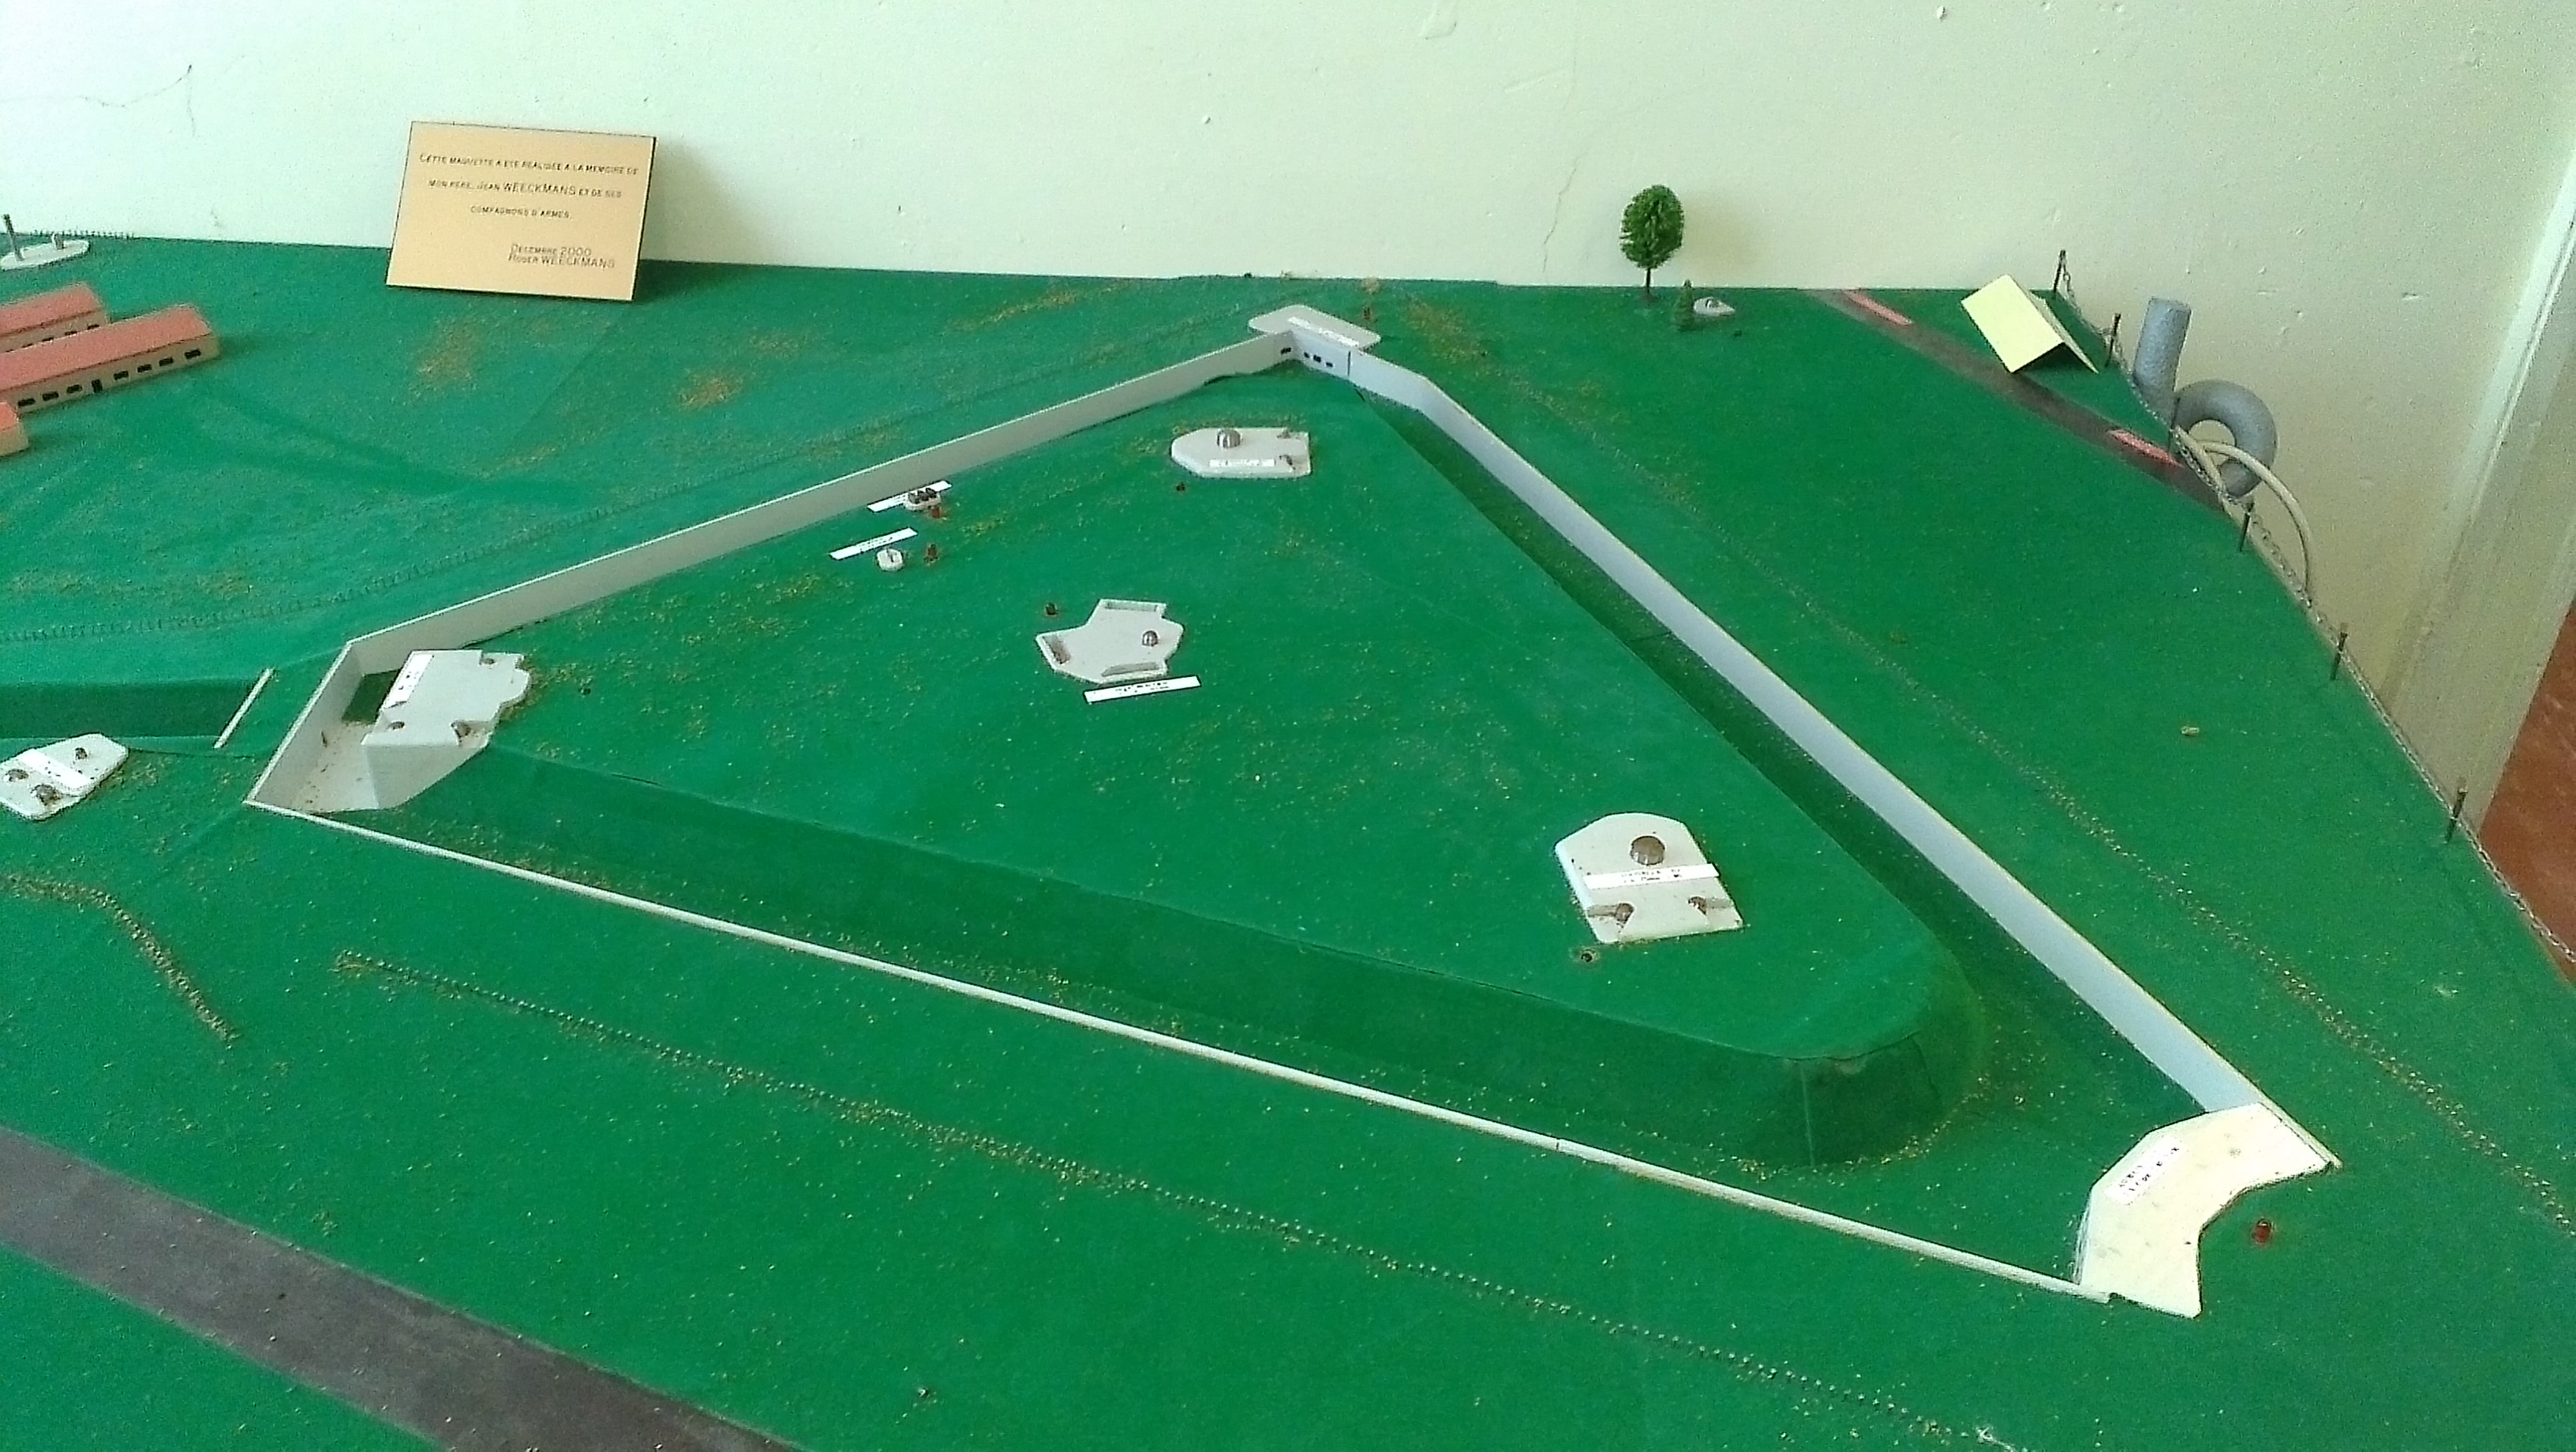
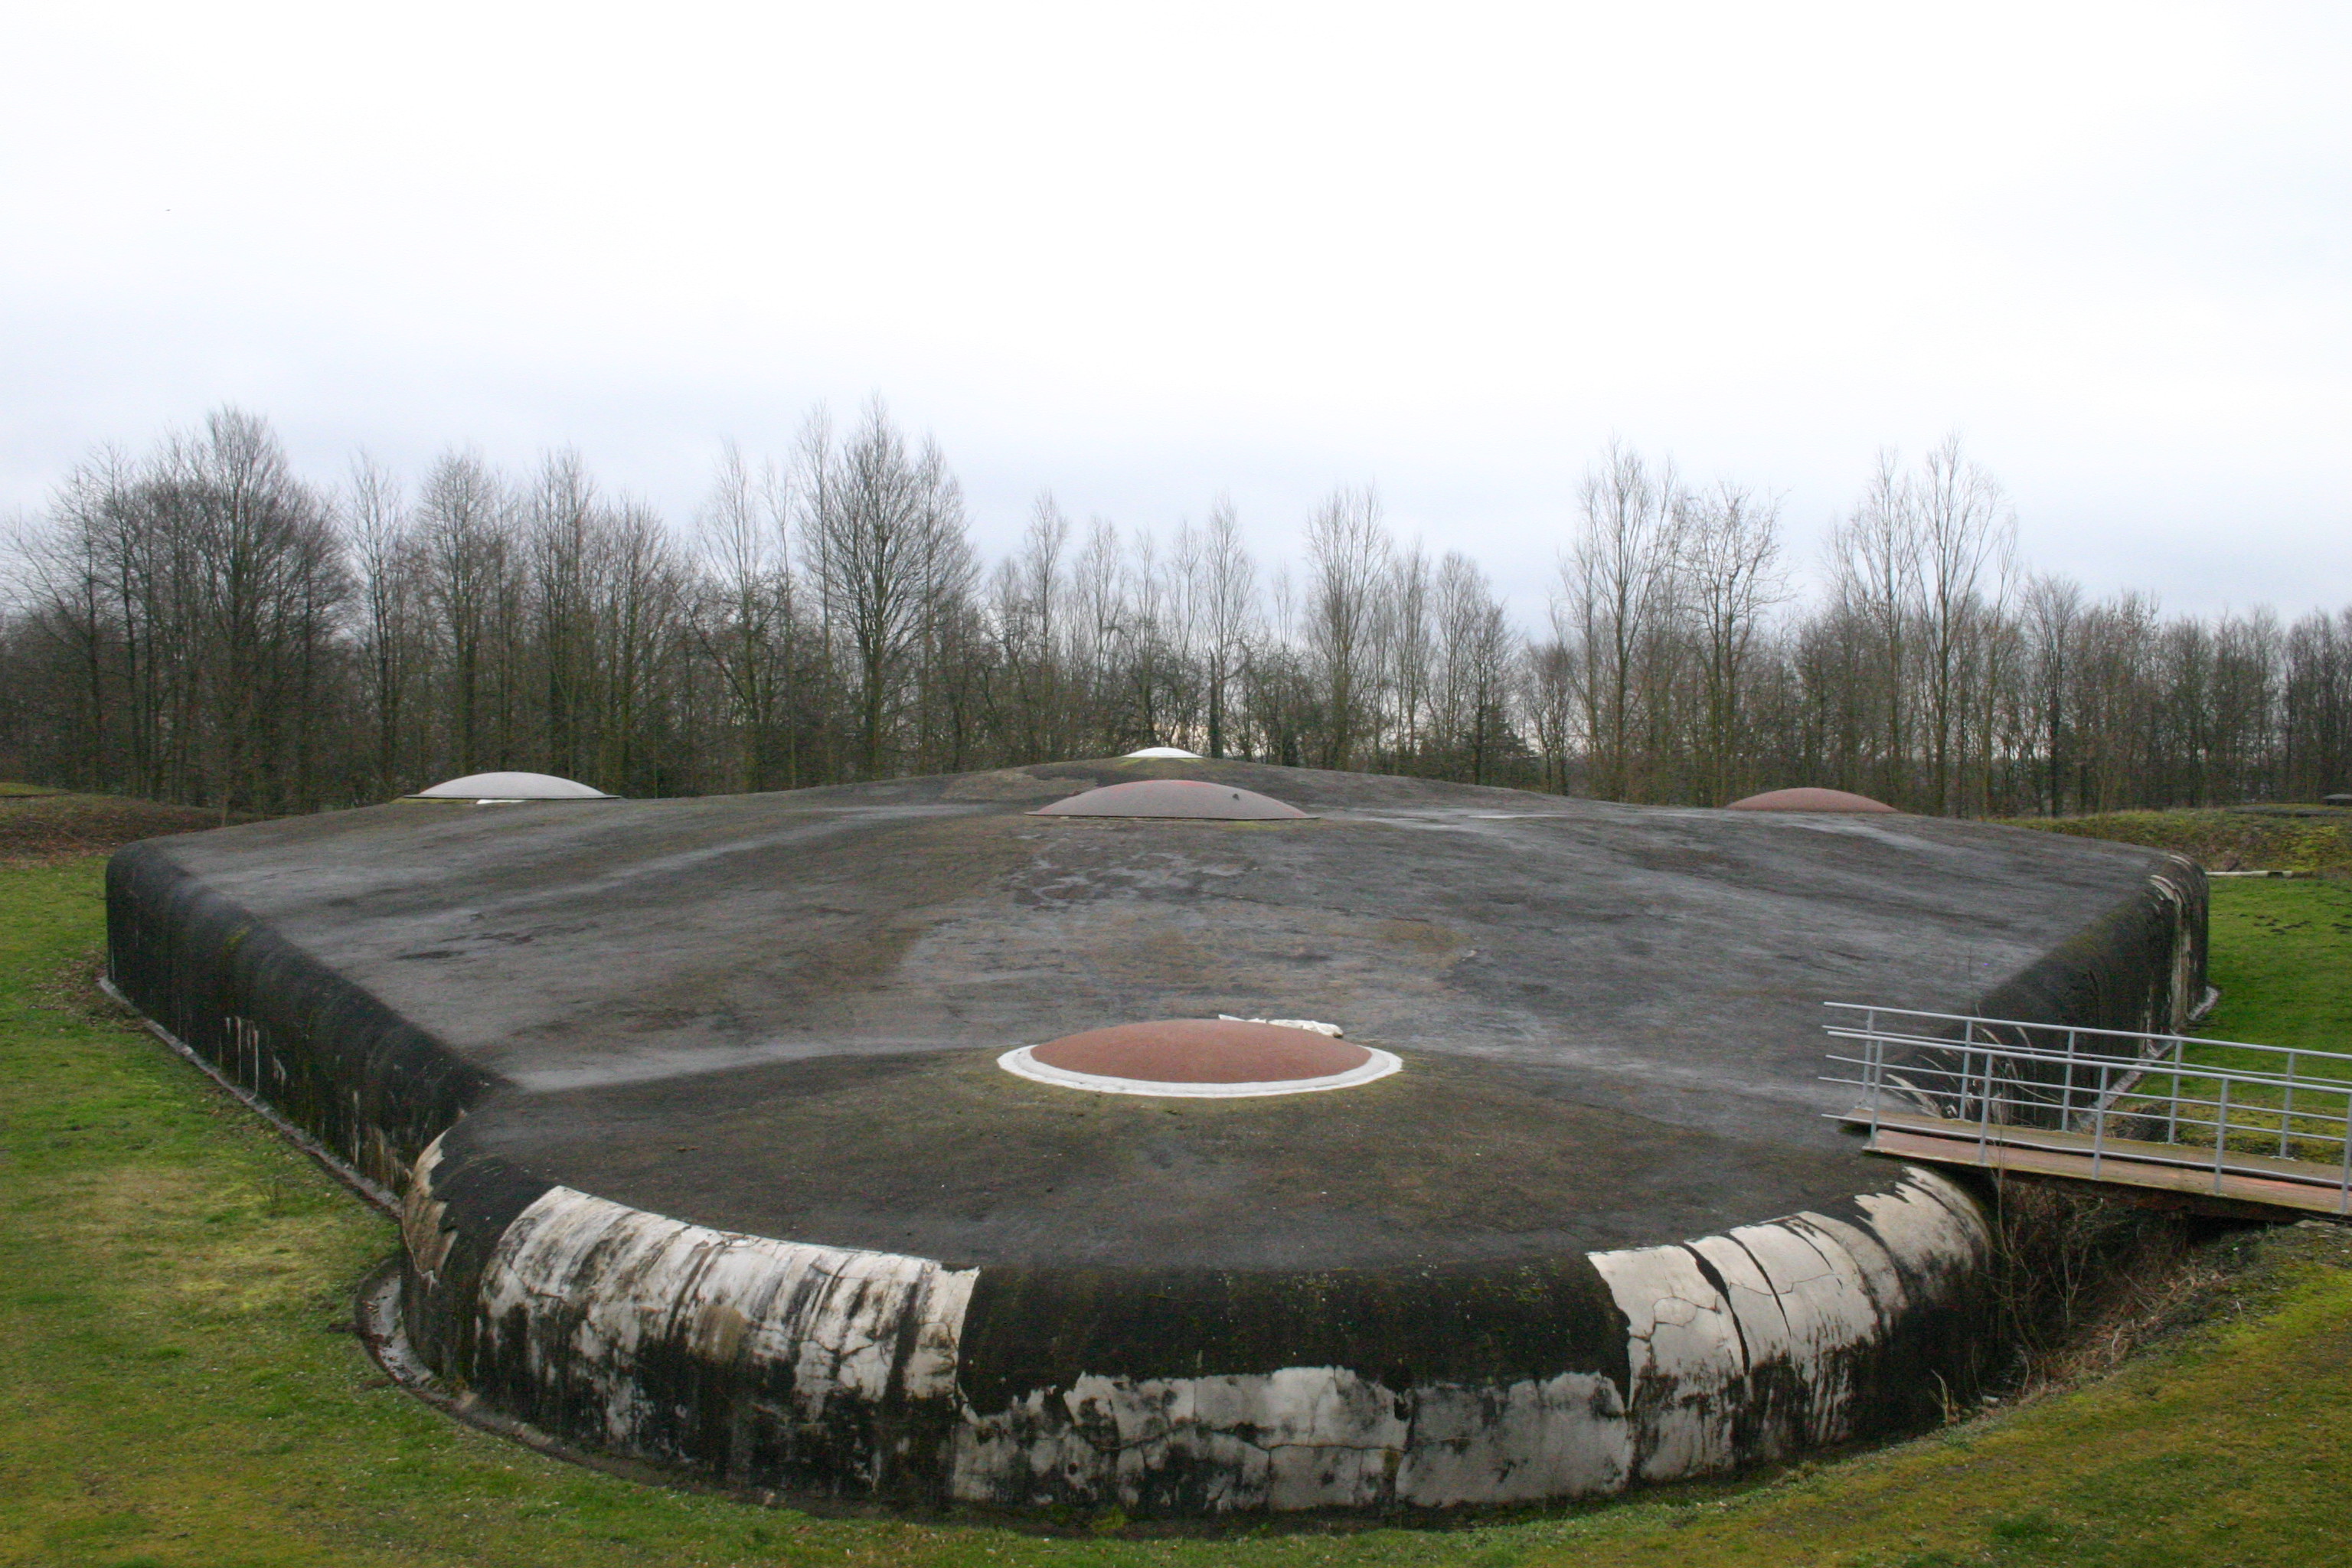
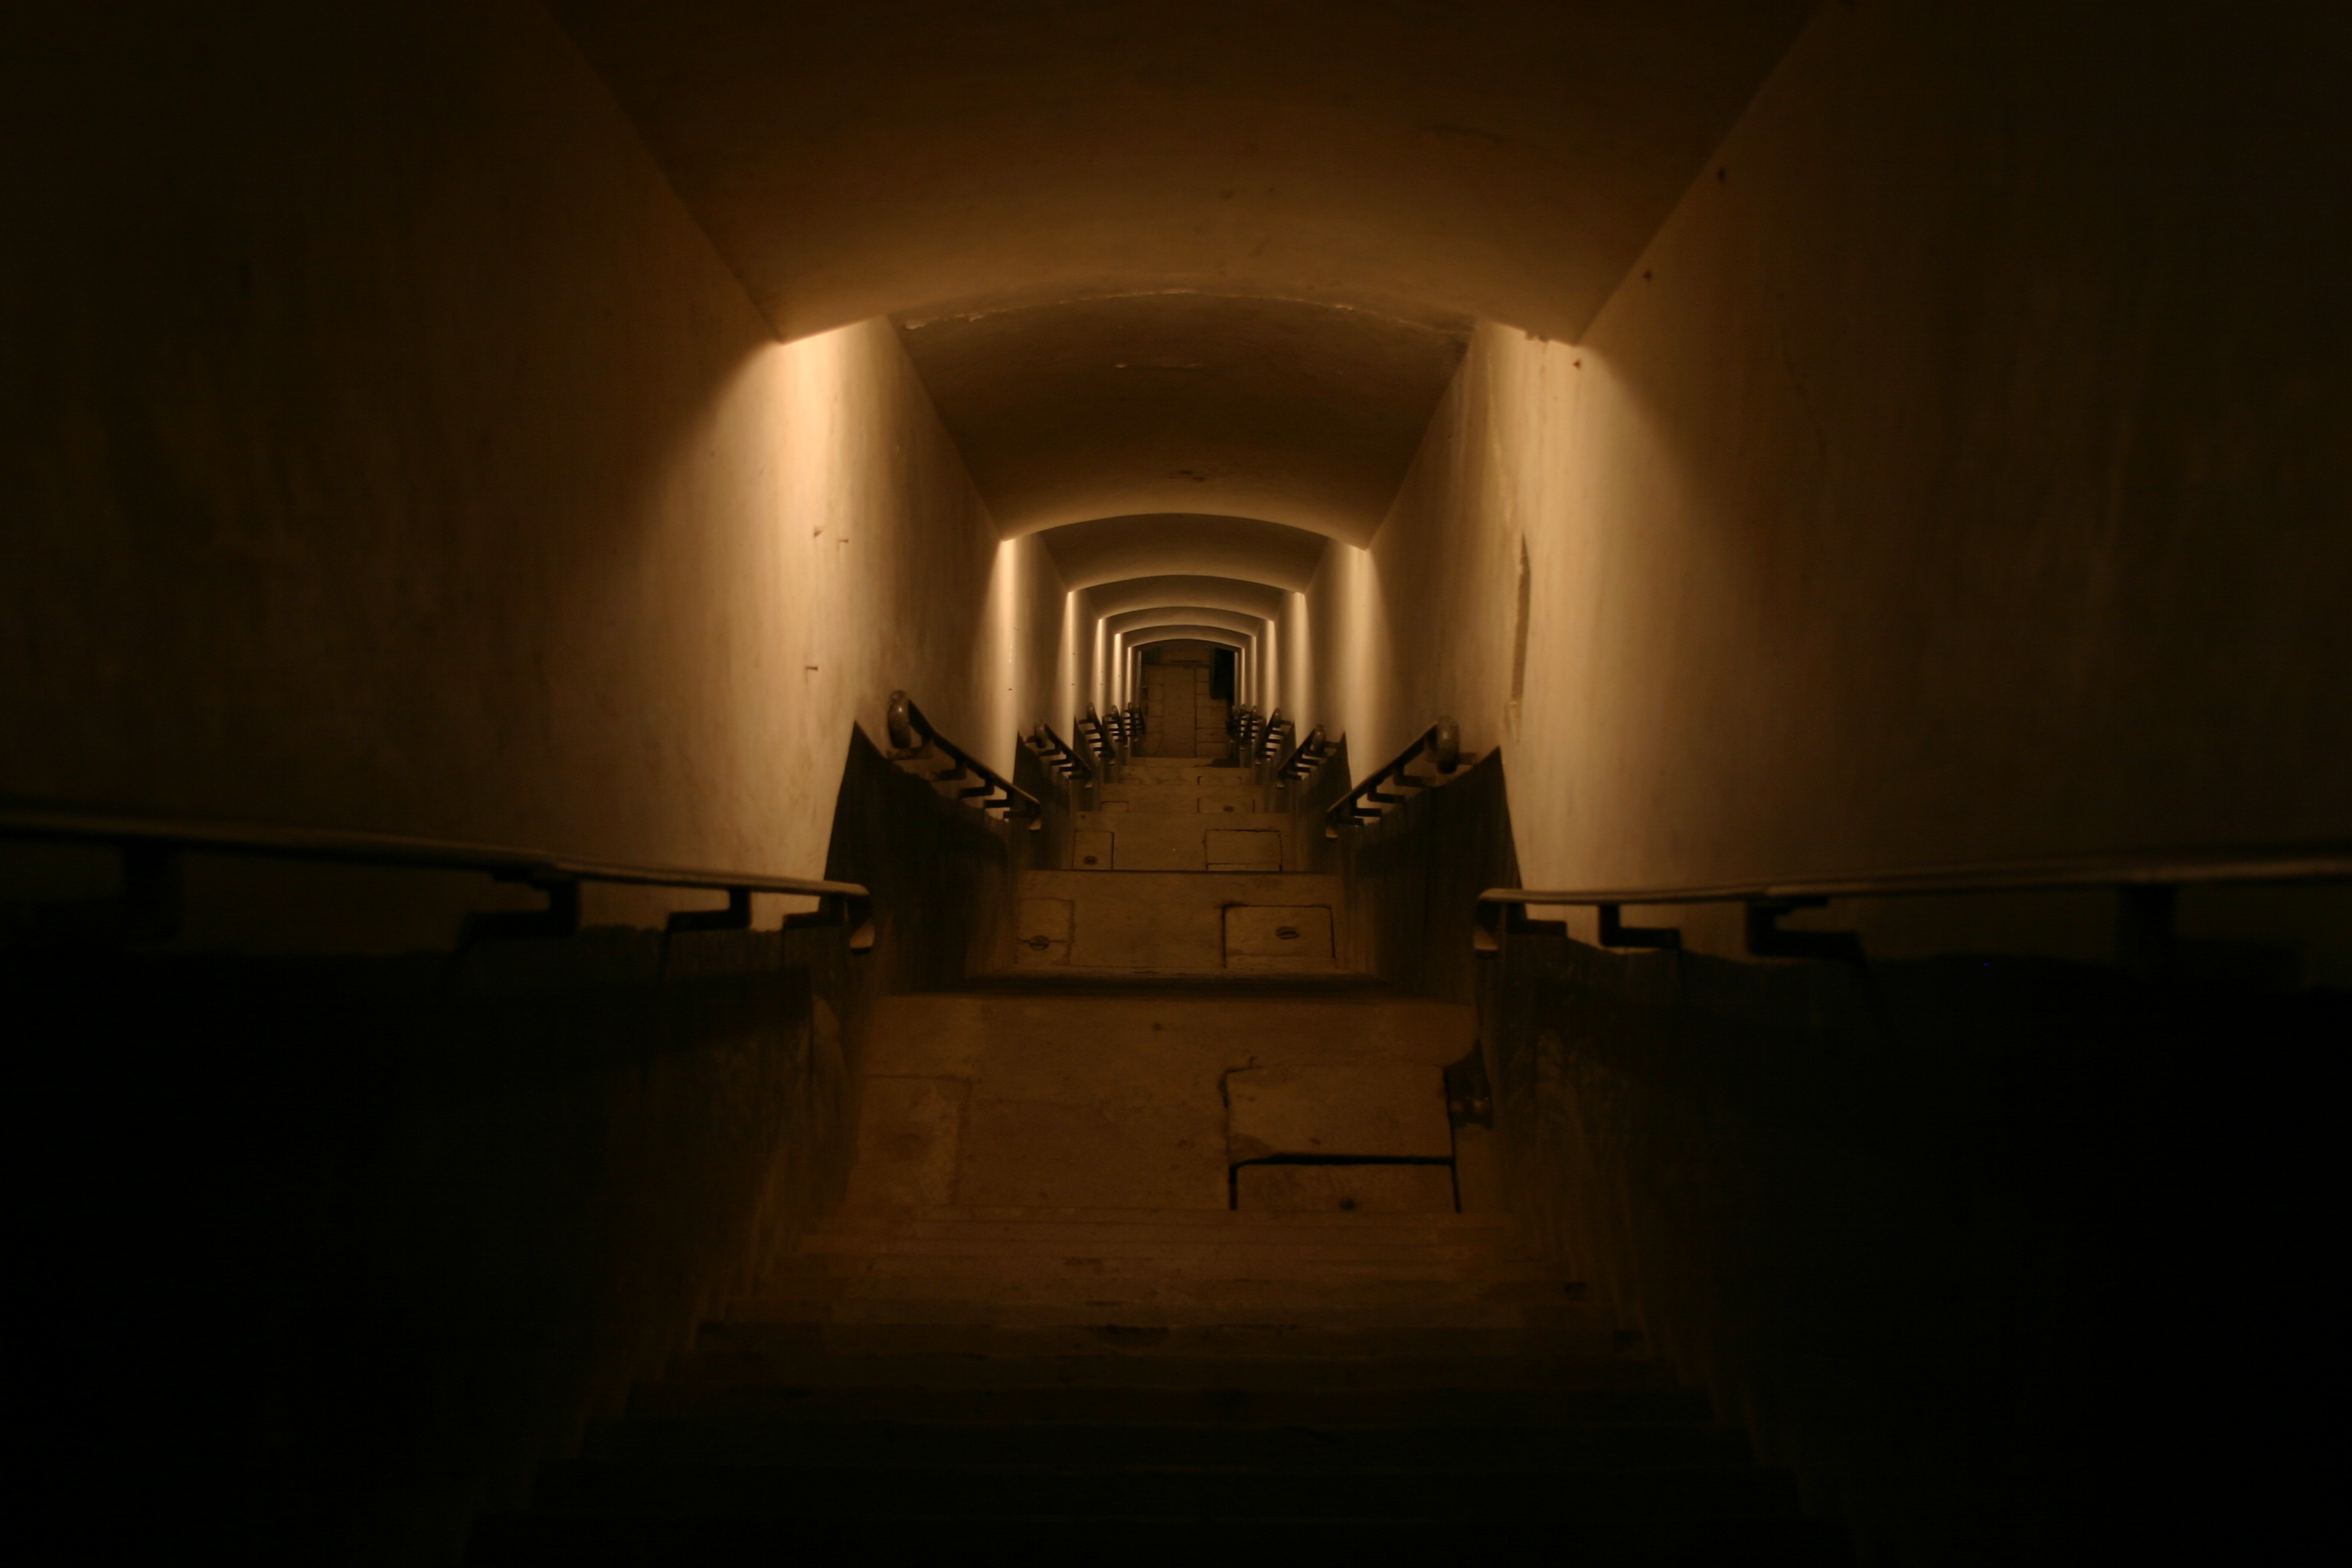
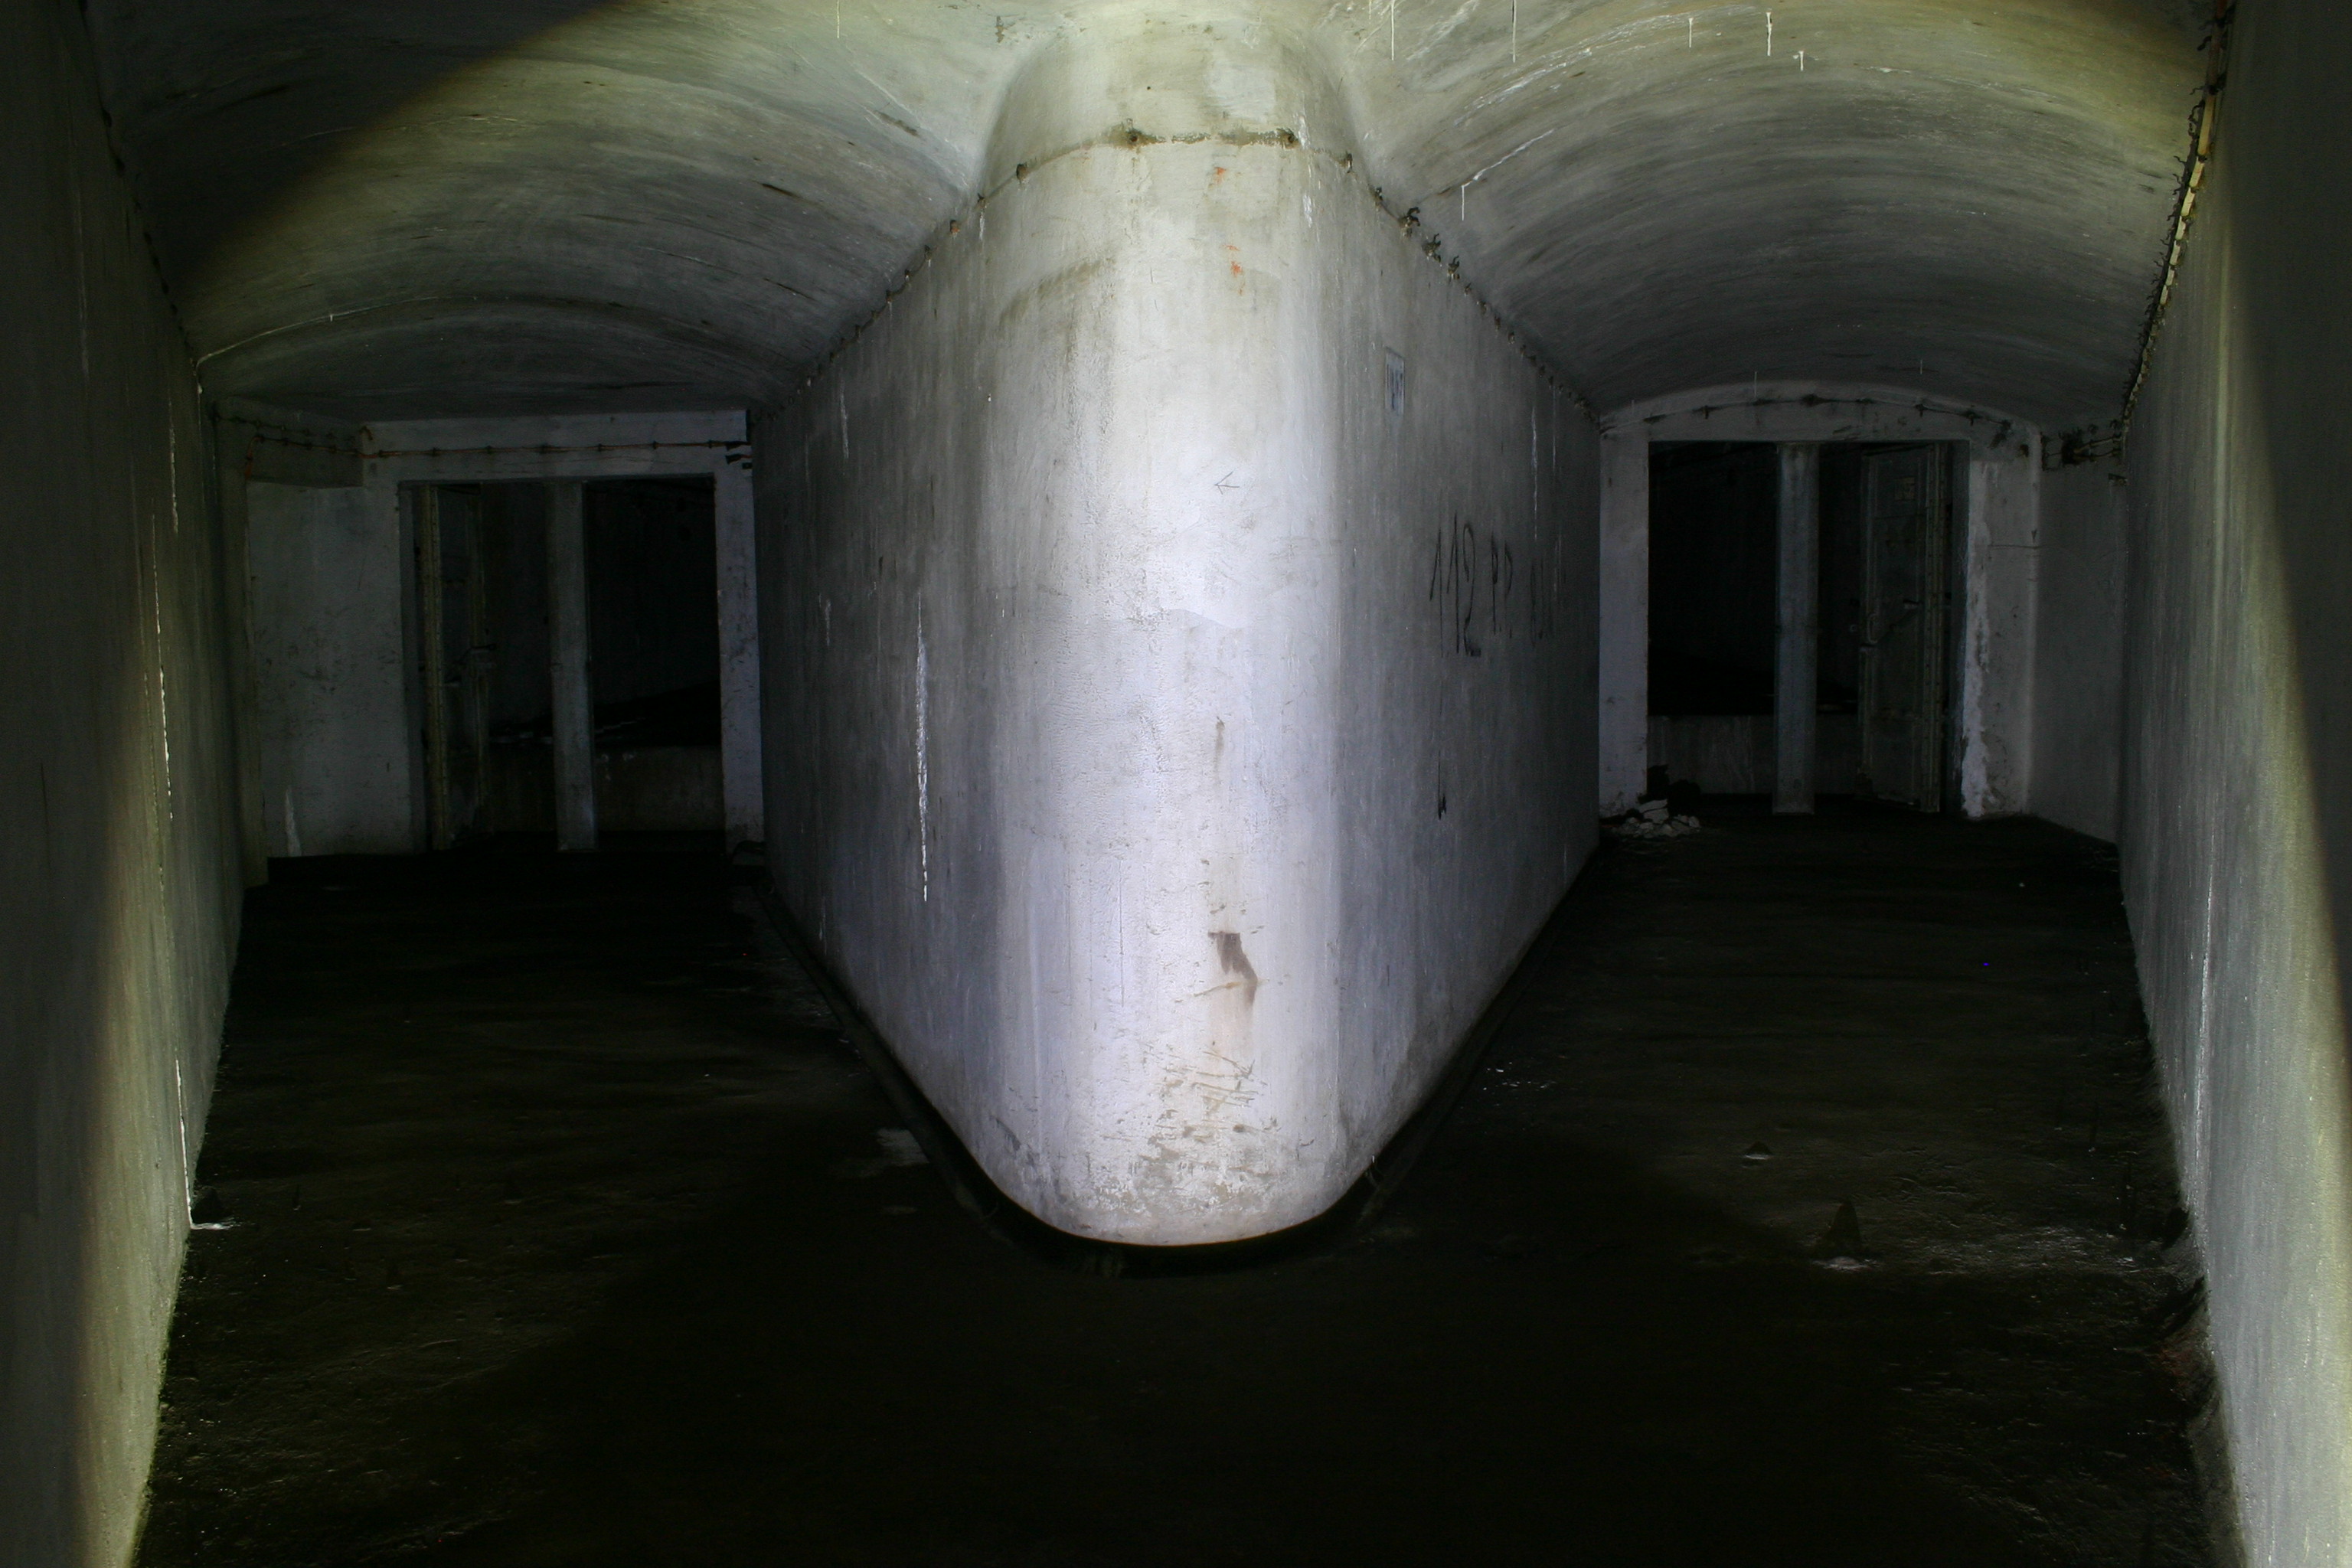
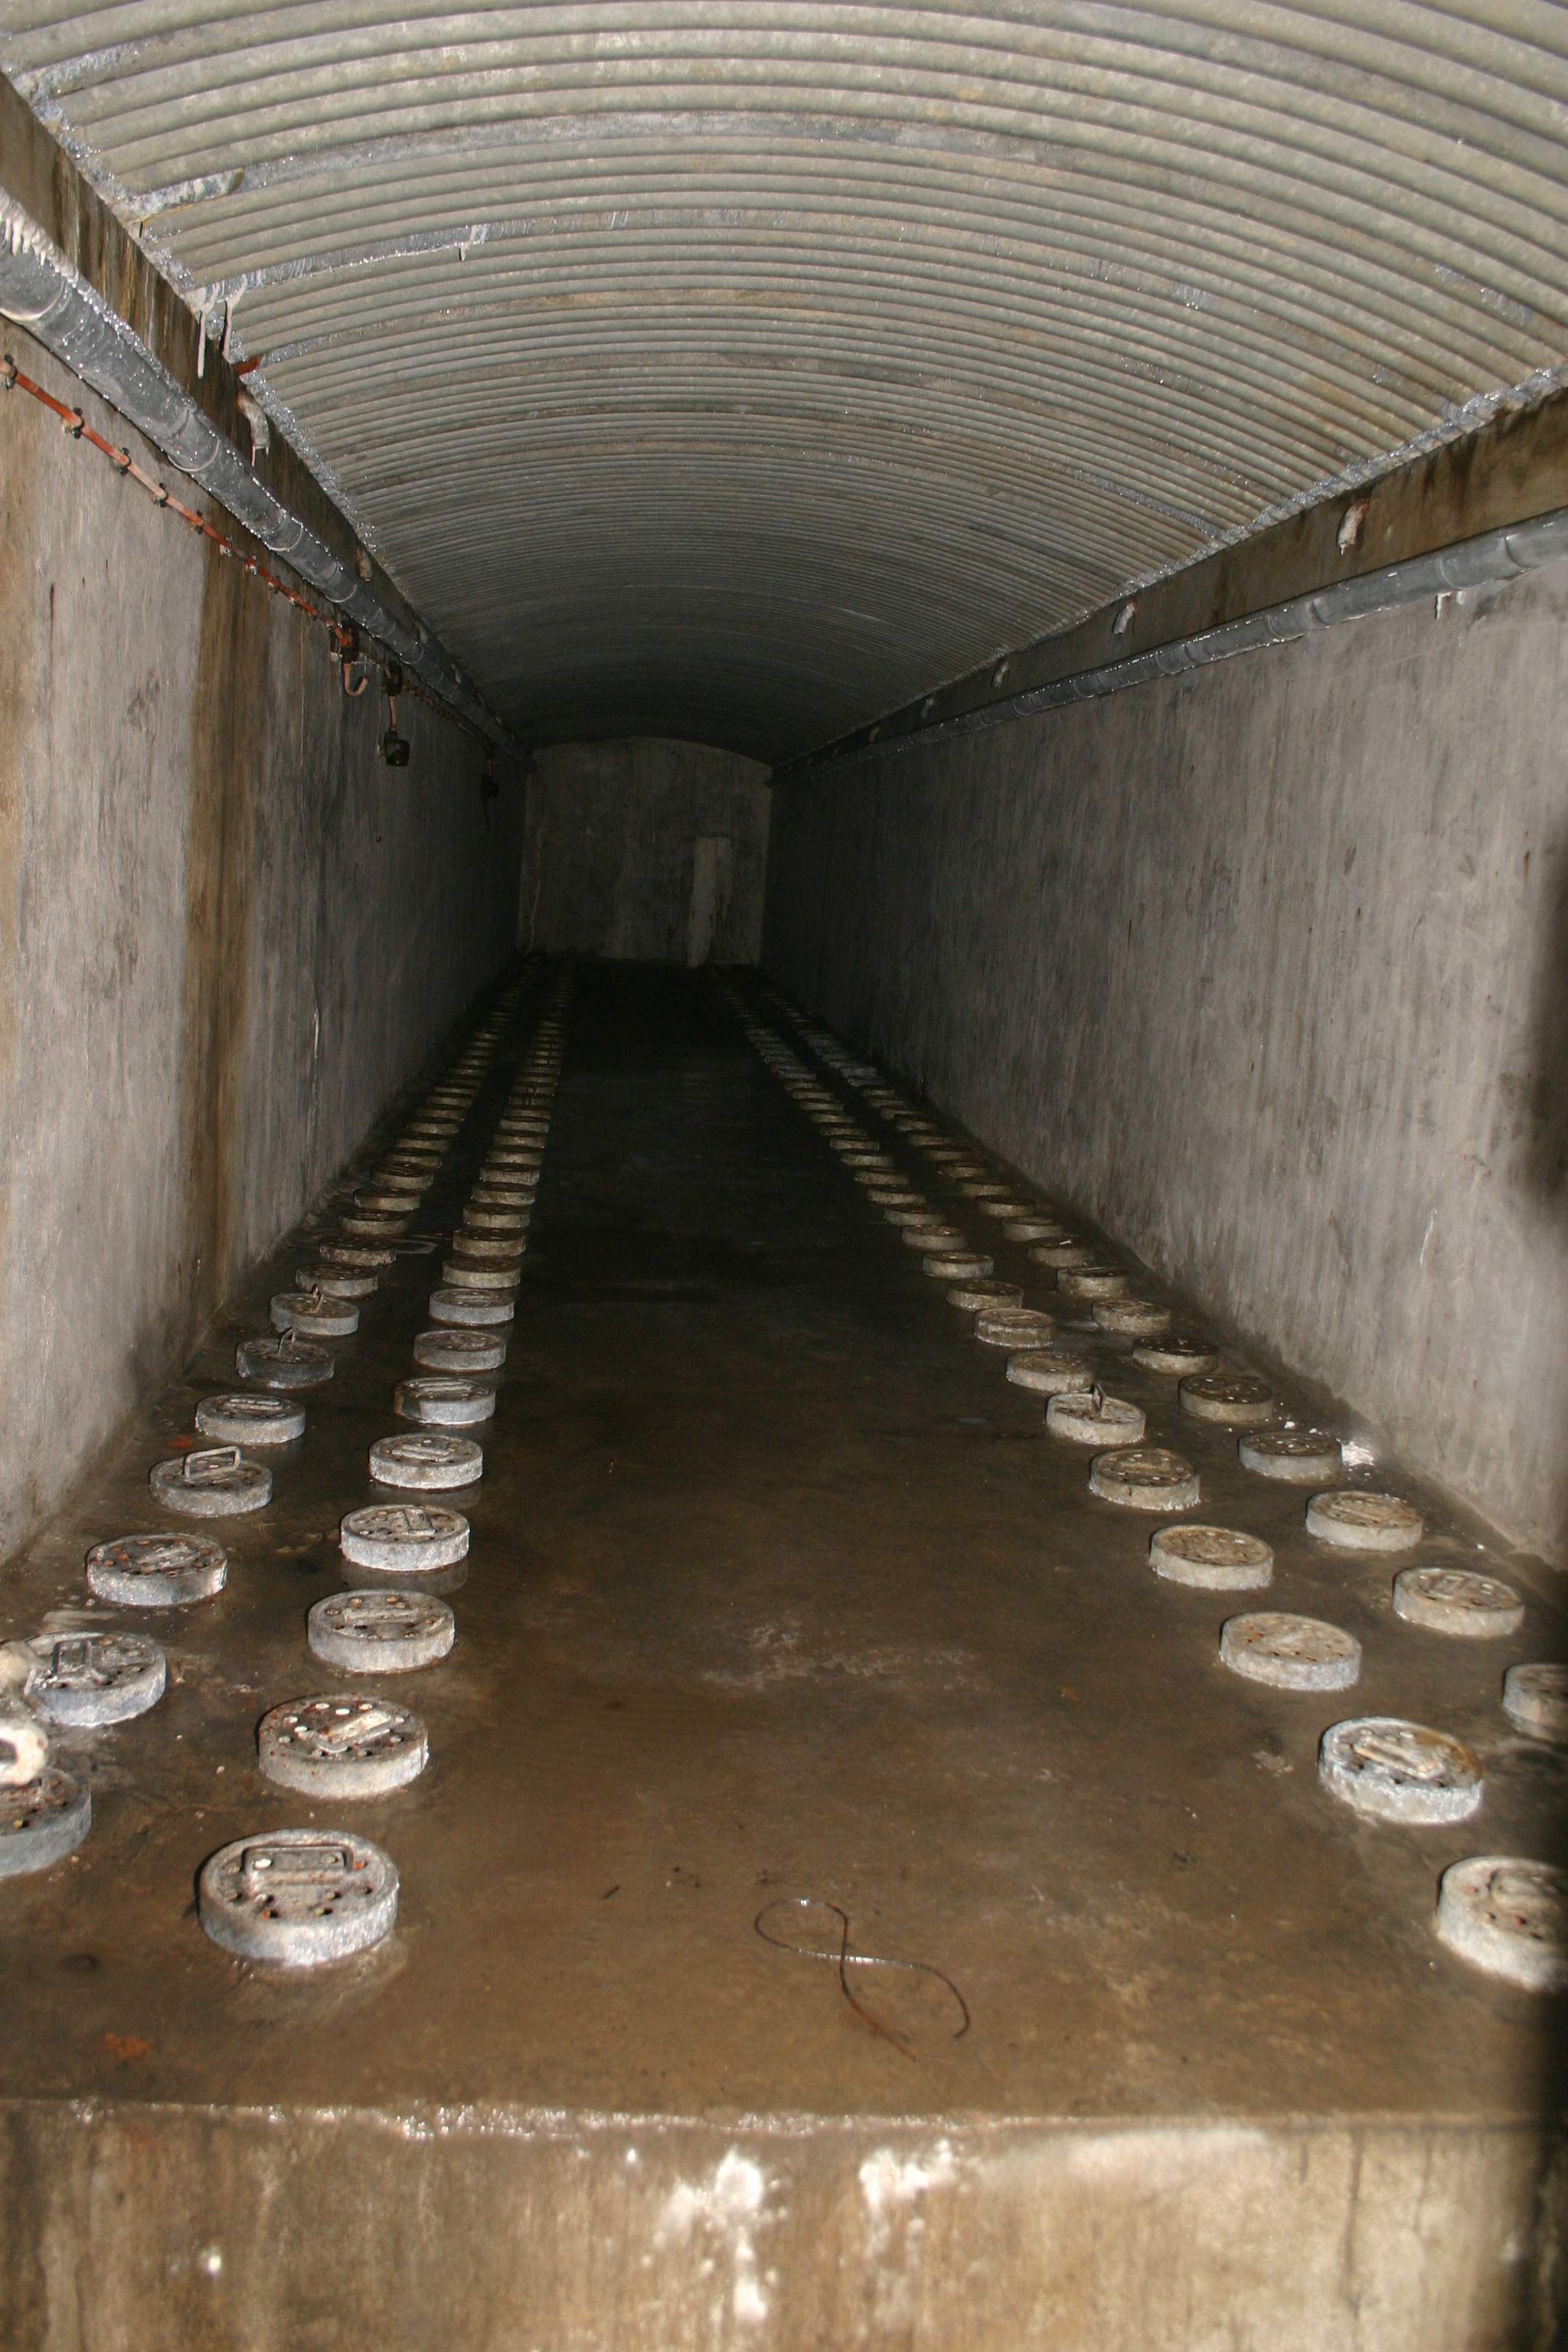
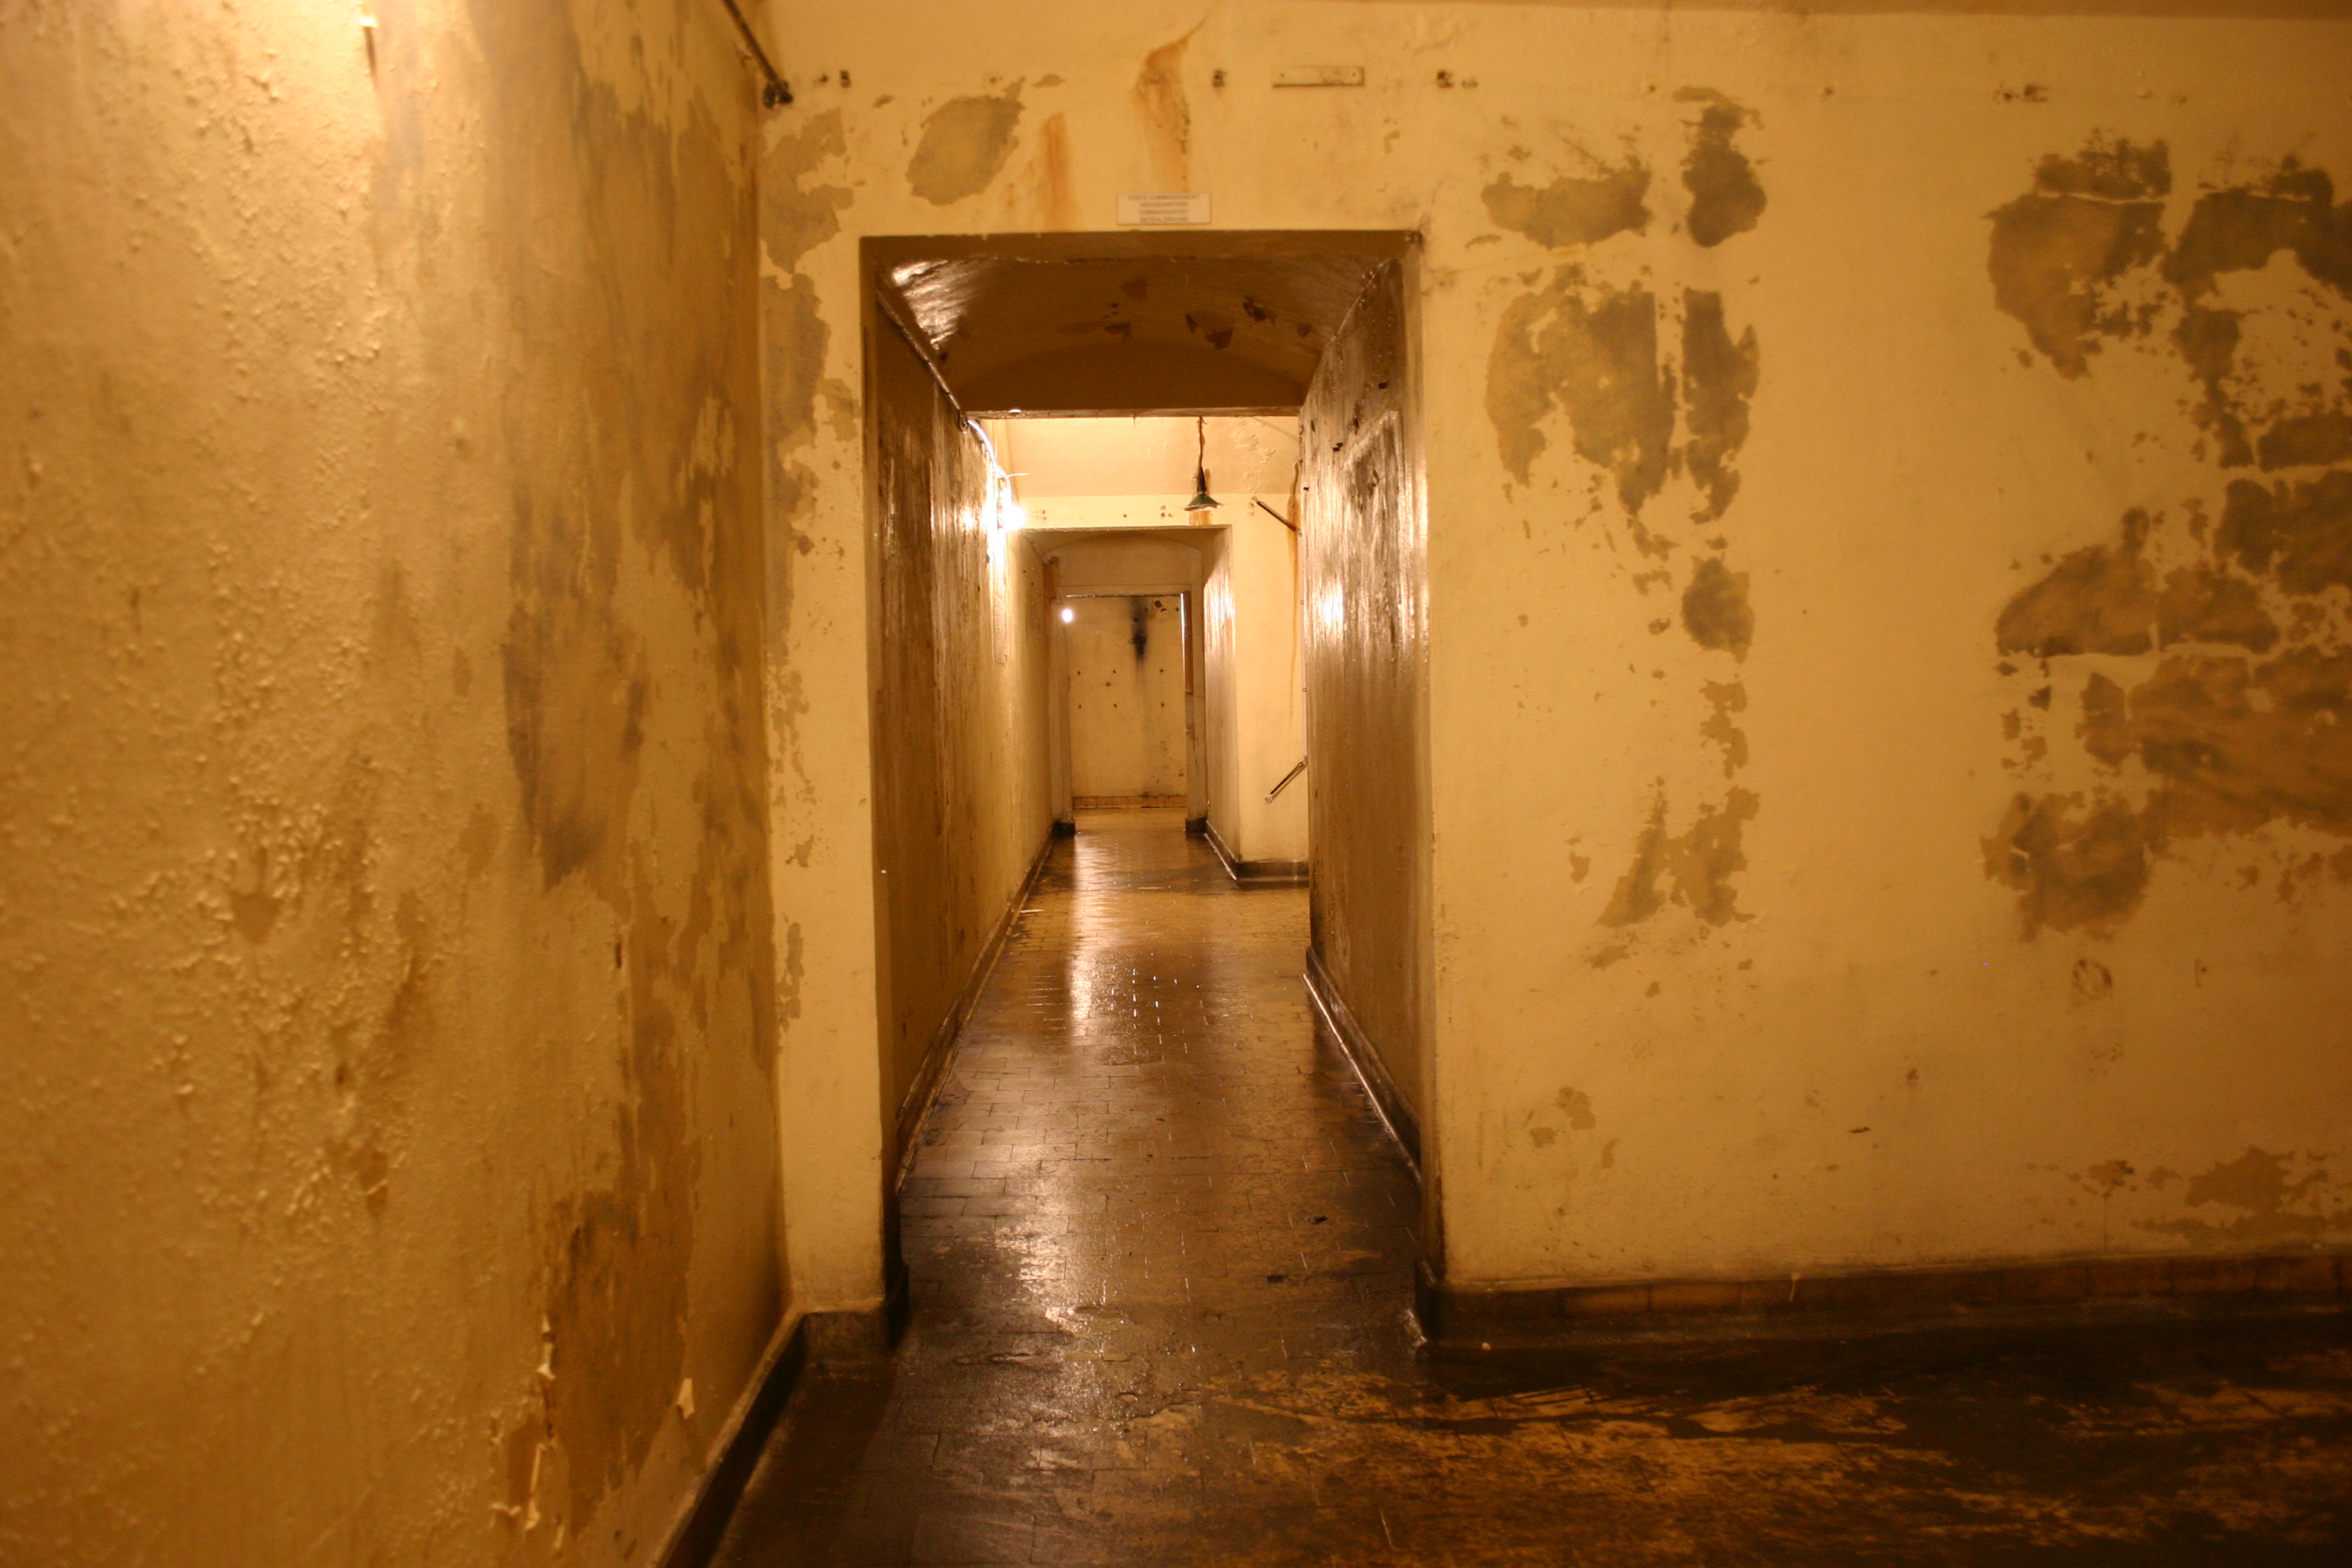
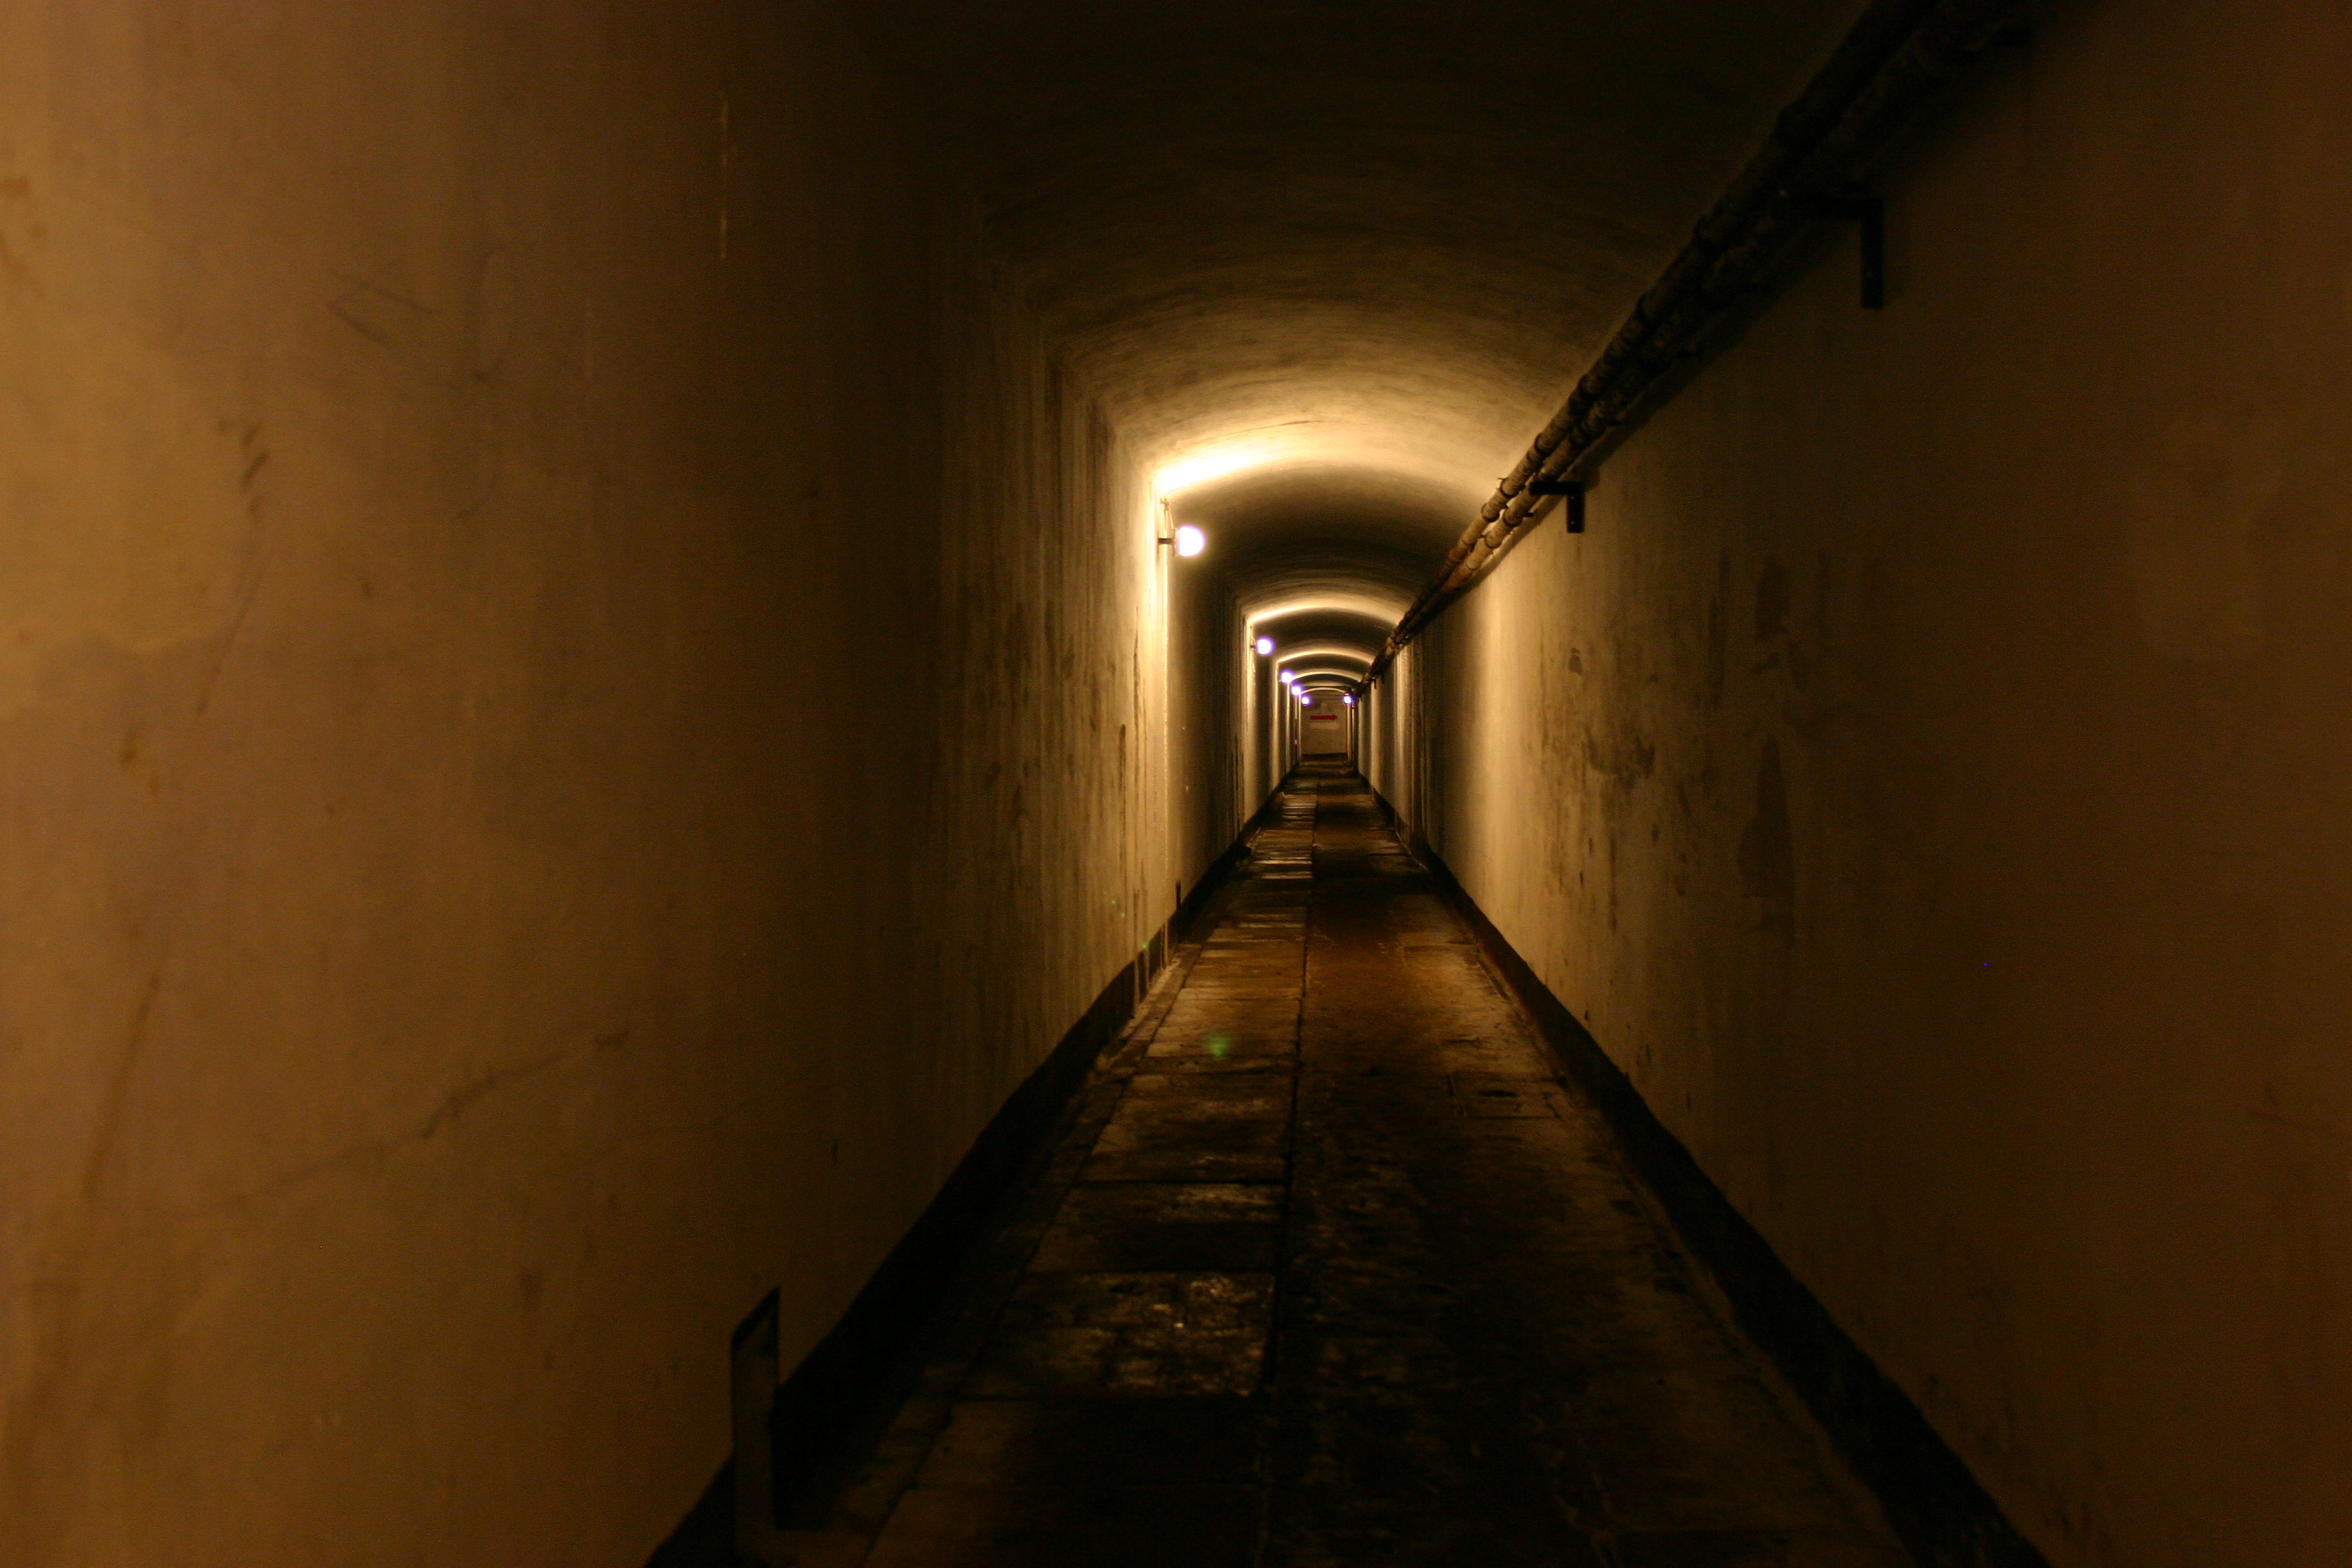
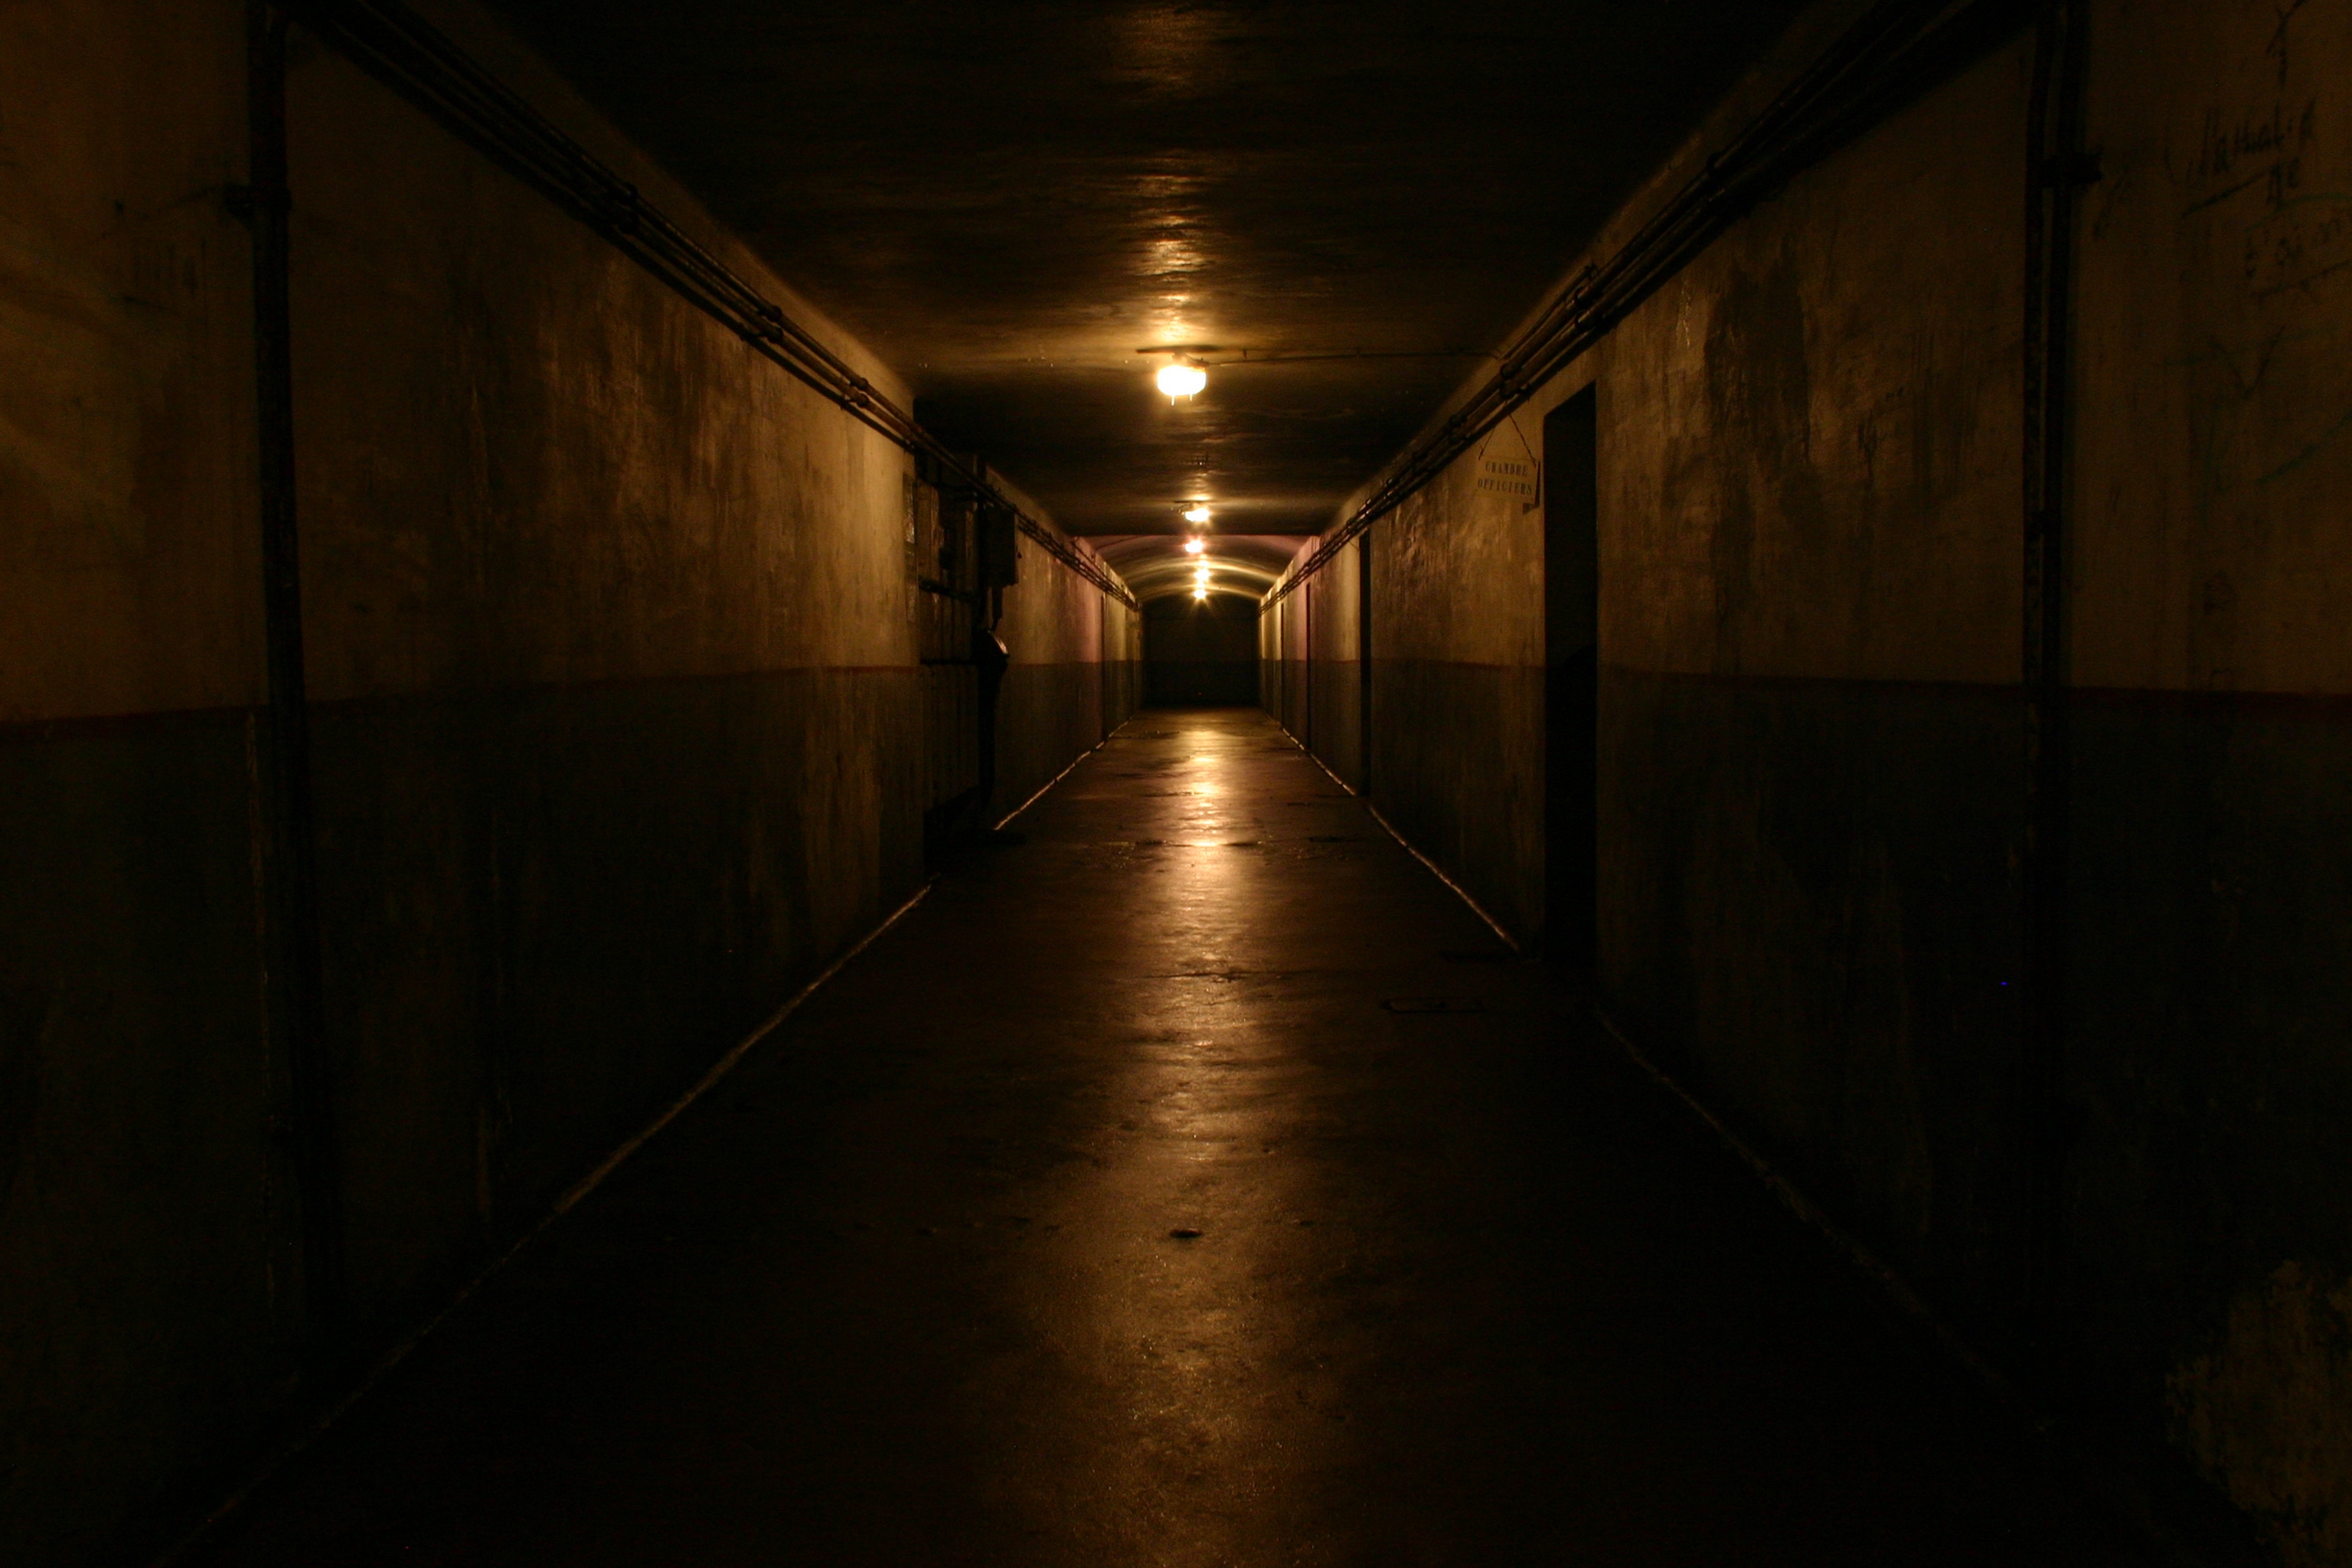
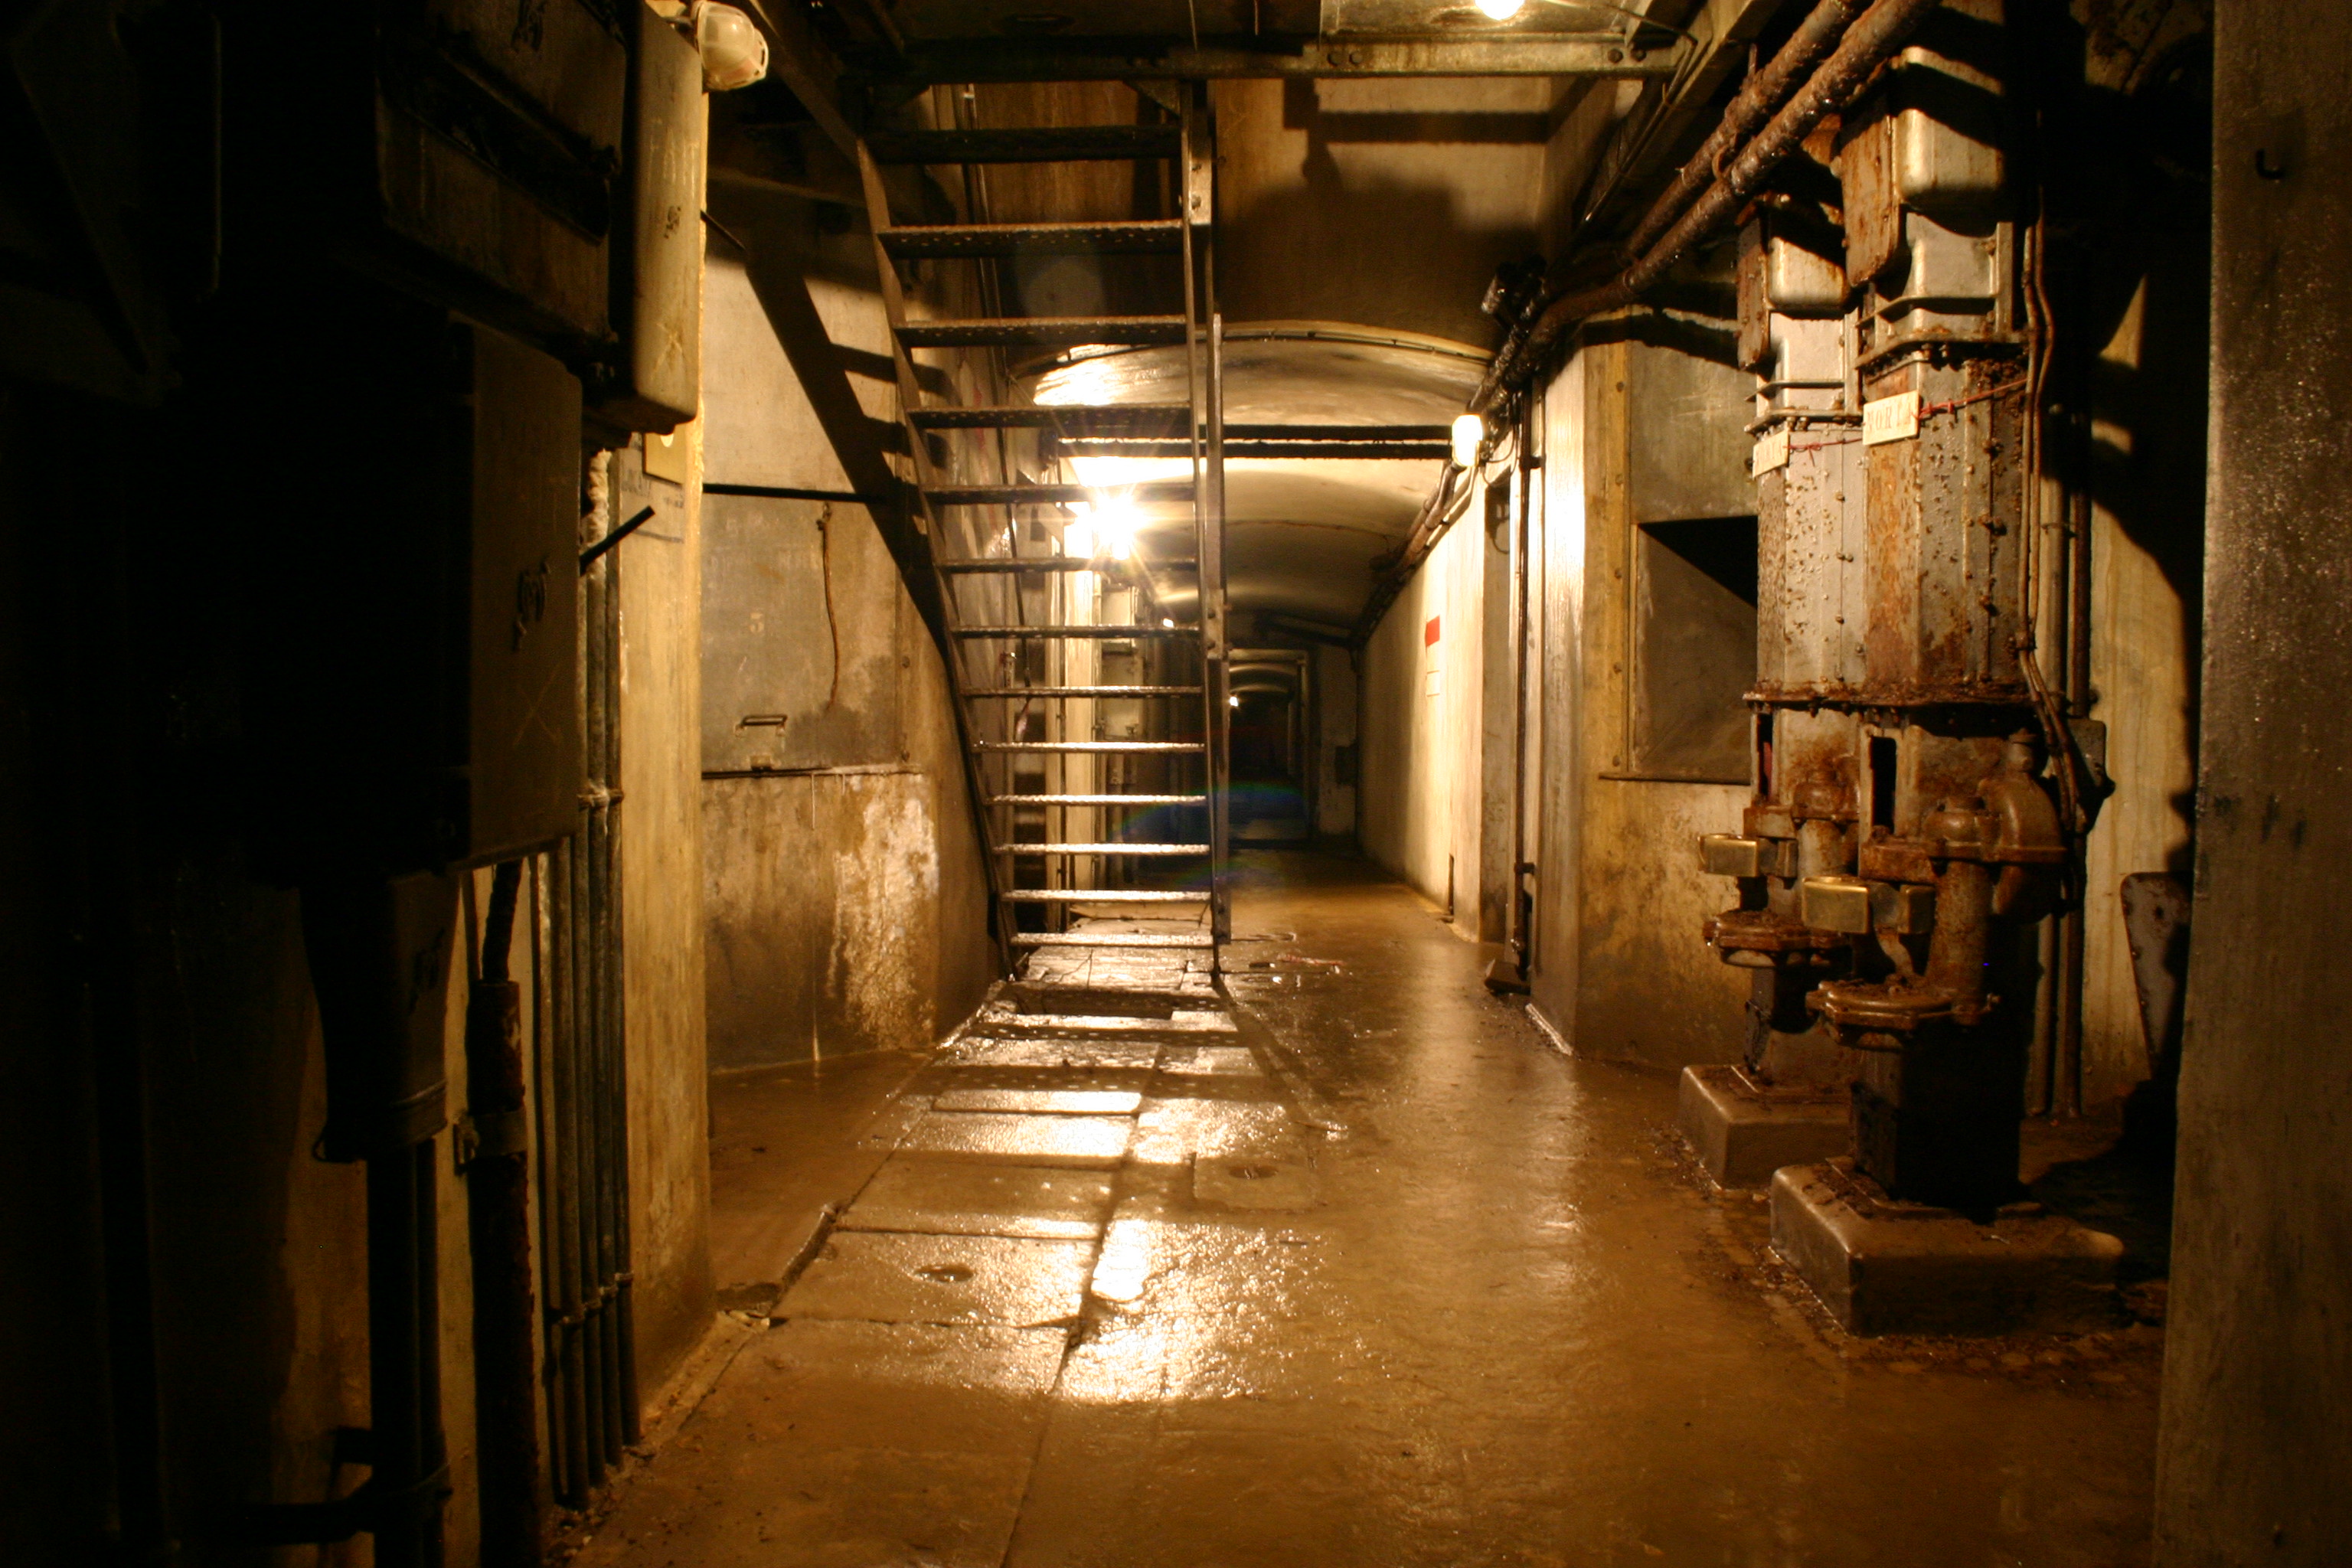
Aubin is a small “interval” fort situated between two big ones (Eben-Emael to the North and Battice to the South) it was built much deeper than the original Brialmont forts. While its combat blocs are visible from the surface, all of its 3 kilometres of galleries, the barracks, living quarters, machine rooms, kitchen, hospital and ammunition reserves were all built 37 metres underground.
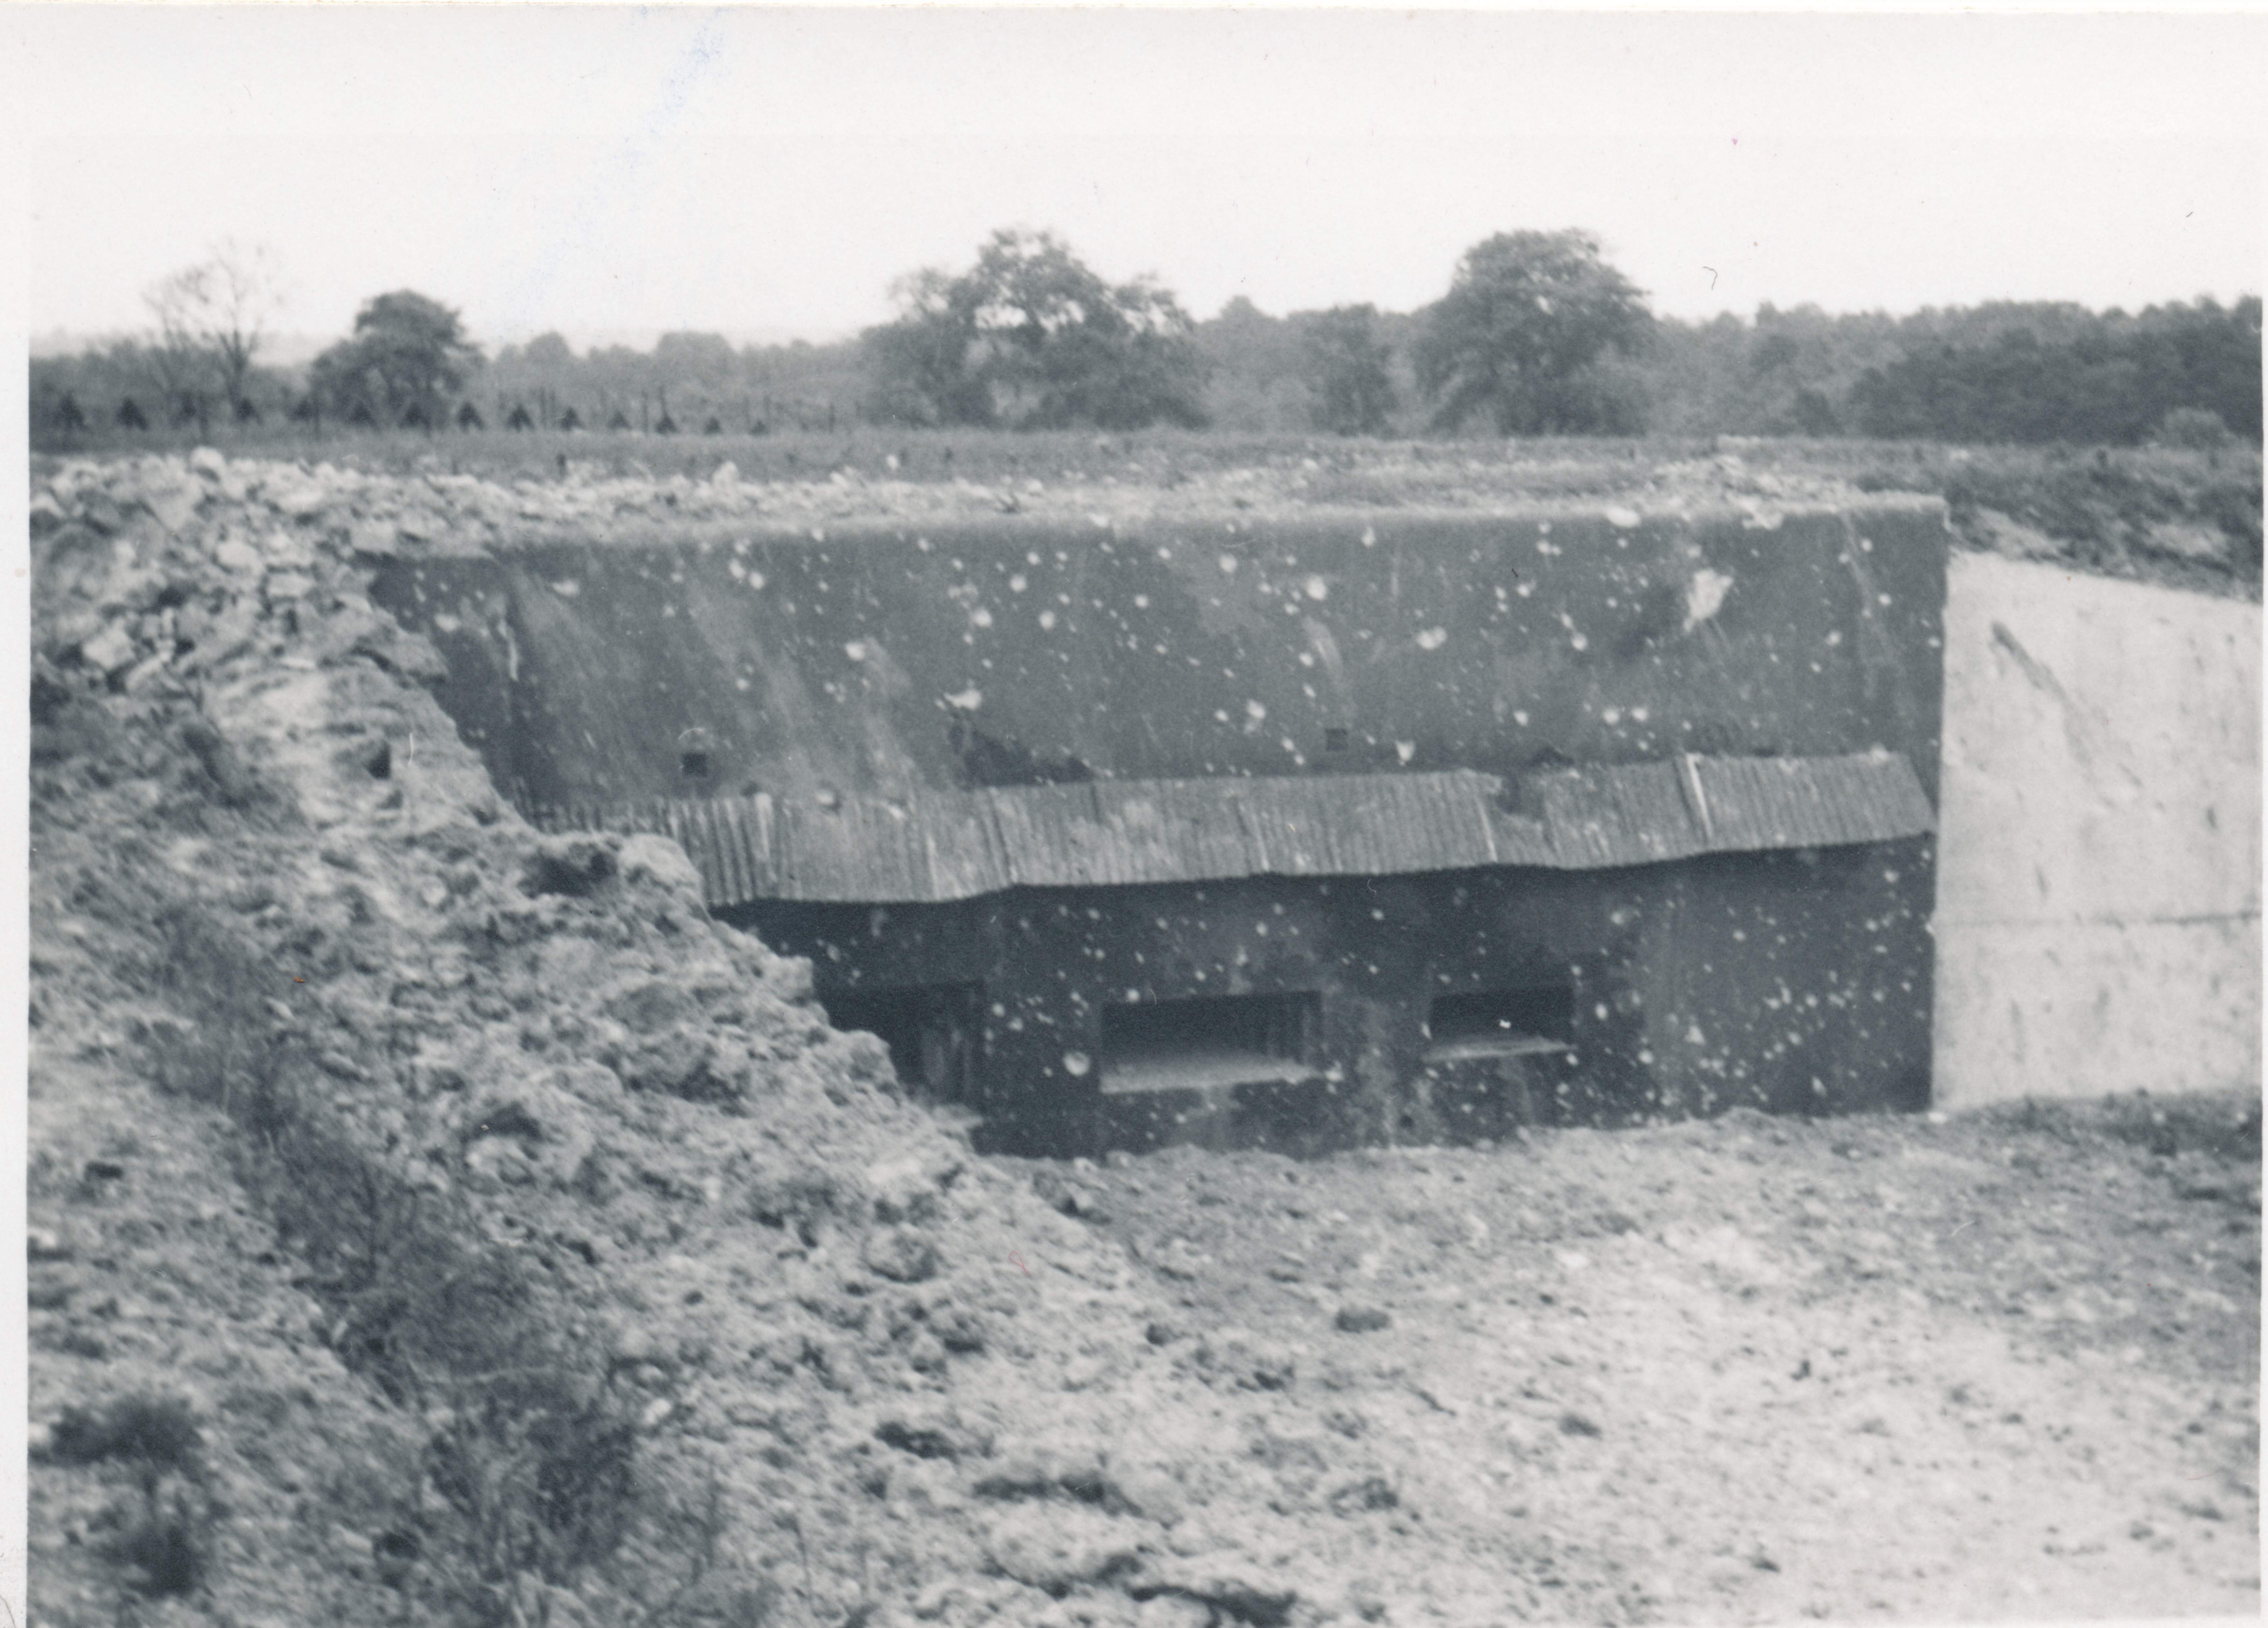
The 3 main combat blocs are 300 metres apart, so enemy artillery cannot target all of them at once. The whole fort is built out of reinforced concrete made to resist shelling of up to 420mm in calibre.
it has 2 air intake stations capable of pumping 35.000 cubic metres of air an hour inside the fort, ventilating it and providing enough air to actually pressurise each combat bloc: Air tight doors and airlocks would be in place and each bloc would be pressurised up to 1 BAR (about 14PSI). That system had a dual purpose: The air pressure inside de bloc being greater than on the outside, the smoke and gas produced by the fort’s guns and machine guns would have been pushed out of the structure automatically, keeping the air inside the fort clean. The other purpose was that in case of a gas attack, the air pressure inside the fort being higher than on the outside, the gas would have been unable to penetrate inside the fort…

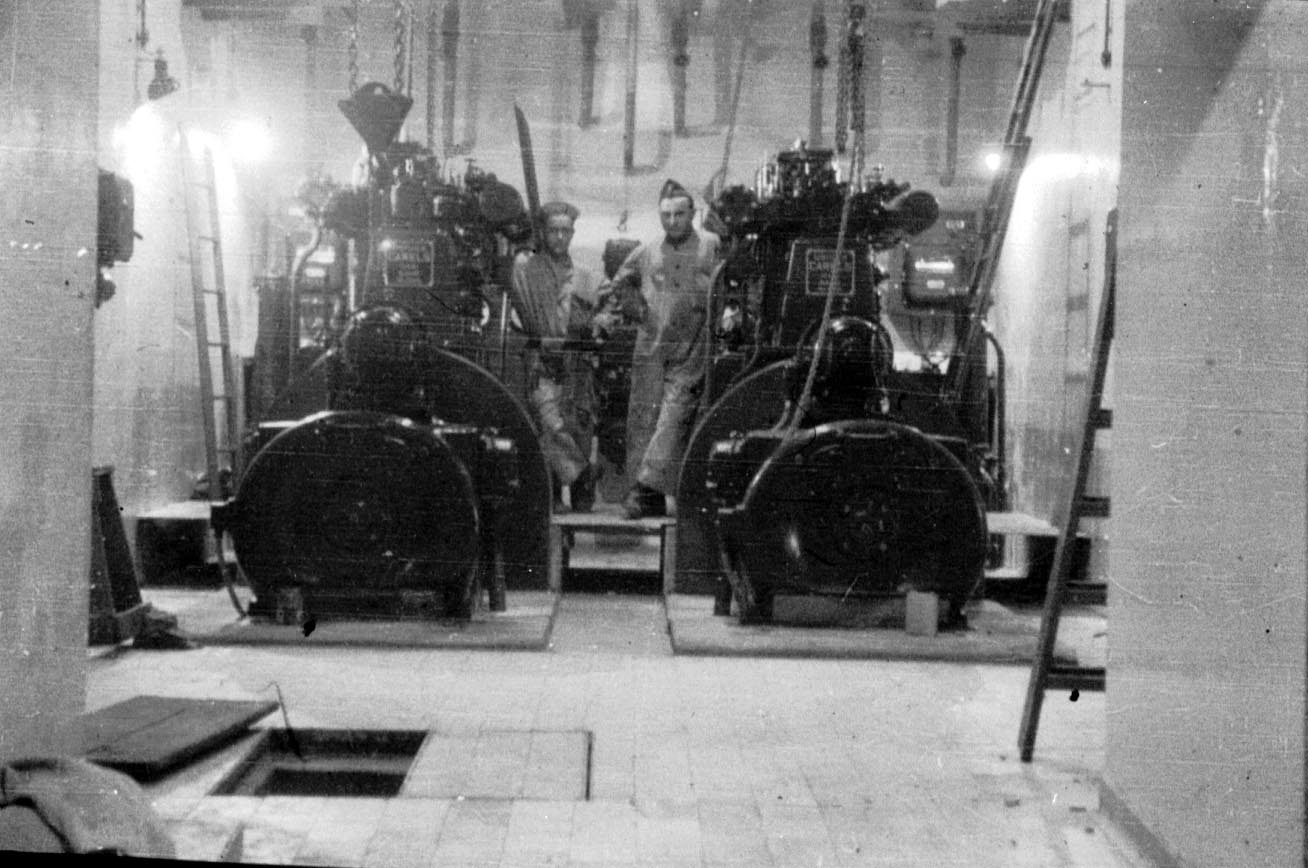
There was a filter system for the air, a purification system for the water (The fort was built on top of a 60 metres deep water table), a machine room with 4 diesel engines that supplied the fort with electricity, hot water for the showers and the kitchen and hot water for the central heating system.

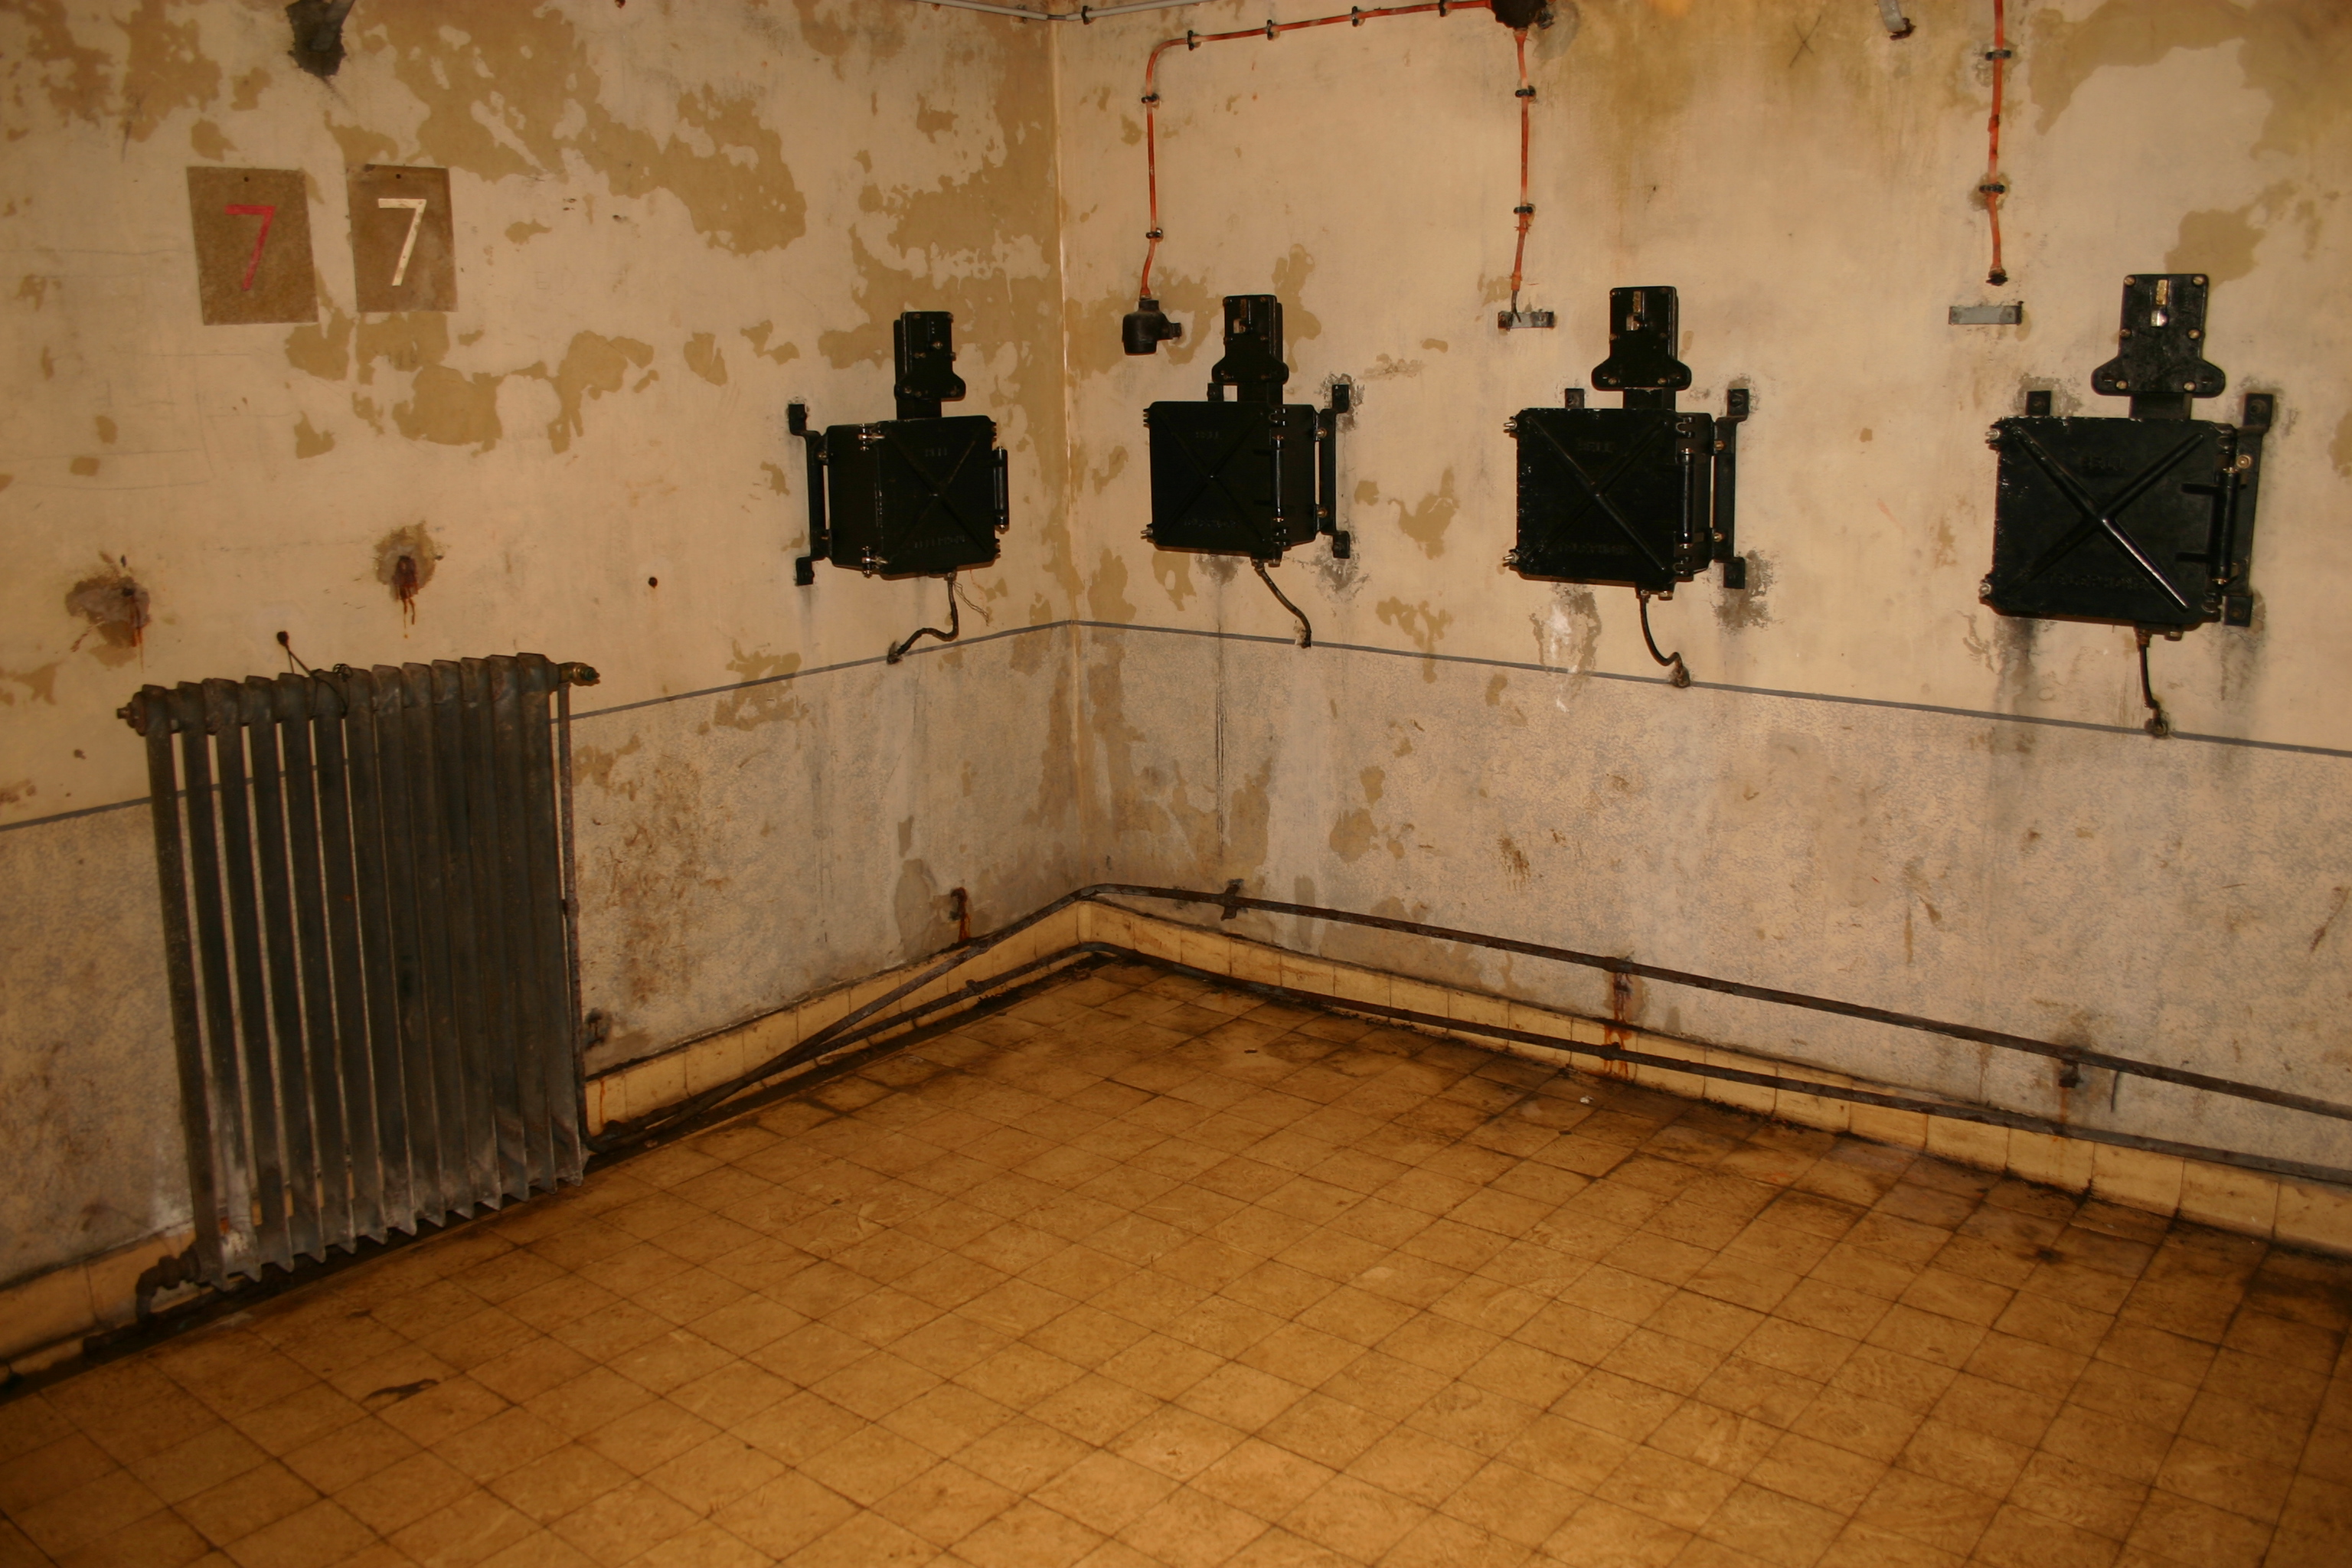
Aubin, like all the other modern forts alongside the older modernised ones was equipped with a telephone exchange. Each fort was linked to all the other forts by underground phone lines. Each fort was also equipped with a radio room (Wireless transmission system). Finally, each fort was surrounded by a network of smaller hidden bunkers overlooking important / strategic places, crossroads, bridges and so on. Those bunkers were linked to the forts by phone lines too and would be the eyes and ears of the forts, calling in artillery fire with accurate coordinates.
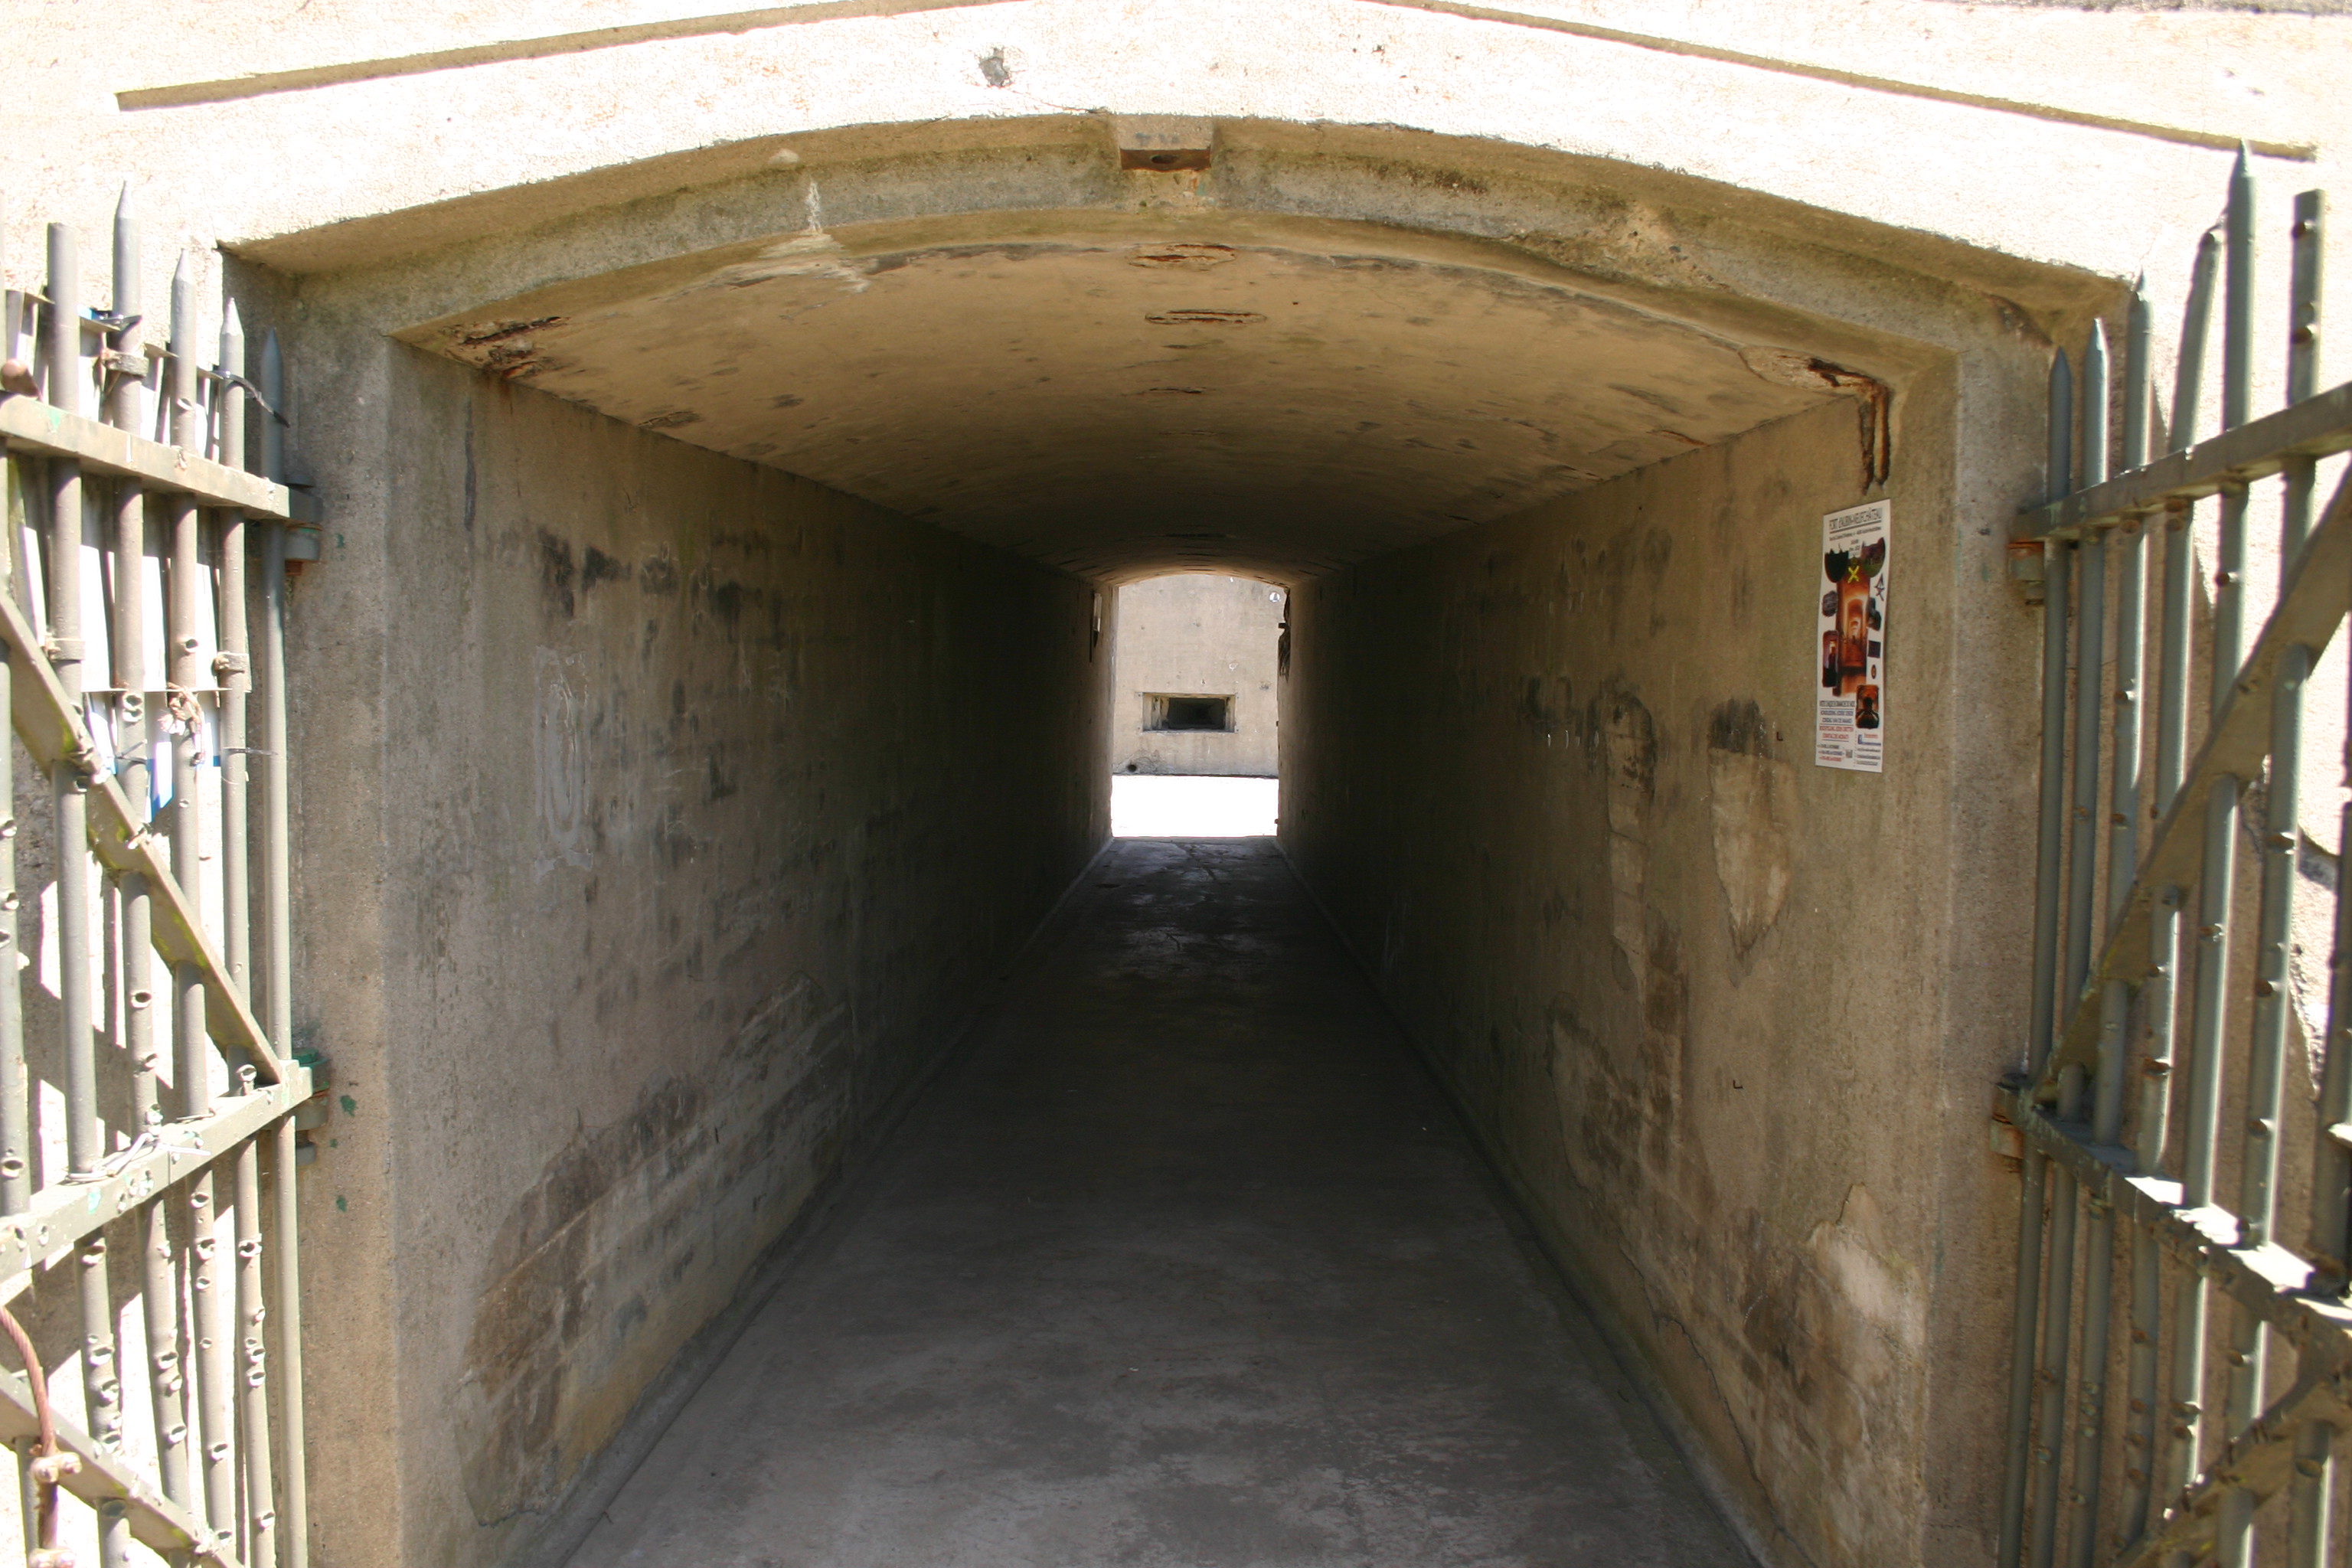
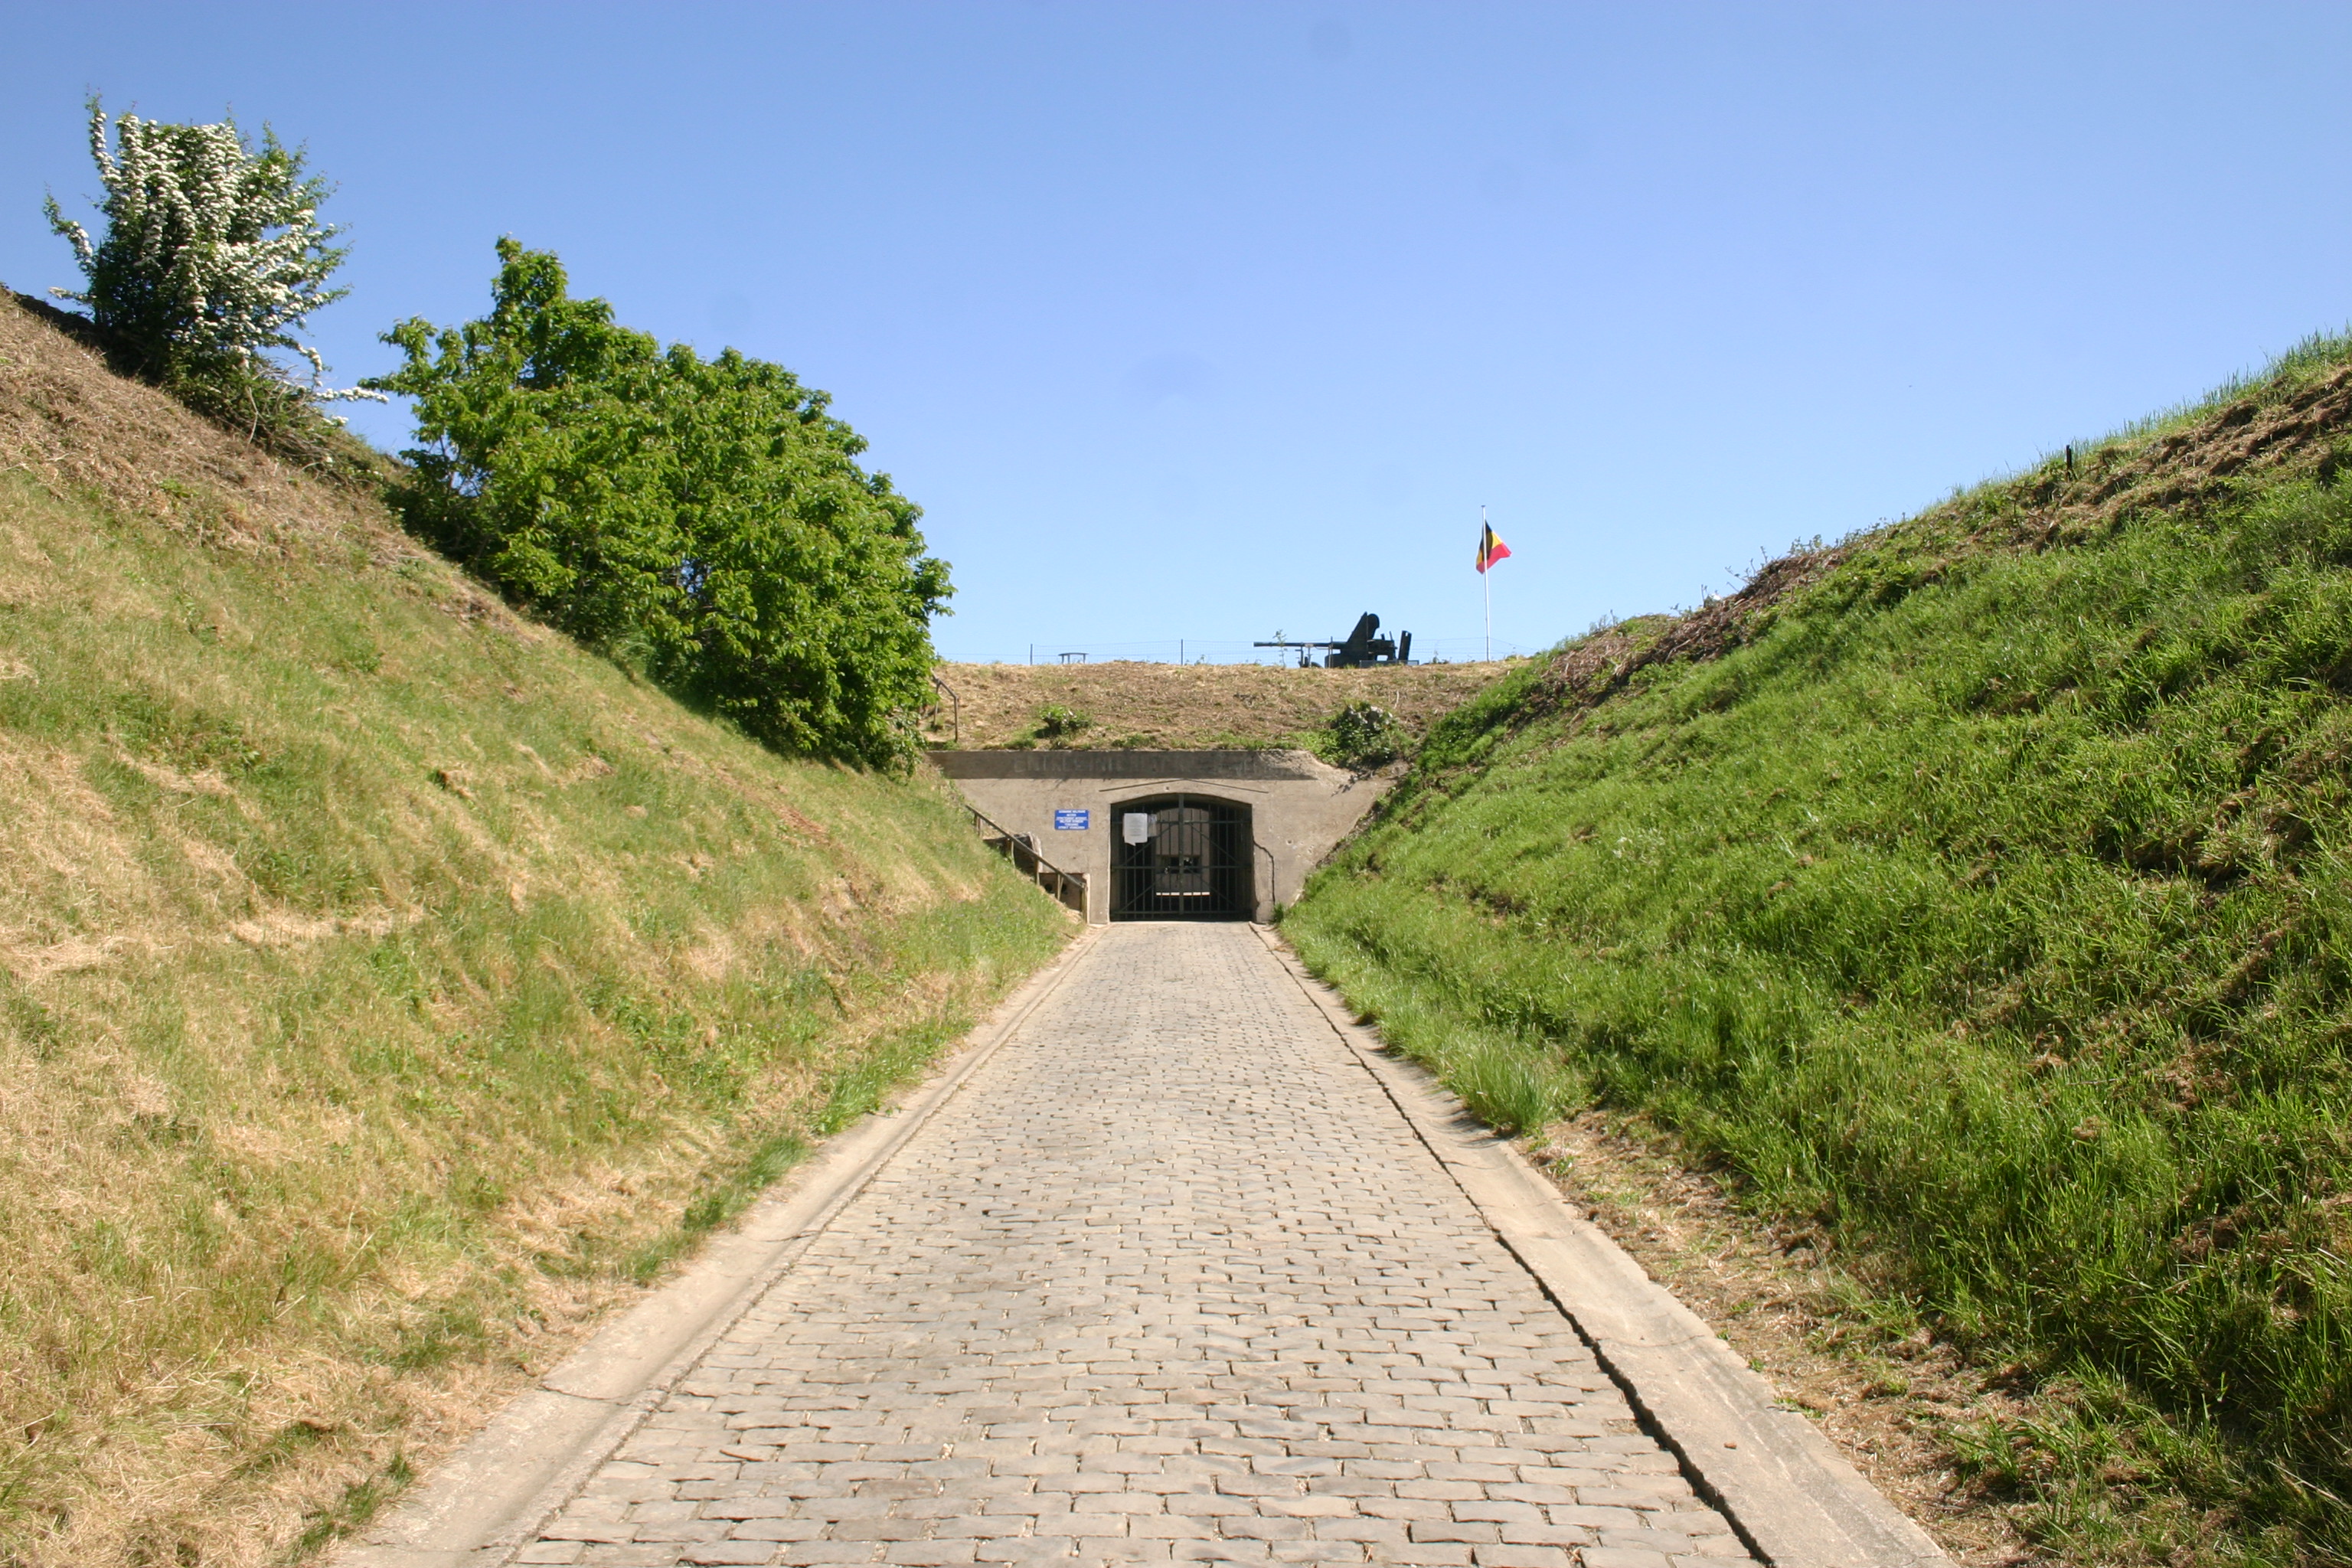
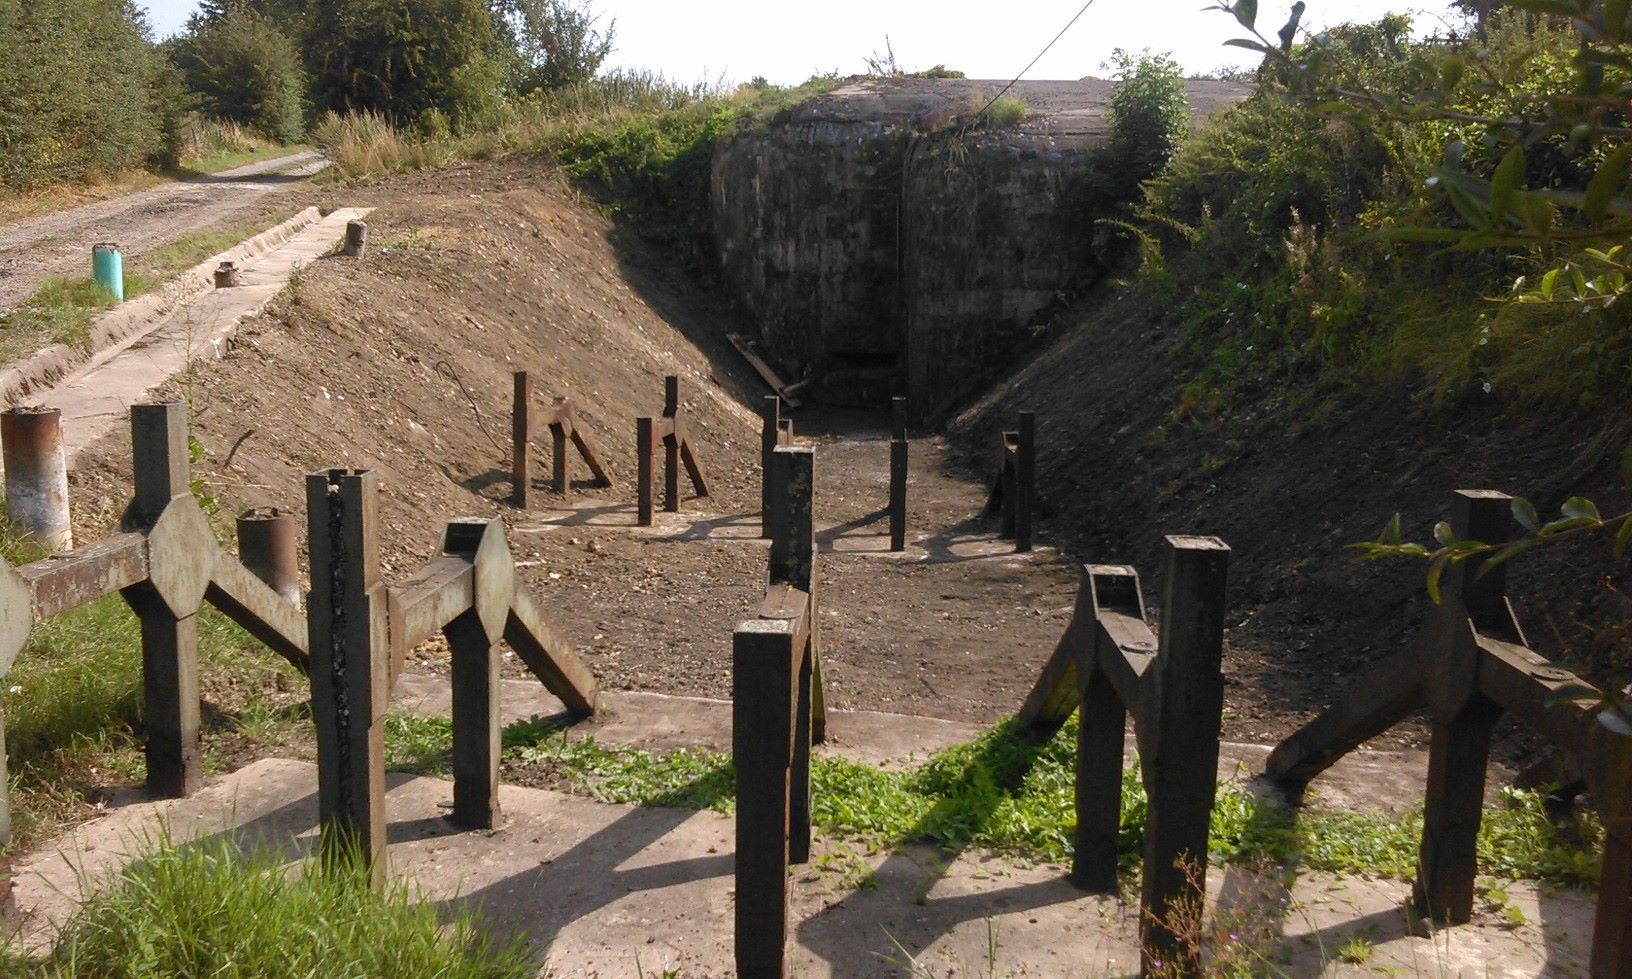
Each combat bloc was supplied with equipment to condemn and detonate it should it be compromised and should the enemy get close to breach it. There are 2 entrance / exits and one hidden emergency exit so secret that only the officers knew about it.
Life inside the fort was far from comfortable. The inside of the fort was damp. Everything was damp. Conditions in that regards were close to the ones inside of a submarine. There was no sewage system. What men needed to do had to be done in buckets called “odourless buckets” (Who said the army has no sense of humour) or in latrines built on top of sceptic tanks… All of which had to be emptied manually (with a big ladle, bon-appetit!) and carried outside to be emptied in a field. Furthermore, while equipping a structure with hot water showers was more than modern and innovating in the 1930’s, there were only 4 shower cubicles for a crew of 500 men… Meaning each man was entitled to one hot water shower per person per week. The rest of the week, they were more than welcome to wash in the washroom which was equipped with sinks and cold water taps only and which was to be used for the laundry too (by hand, of course).

Oh, and men had to share their beds using the hot bunk system: You had a garrison working the 3X8 shift, as in one shift/team sleeping, one working/fighting and one devoting the other 8 hours between relaxing and the chores (You hold the shit ladle, no, you hold the shit ladle). And shifts would obviously rotate… So as one man was hopping out of a bed ready for his shift, one would jump straight back in for his 8 hours of sleep.
The only people not sharing their bed with anybody else were the fort’s commander, the fort’s priest and the surgeon.
And while officers had a little radiator in their bedroom to cut the damp, there were none equipping the crew’s bedrooms to avoid soldiers fighting to have the bed closer to the nearest radiator… Finally, the 35.000 cubic metres of air being pumped inside the fort hourly were circulated through the galleries. So on top of living in a damp environment, the soldiers lived in a draughty one too.
The weapon systems
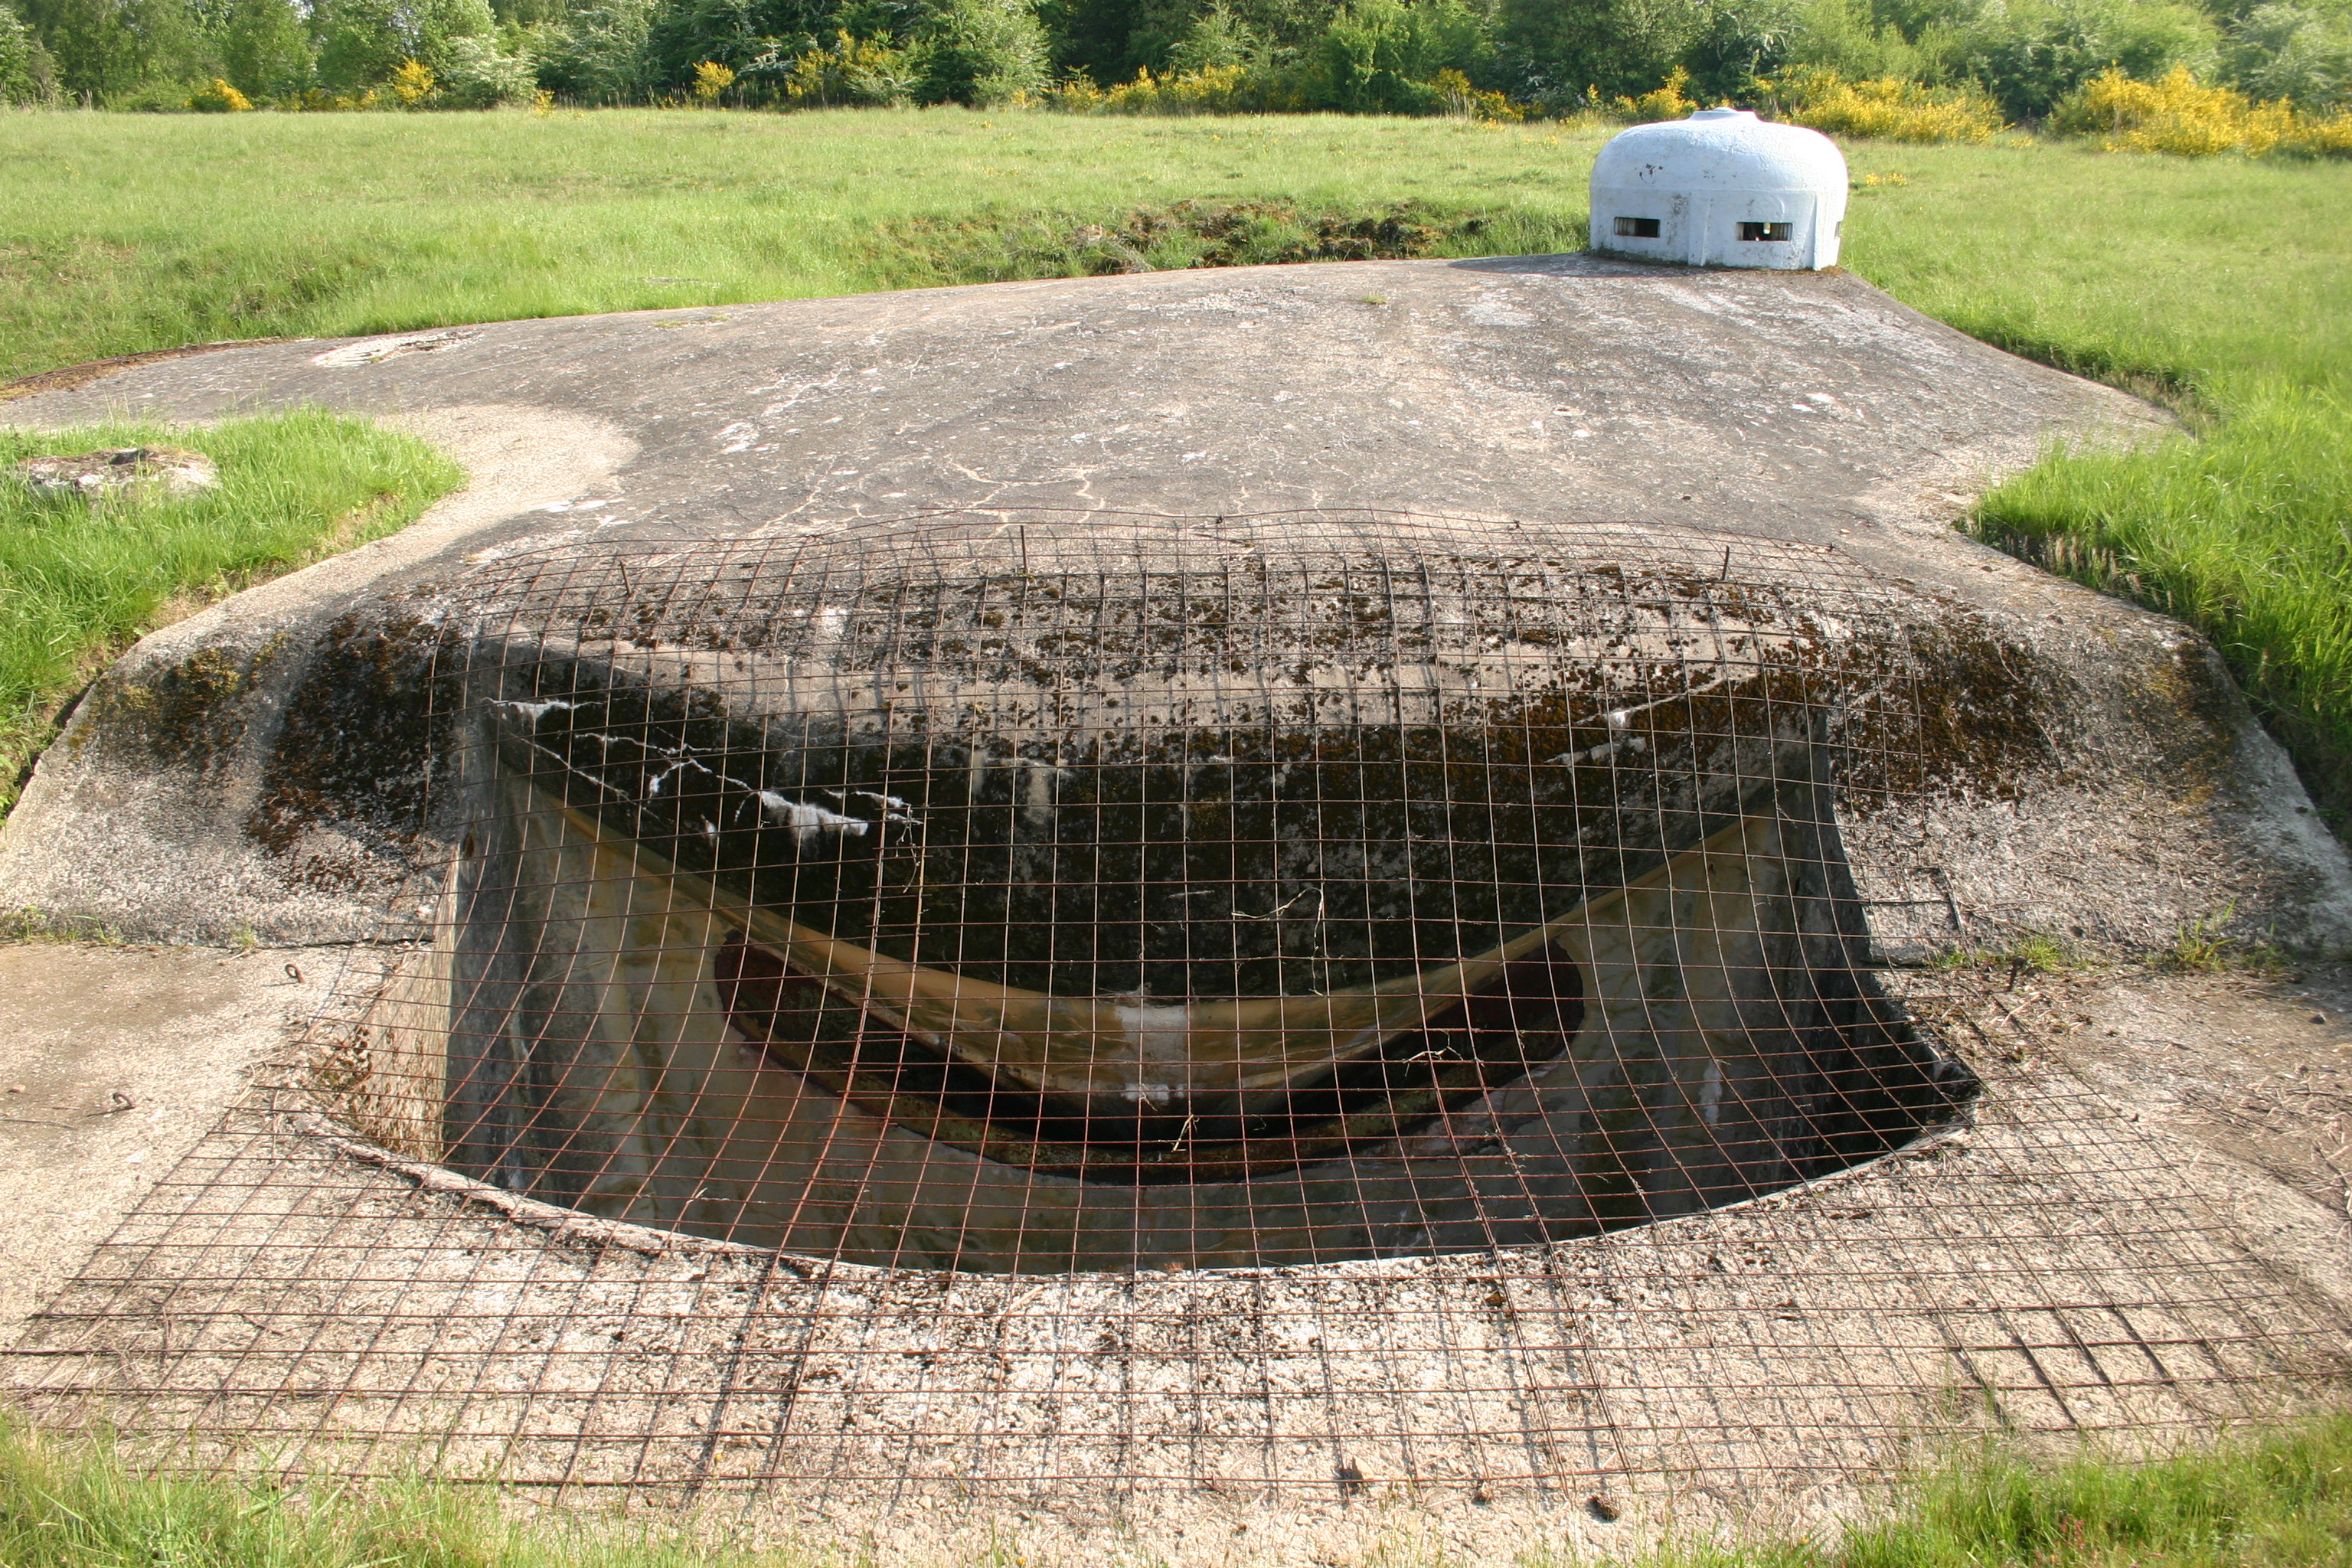
Aubin was equipped with two 120 tons gun turrets.
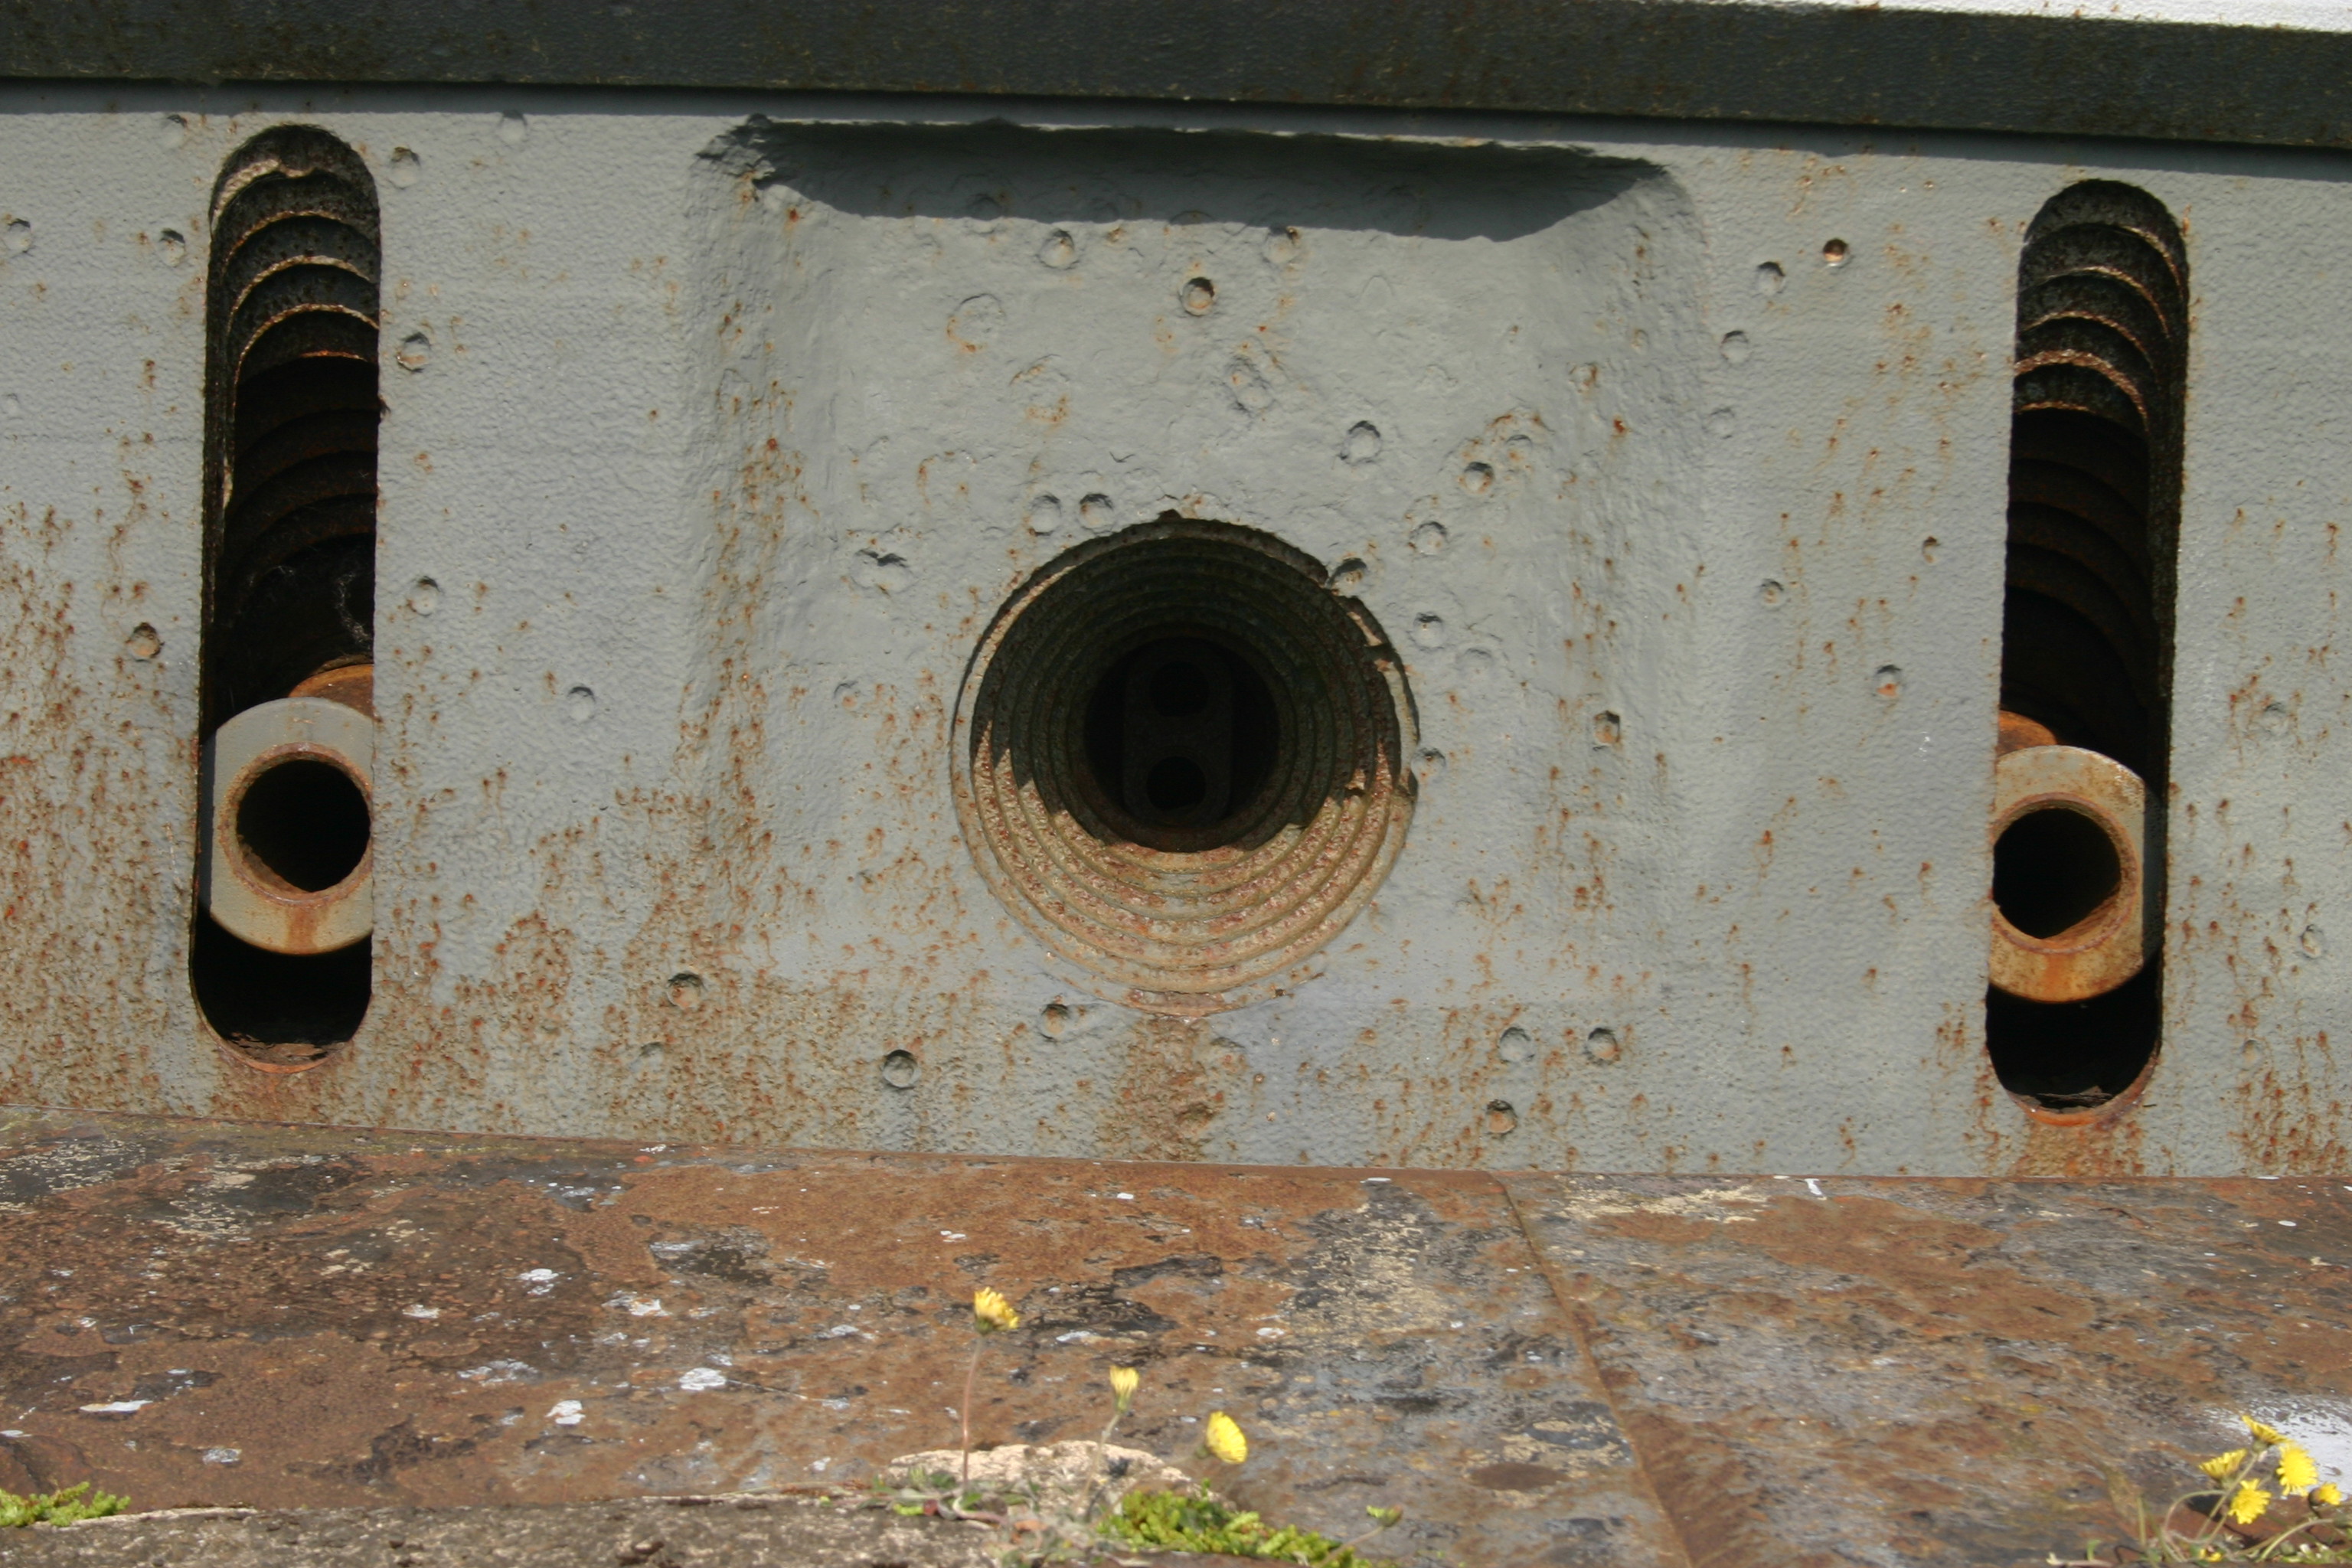
Each of those turrets could rotate over 360 degrees, being raised to expose the guns and fire and then being lowered (eclipsed) again, protecting the guns and its crew under its 36 cm (14 inch) of Nickel-Chrome armour. Each of those two gun turret was equipped with two 75mm guns that had a rate of fire of 12 RPM per gun and a range of 10.1km.


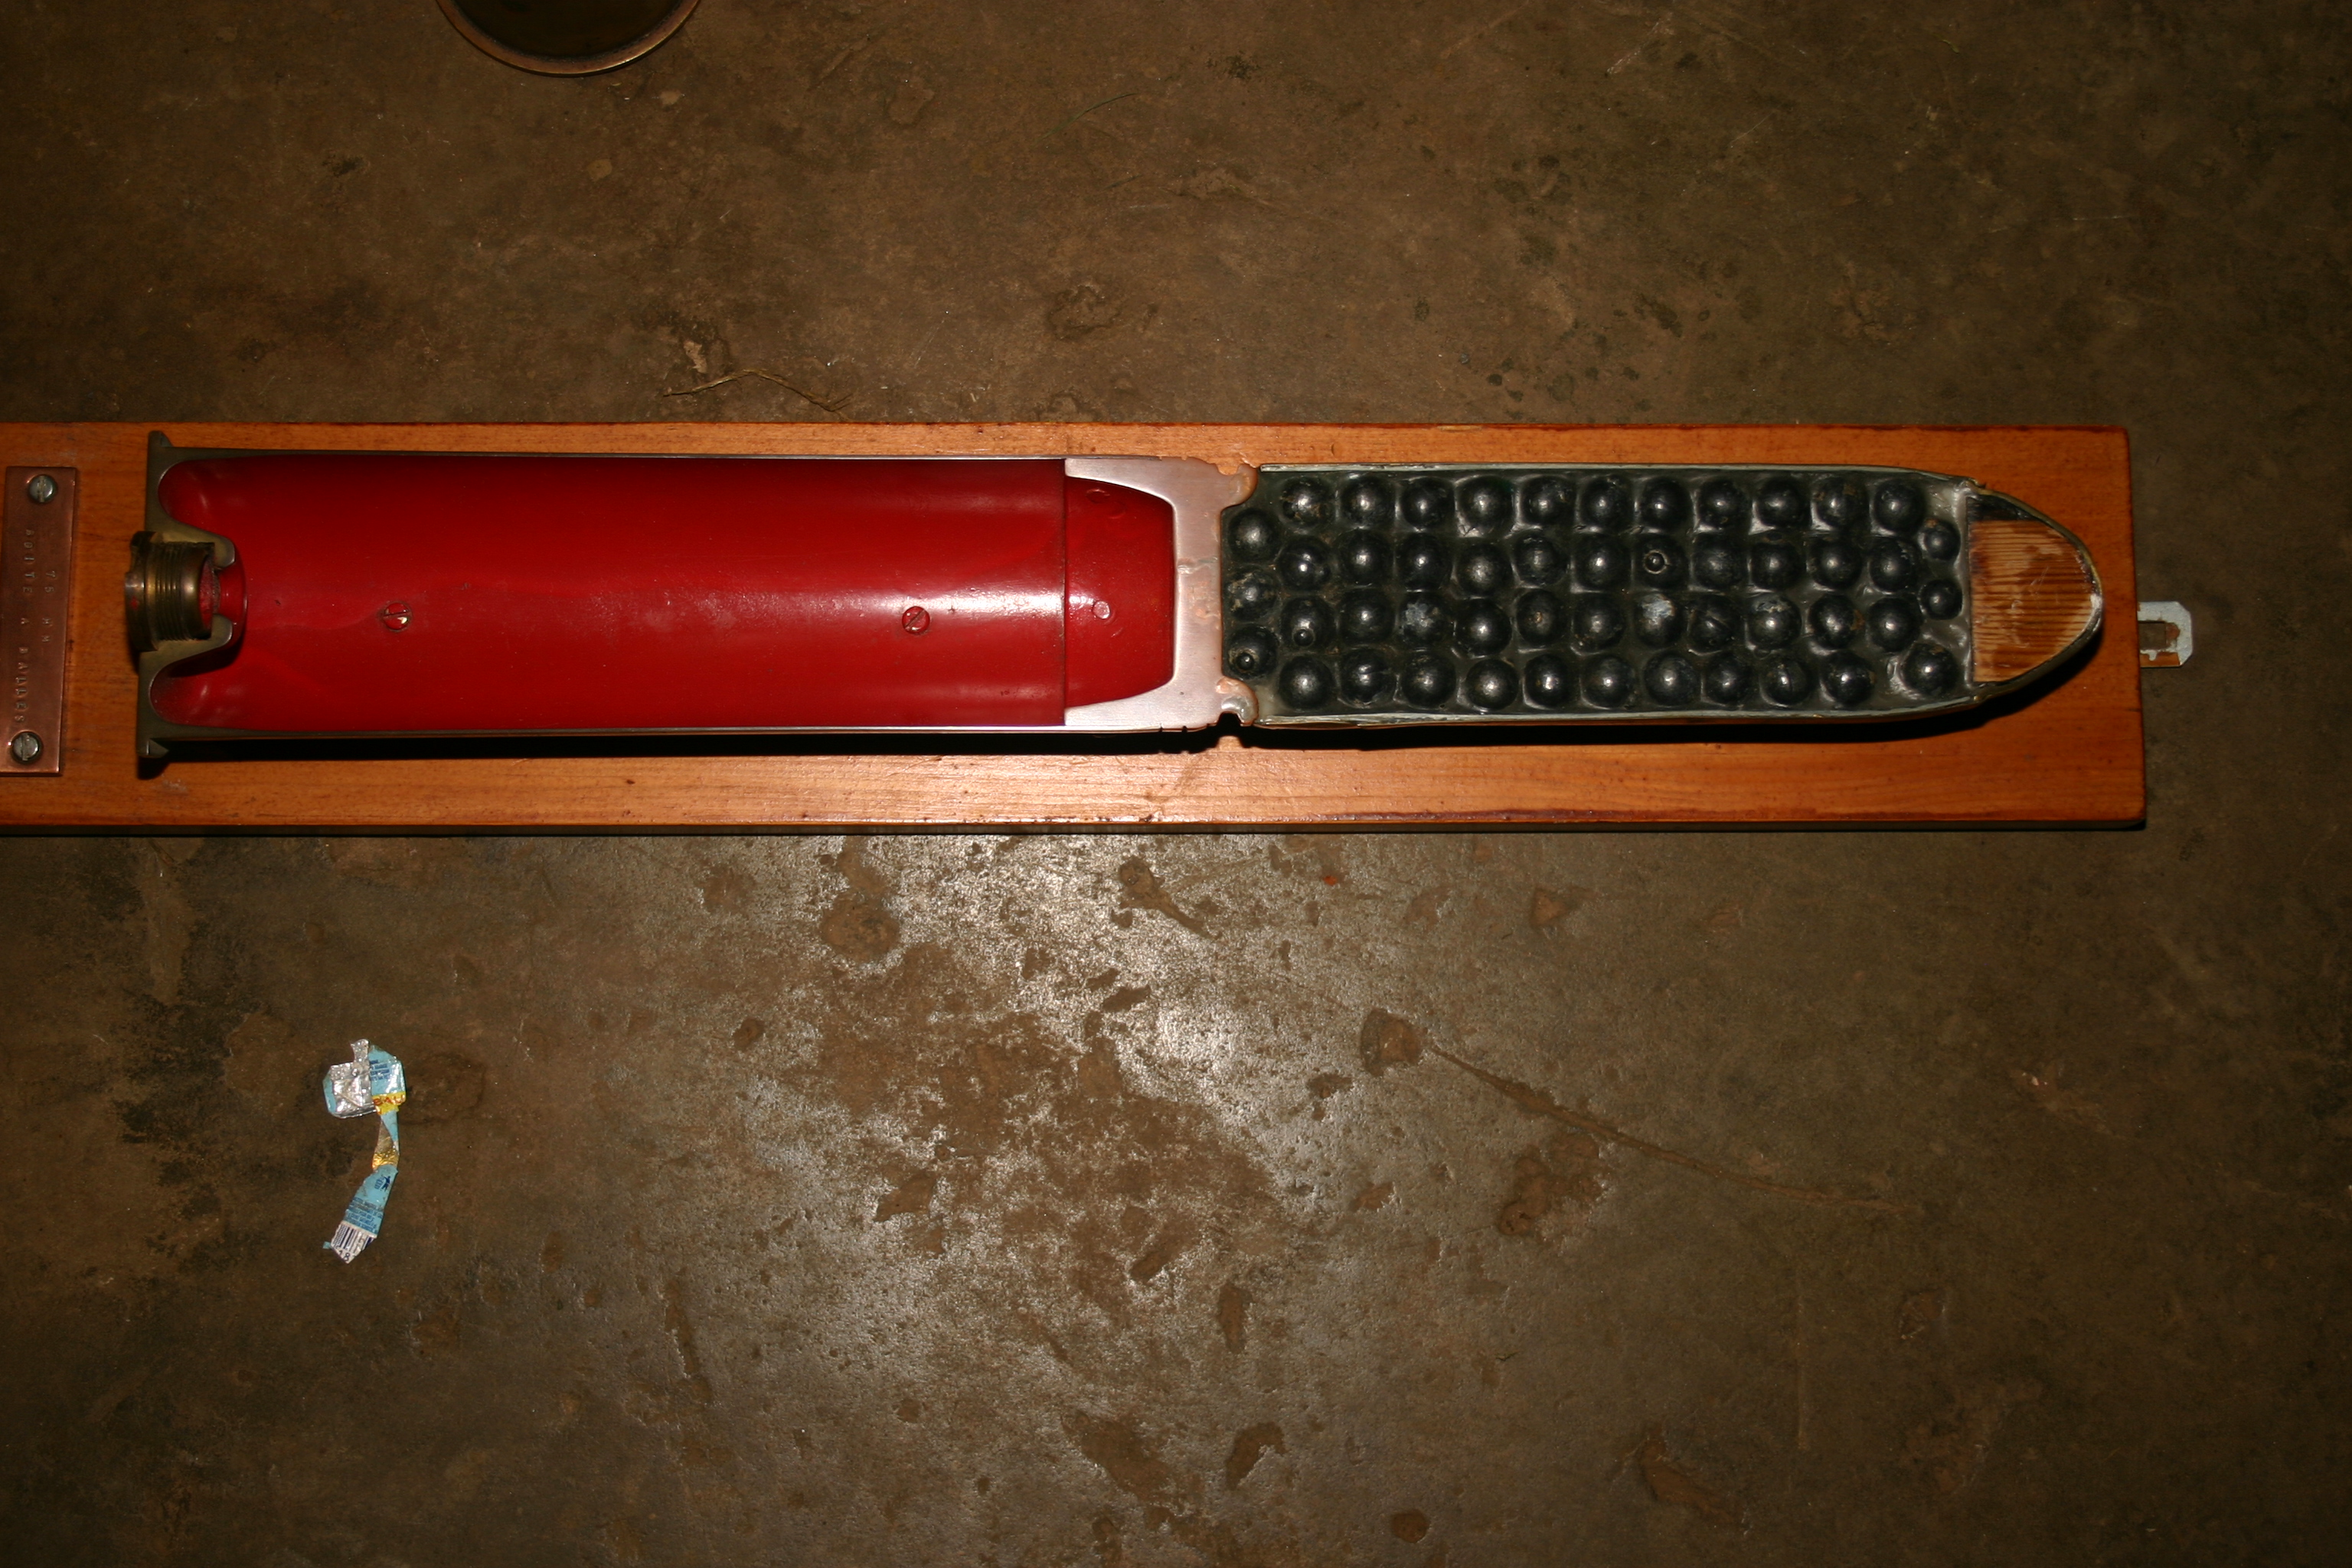
Those guns would fire 3 types of shells: HE, detonating on impact, Shrapnel, detonating above ground for long range anti-personnel use and Grapeshot which had a range of only 300 metres but was devastating against infantry at close range.

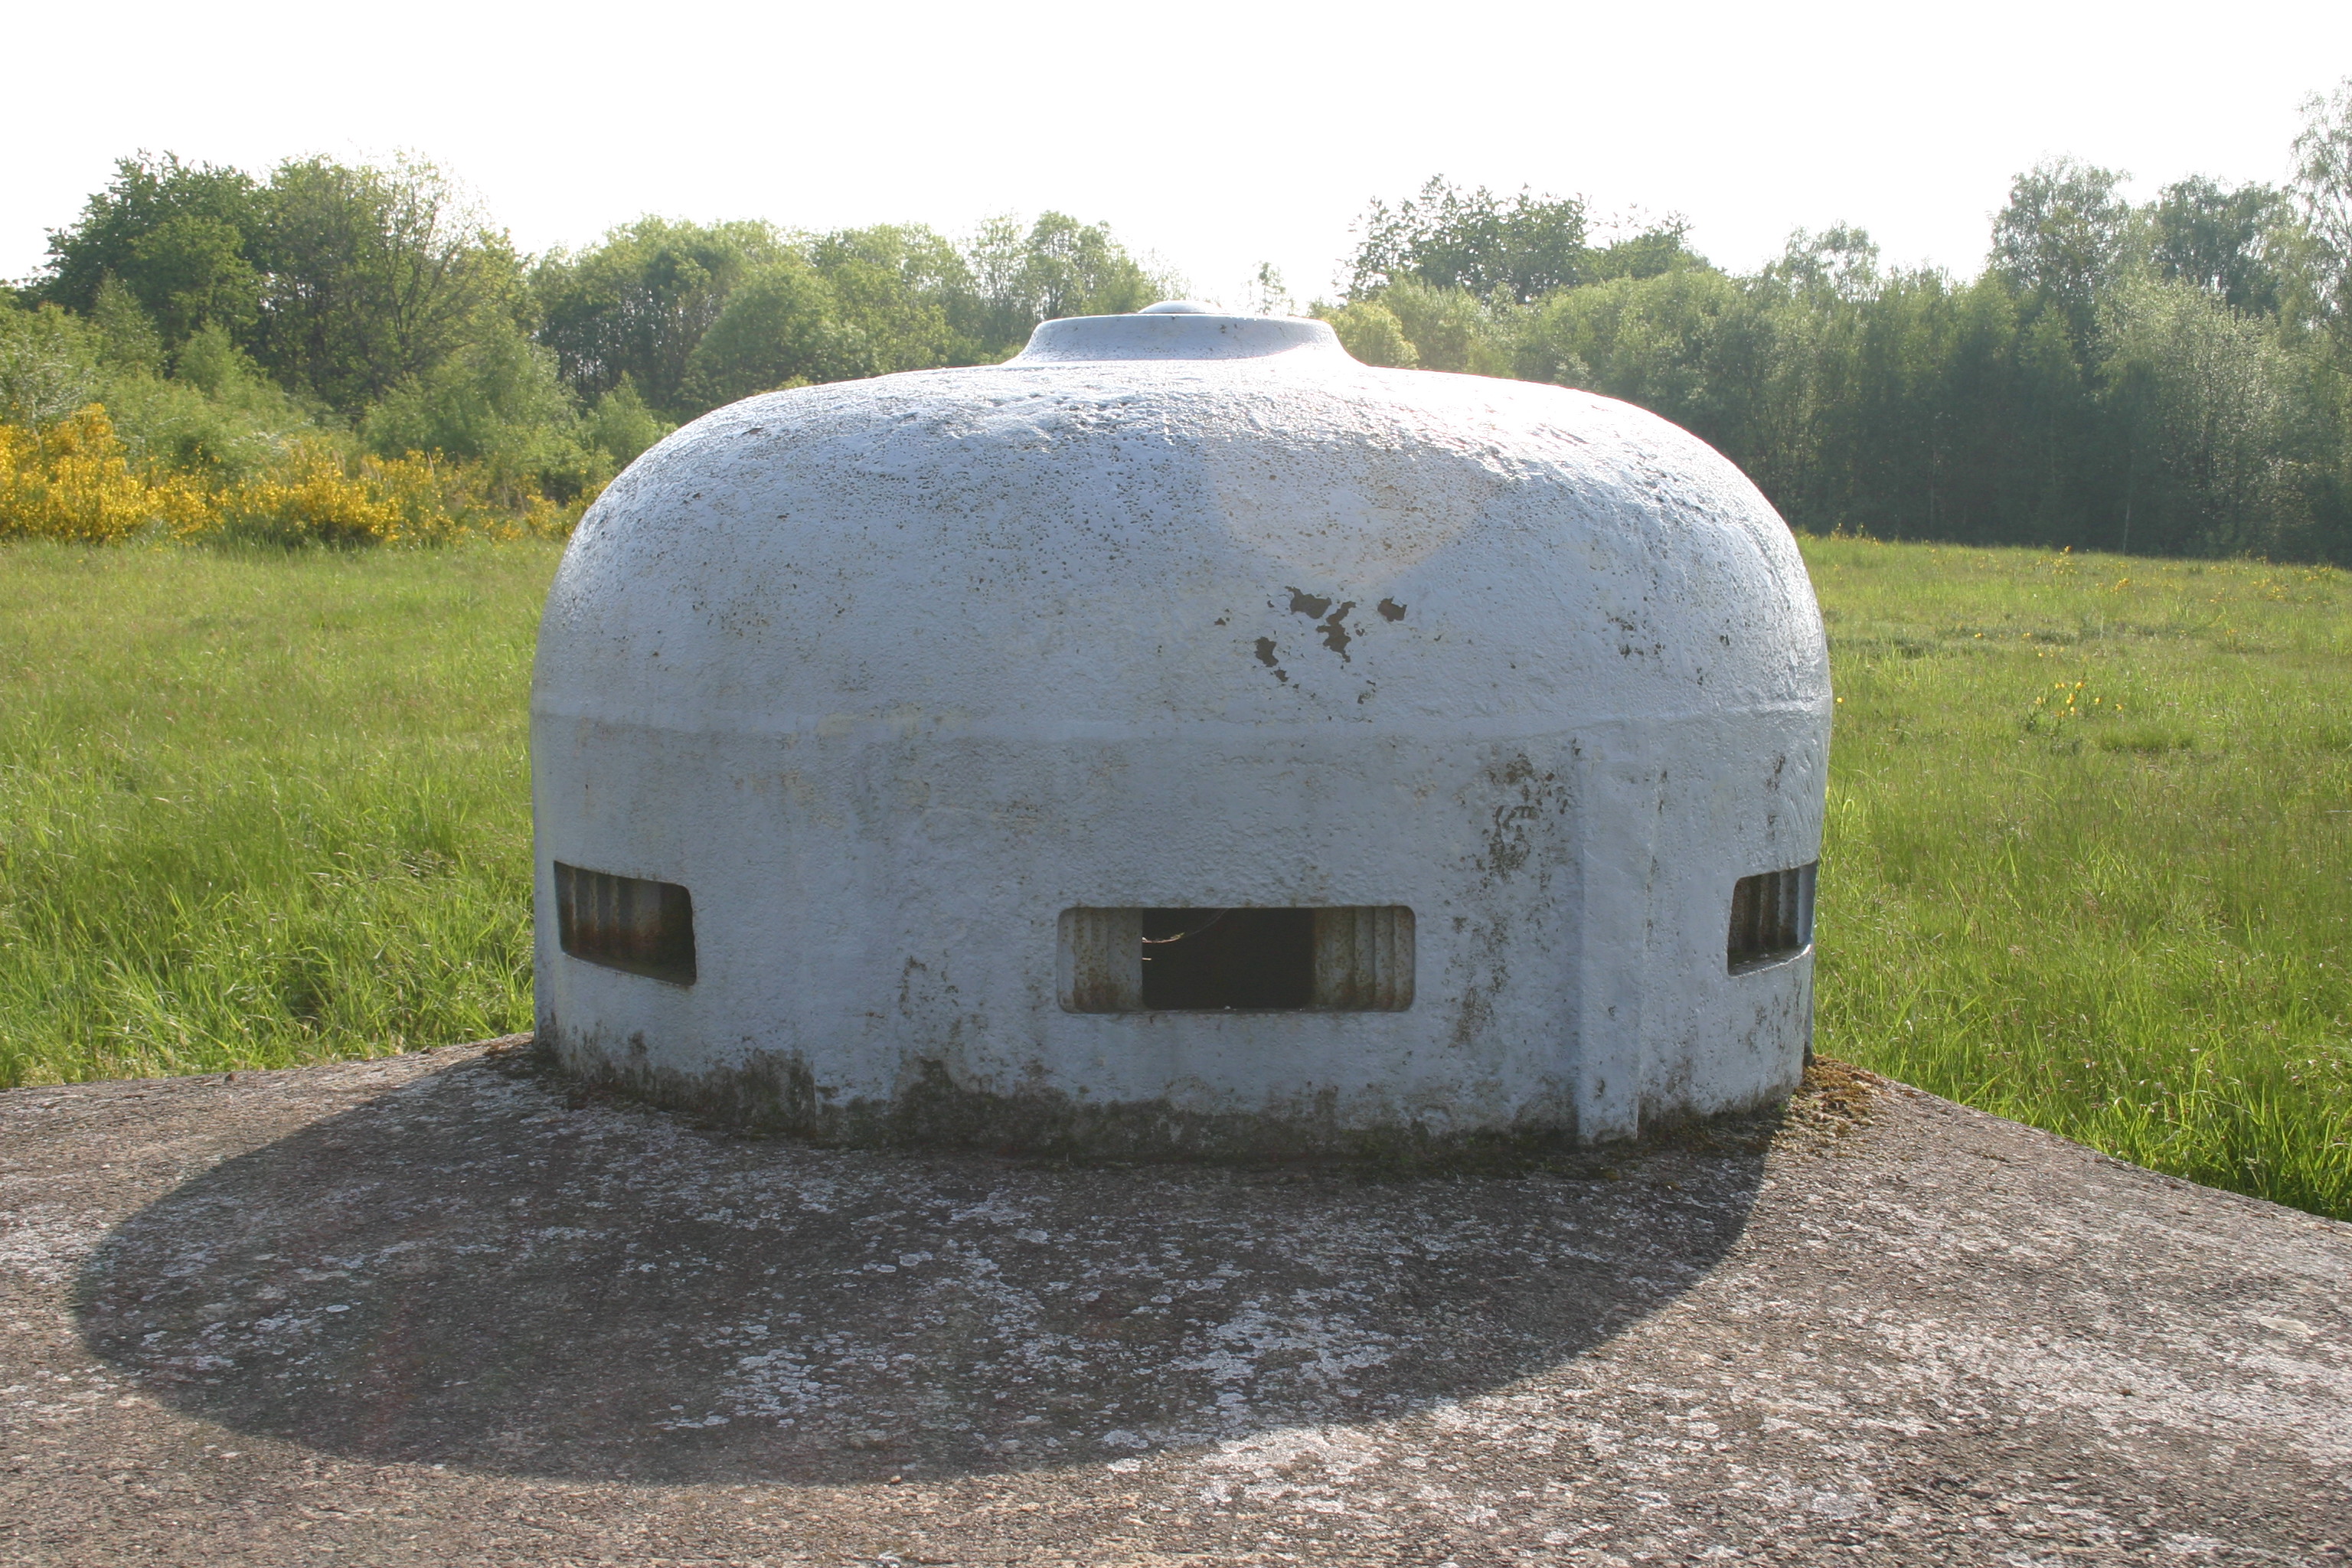
Both gun turret blocs were also equipped with two machine gun cupola for close defence.
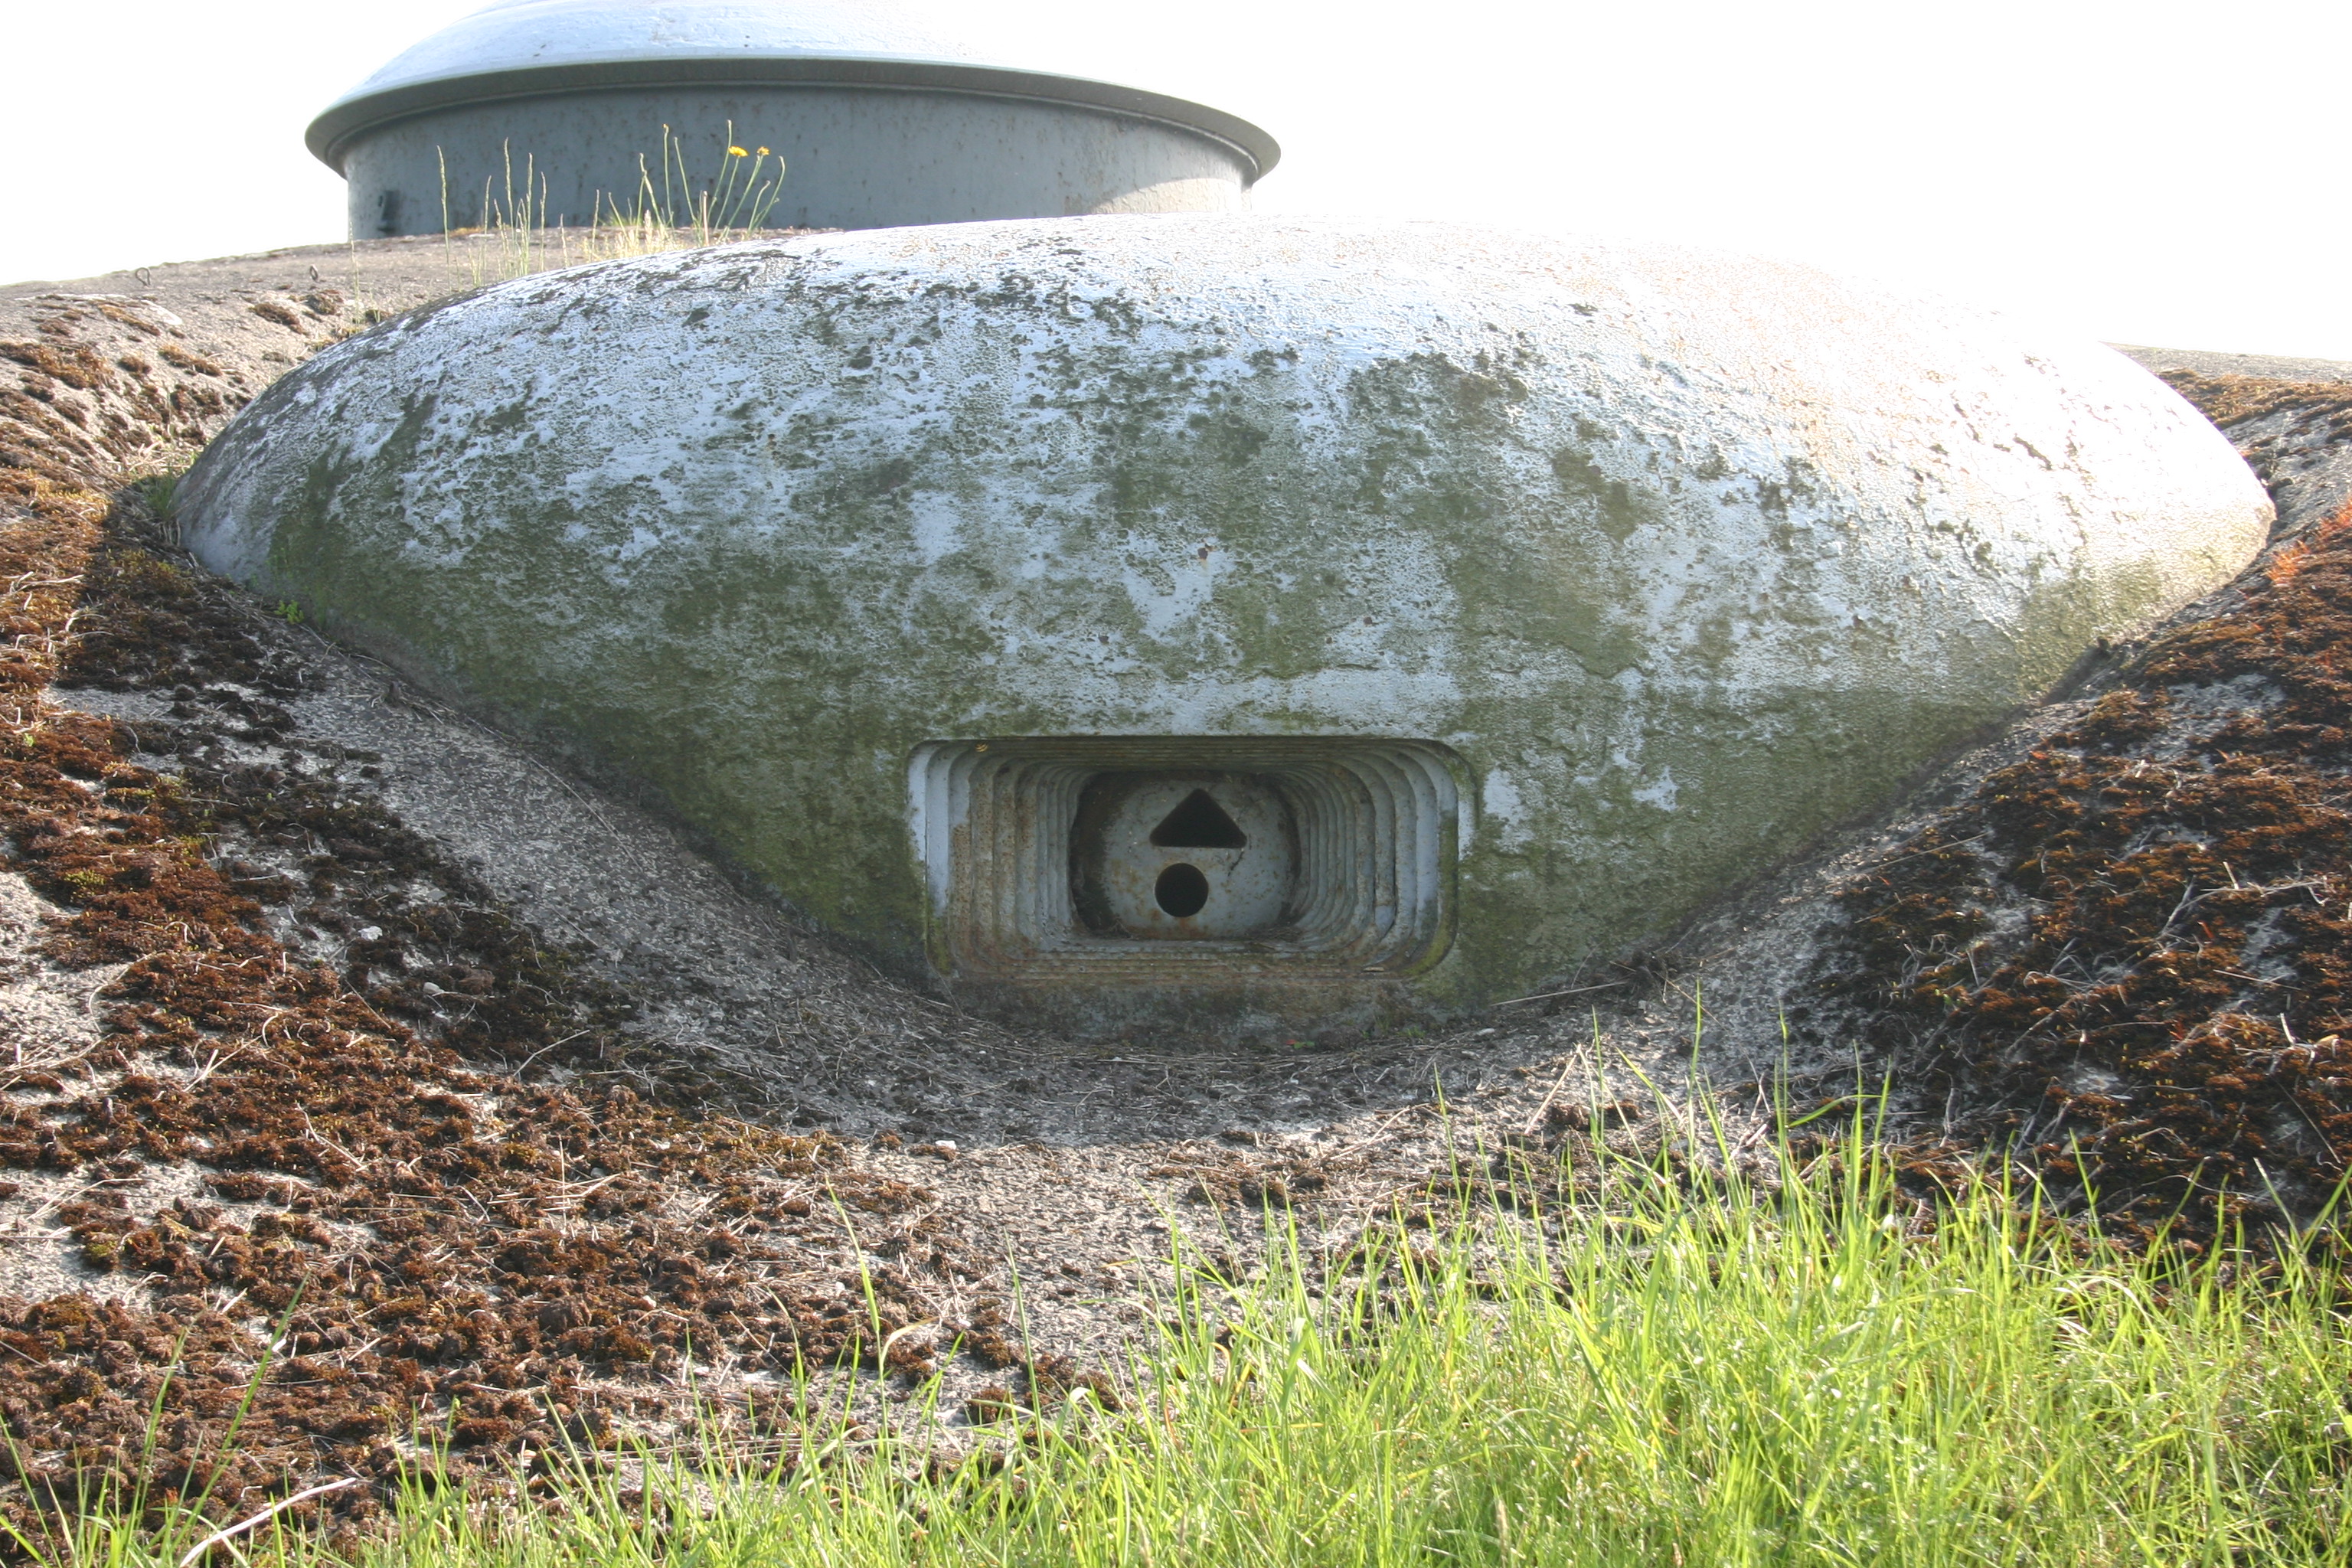

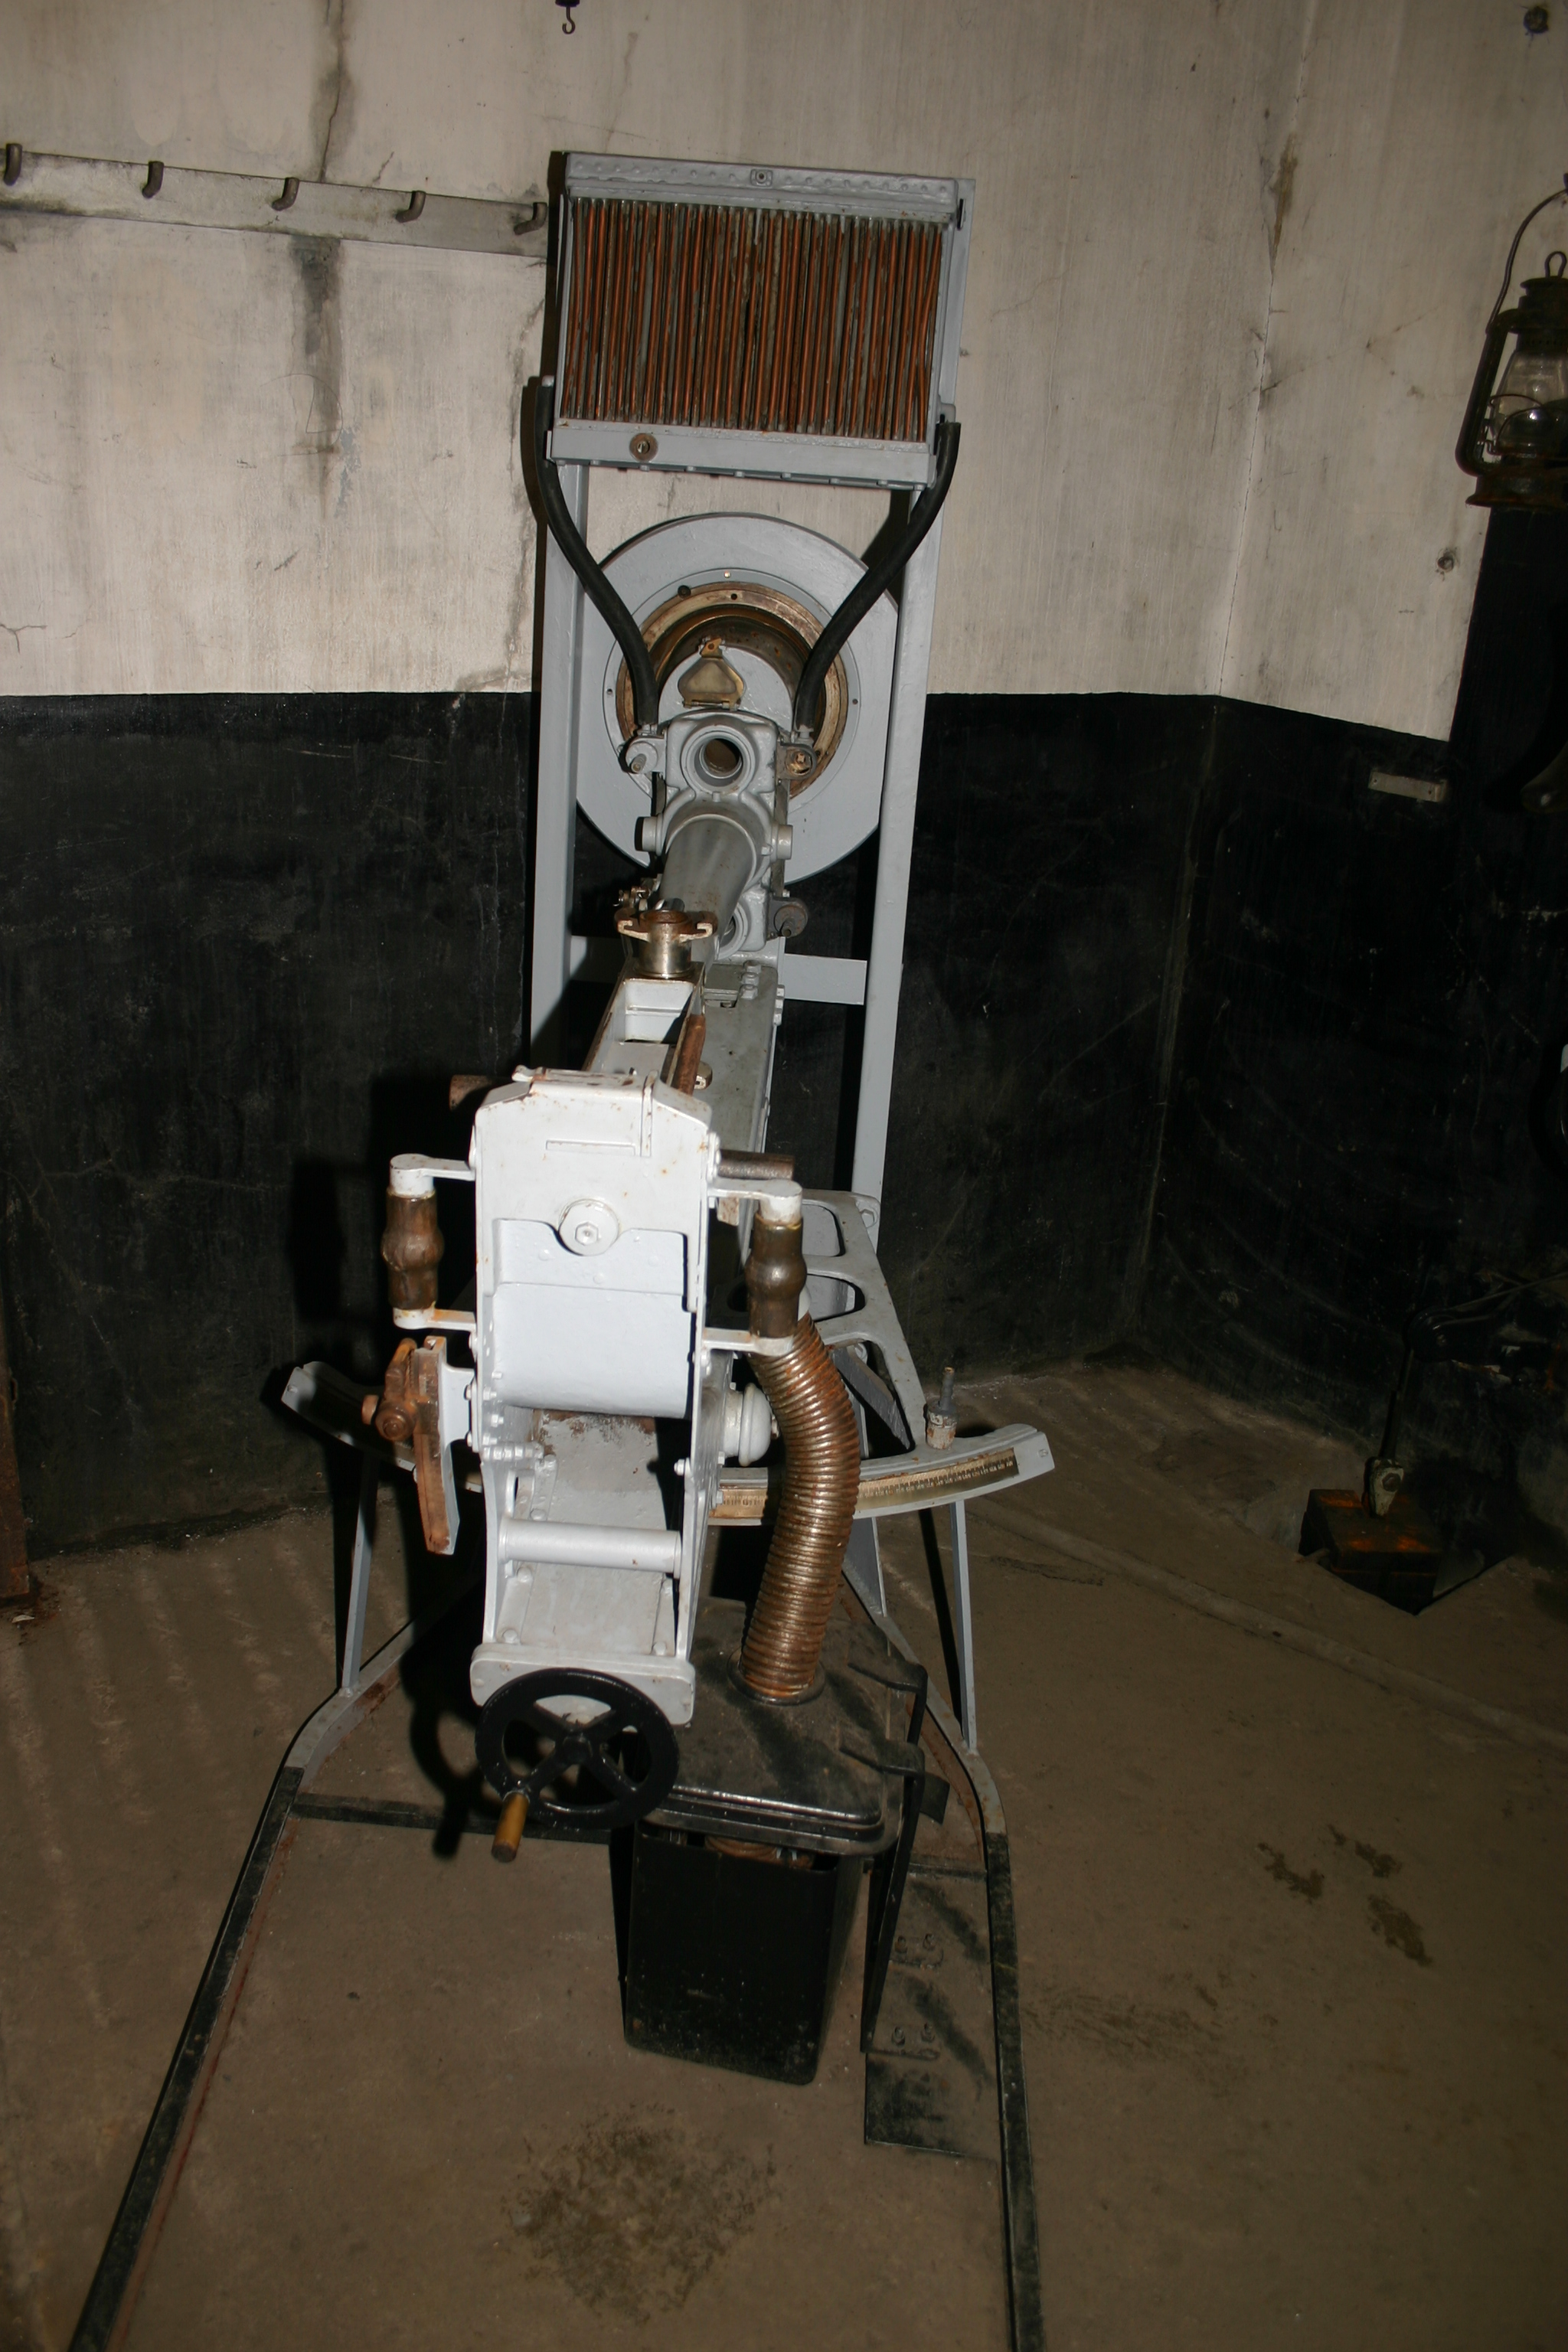
The second main weapon system of the fort was the mortar bloc. It was equipped with three 81mm mortars that had a rate of fire of 8 RPM per tube and a range of 3.6 km. The Mortar bloc was equipped with an observation cupola which unlike a machine gun cupola, gave its crew a 360 degrees view over the roof of the fort.

The main entrance bloc was defended by 3 machine gun cupolas, 2 machine gun guns in casemate and equipped with a searchlight and two grenade ramps.

There was a bloc equipped with two 47mm AT guns under cupolas.


The war time entrance was defended by two machine guns and two grenade ramps, it was acting as the main air intake station and was within range of the mortars if needed. It was also equipped with two observation cupolas.

The emergency exit bloc also had an observation cupola and was acting as the secondary / back-up air intake station.

Finally, the dry moat of the fort was protected by one single and one double coffer (casemate). Each of those coffers was equipped with one machine gun, one grenade ramp, one 47mm AT gun and one searchlight.
The fort also had a fake machine gun cupola situated outside its outer wall. That decoy provided a juicy bait for enemy soldiers looking for a weak spot to breach the fort while being within range of the fort’s grapeshot…Just before the German invasion, the fort was equipped in total with four 75mm guns under two armoured turrets, three 81mm mortars, three 47mm anti-tank guns in casemates, two more in cupolas, four Maxim machine guns in casemates, seven more in cupolas, five automatic rifle embrasures, 4 observation cupolas and 5 searchlights. Every single one of the 11 cupolas on the fort were equipped with either a periscope or a flare launcher.
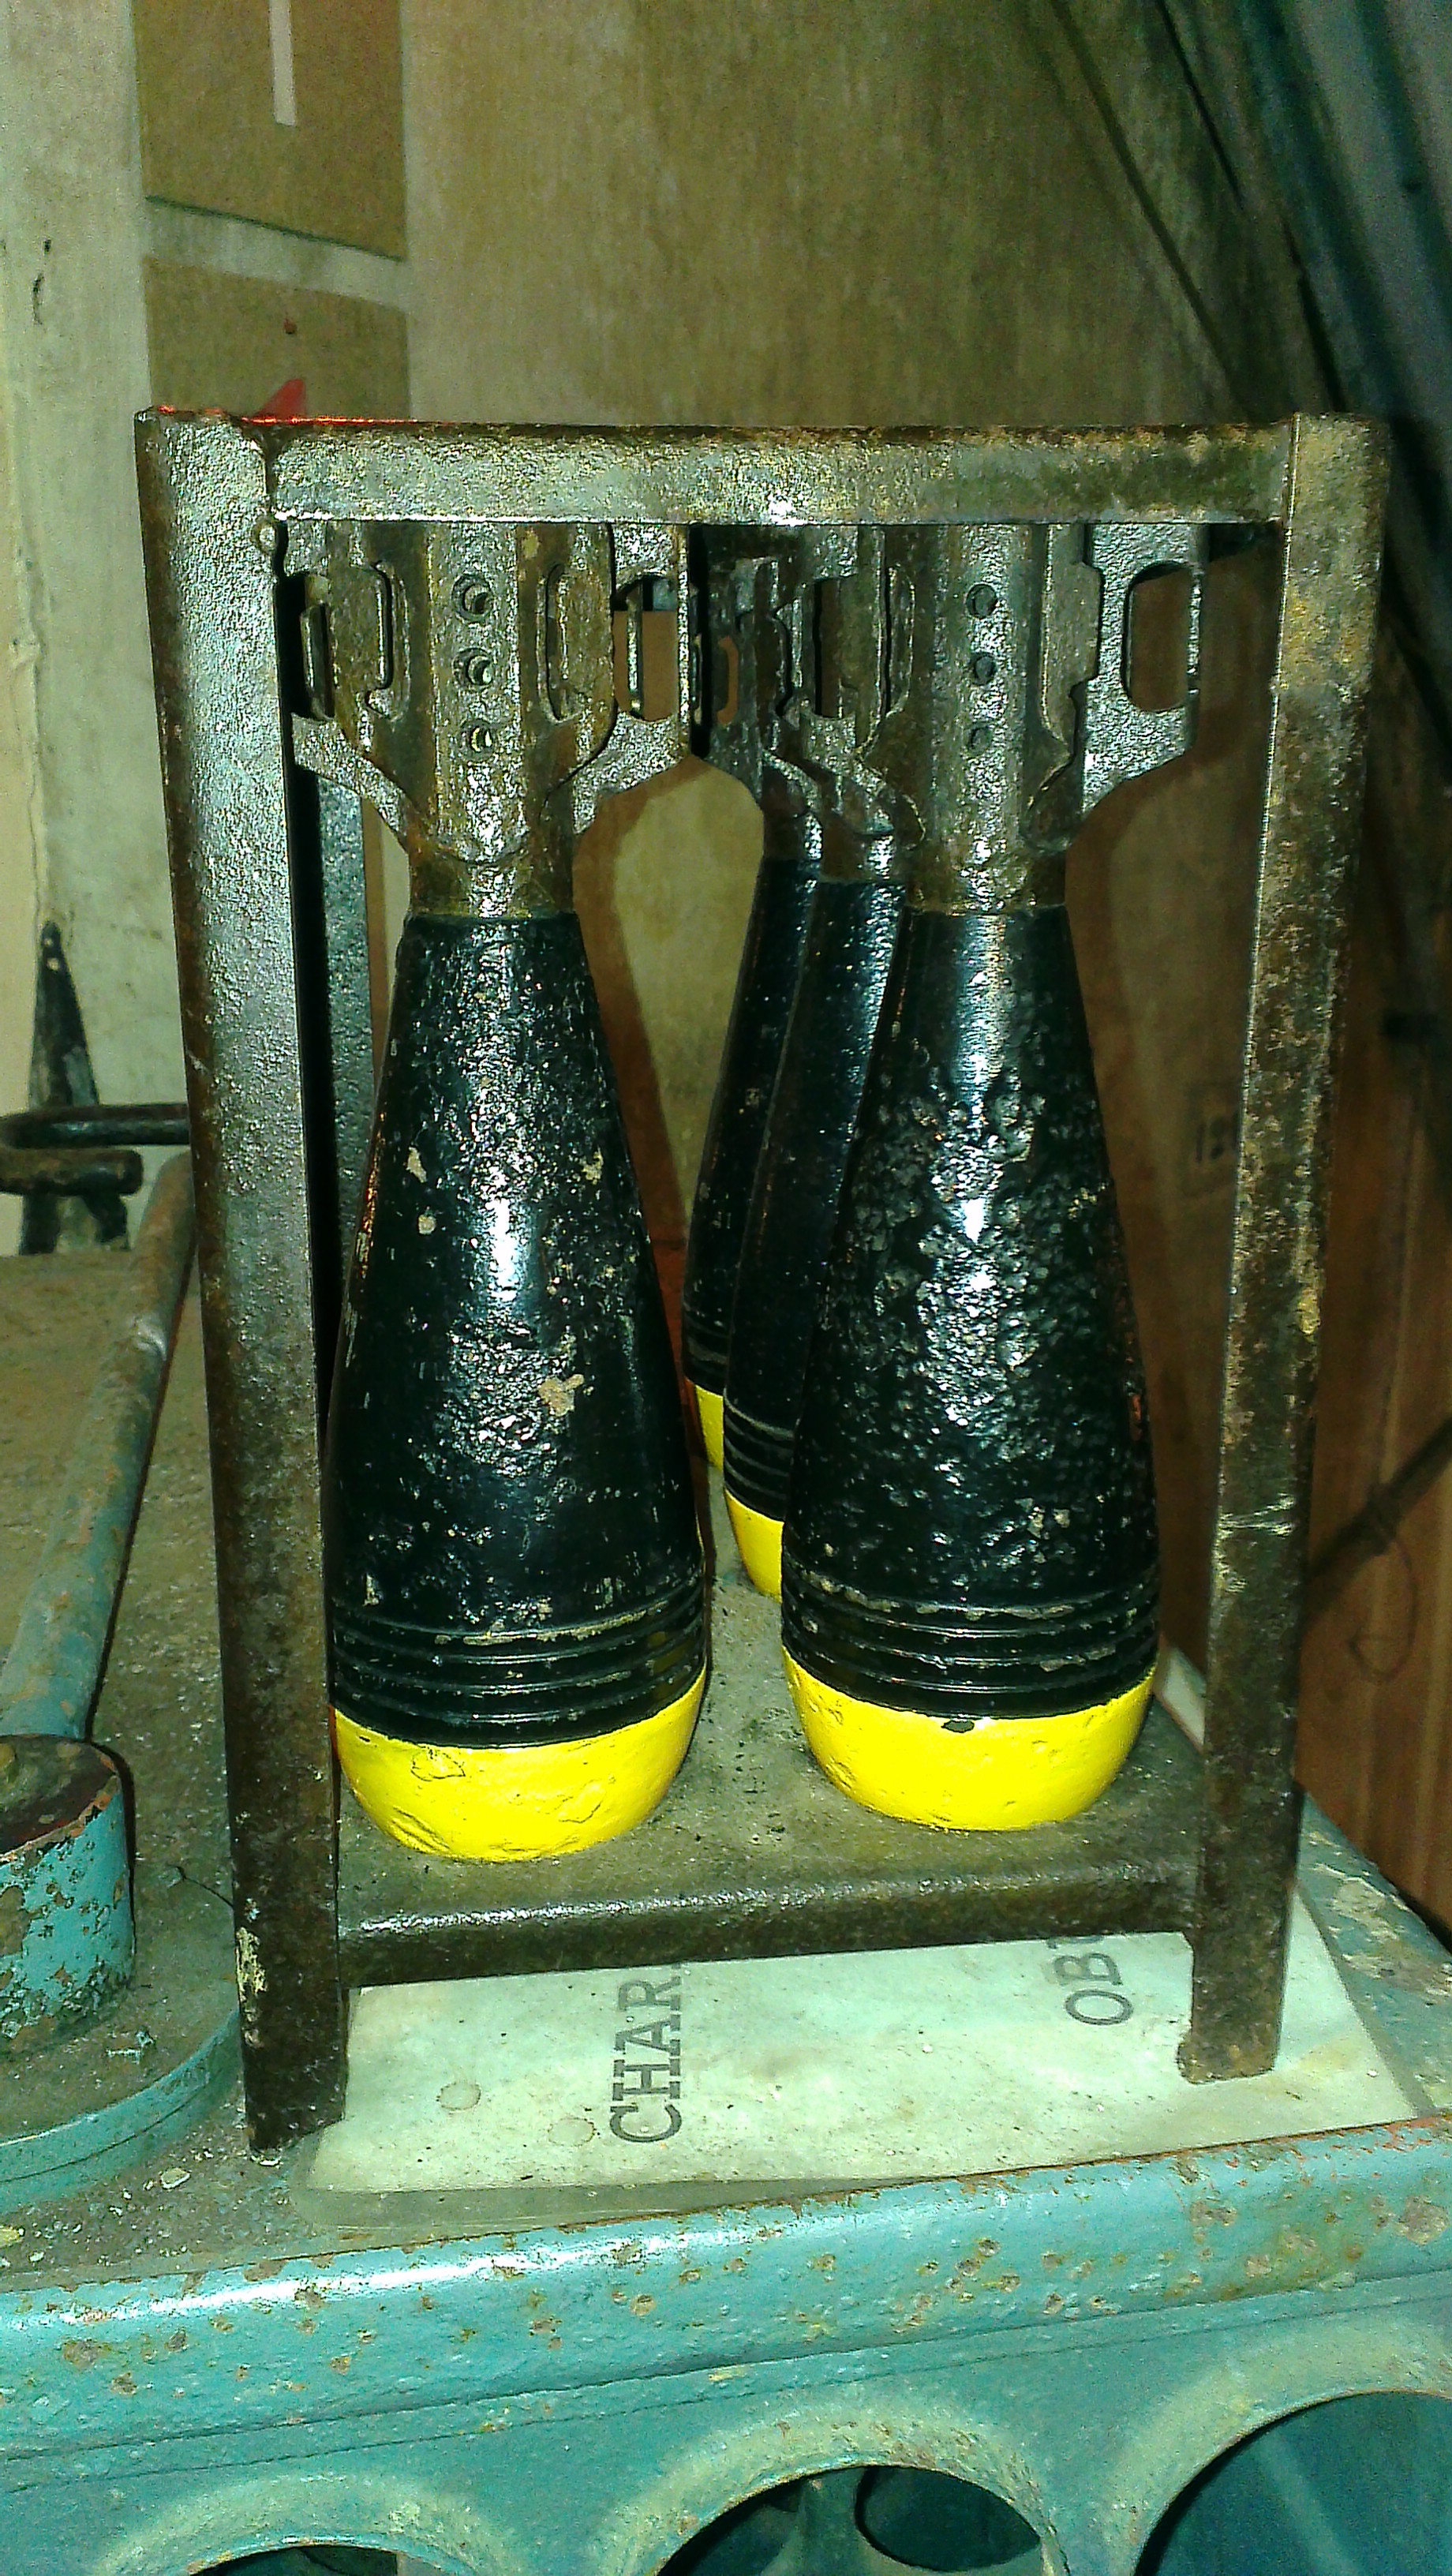
The ammunition reserves were as follow:
- 11.200 x 75mm shells (3.000 shrapnel, 7.000 HE, 1.200 grapeshots shells).
- 6.000 x 81mm bombs for the mortars.
- 1.500 x 47mm shells (360 Anti-tank and 1.140 Anti-personnel)
- 720 Mills grenades (hand grenades)
- 315.000 x 7.65mm cartridges for Maxim machine guns, automatic rifles and rifles.
- 27 FN Mle 1930 automatic rifles
- 433 Mauser rifles
One can add to that medical supplies, food, coal (for the kitchen cookers) and over 8.000 litres of diesel in underground tanks, all of which was in theory enough to enable the fort to hold for one month.The mission of the double line of forts was to delay the German invasion as long as possible to enable the French and British armies to move forward and defeat the German thrust. The forts’ commanders had order to fight until relieved or until the fort was no longer in a position to fight.
Please note not all the pictures detailing Aubin fortress were taken at Aubin fortress : Most of Aubin systems including its weapons were scrapped in the 1950’s. Some of the pictures presented here were taken at Tancremont and Battice fortresses which were using identical systems.


I’m really enjoying the design and layout of your website. It’s a very easy on the eyes which makes it much more enjoyable for me to come here and visit more often. Did you hire out a developer to create your theme? Excellent work!
Spot on with this write-up, I honestly feel this web site needs much more attention. I’ll probably be back again to read more, thanks for the info!
Peculiar article, exactly what I was looking for.
This is very interesting, You are a very skilled blogger. I’ve joined your feed and look forward to seeking more of your great post. Also, I have shared your website in my social networks!
I simply could not go away your site prior to suggesting that I actually loved the standard info a person provide in your guests? Is gonna be again incessantly to investigate cross-check new posts